You can turn any graph into stunning 3D with Illustrator. In this post we show you how to make a Bar Graph 3D in Illustrator. This will help your presentations and infographics stand out.
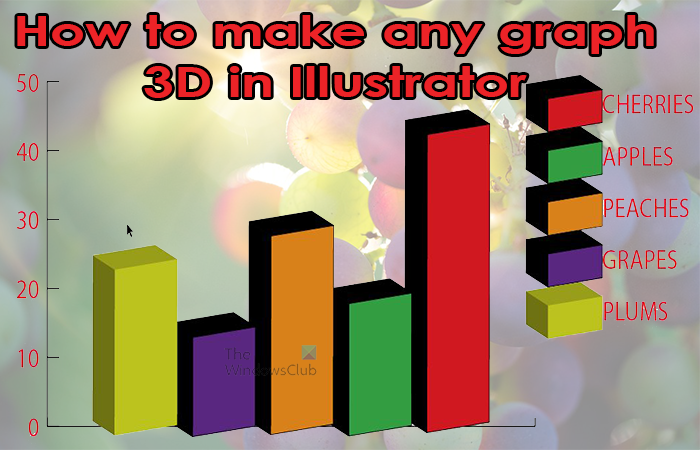
How to make a Bar Graph 3D in Illustrator
Making any graph 3D in Illustrator is quite easy. You do not have to create the graph in another software and then place it in Illustrator. Illustrator provides the tools to create the graph. You can also import data into illustrator to create the graph and then make the graph 3D. The great thing about making a graph 3D in Illustrator is the ability to do it for new and previously created graphs.
- Open and prepare Illustrator
- Create or open the graph in Illustrator
- Select graph elements
- Add 3D effect
- Save
1] Open and prepare Illustrator
The first step to making any graph 3D is to open and prepare Illustrator. Click on the Illustrator icon and then wait for it to open. When Illustrator opens up go to File then New (Ctrl + N) to open a new document. The New document options window will appear and you can choose the options that you want and then click Ok.
2] Create or open the graph in illustrator
Create a graph from scratch
It is now time to create the graph from scratch, This article will show you how to create graphs in Illustrator <<<(link to the article – “how to create graphs in Illustrator”)>>>. With the graph created, add color to the elements (bars if it is a bar graph or slices if it is a pie graph). The colors will make it easier to see the different data areas.
Open previously created regular graph
If you have an Illustrator document with a graph already created you would just need to find it and click and open it. you may also open Illustrator then go to File then Open ot press Ctrl + O, you then search for the Illustrator file, click and open it.
With the graph now in illustrator, whether you created it from scratch or you opened a previously created one, it is time to make the graph 3D.
3] Select the graph’s elements
In this step just before making the graph 3D, you will need to decide if you want to make the graph and the legend (words and symbols that help to interpret the graph) 3D as well.
If you want to make everything 3D then just click the graph with the selection tool and move on to the add 3D effect step.
If you want to make only the graph data elements 3D without affecting the legend then you will need to select the Direct selection tool from the left tools panel. With the Direct selection tool active, click and drag around the graph, excluding the elements that you do not want to make 3D.
4] Add 3D effect
This is the interesting part, this is where the graph is made in 3D. The previous step is where you decided how much of the graph you want to make 3D, whether all of the graph (images, legend, and words) or just the image section of the graph. Below you will see what each of these will look like then you can decide what you want to do for your graph.
All graph elements in 3D
As was previously explained, you would just make sure that you have the regular selection tool active then click on the graph and add the 3D effect.
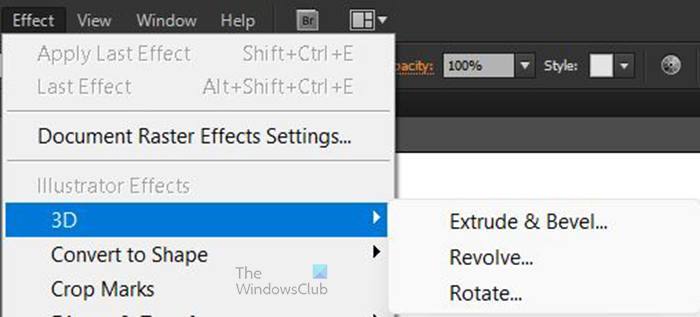
With the graph selected go to the top menu bar and click Effect then 3D then Extrude & Bevel.
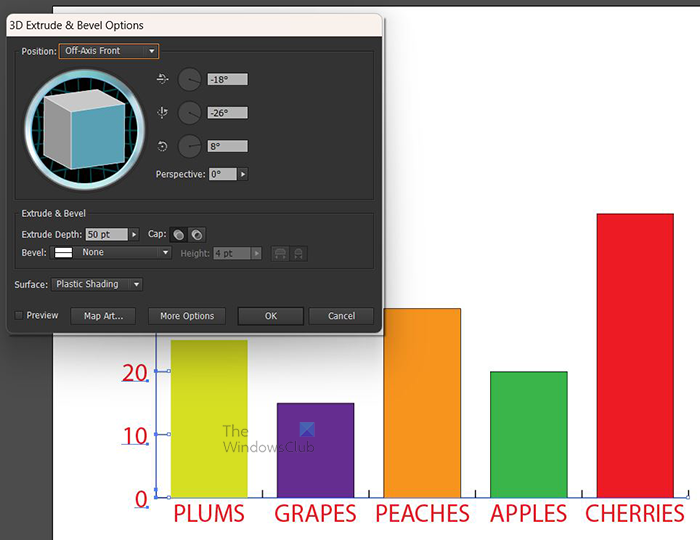
The 3D Extrude and Bevel options window will appear. Make sure to check Preview so that you can see the live changes happening to the graph as you change the options.
Look for Position and you will see an arrow for a drop-down menu where you can adjust the 3D graph. You can also click the visual representation of the 3D (cube in a circle) and use the mouse to drag and adjust it. This will adjust the angle of the 3D graph.
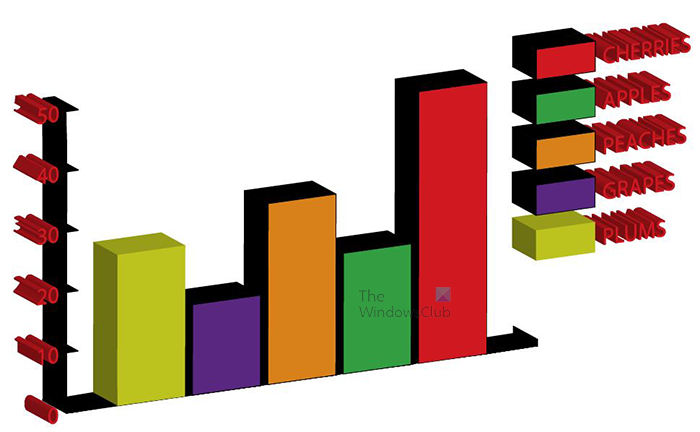
This is the graph with everything made 3D. The categories are placed under the corresponding bars. This is done by clicking the Transpose/rows columns option in the data window.
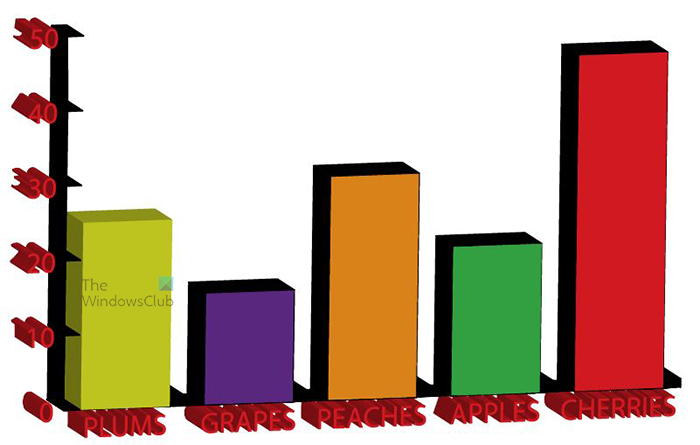
This is the graph with everything made 3D but the legend and categories are different. This is done by keeping the categories horizontal in the data table with the corresponding numbers under each.
Only graph made 3D
This part will show you what the graph will look like if the legend and text are not made 3D. You may want only the body of the graph to be 3D for your project.
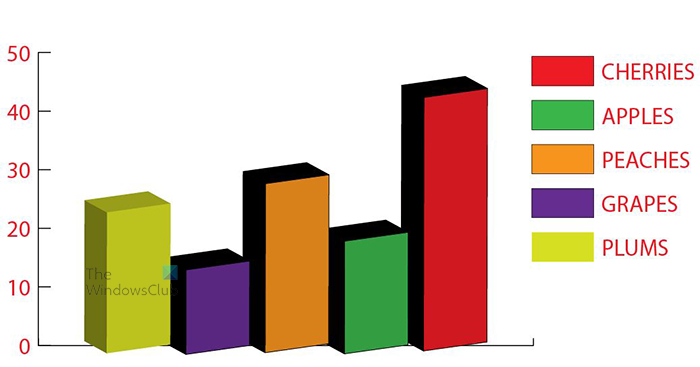
This is what the bar graph looks like when it is made a 3D with the other elements remaining unchanged.
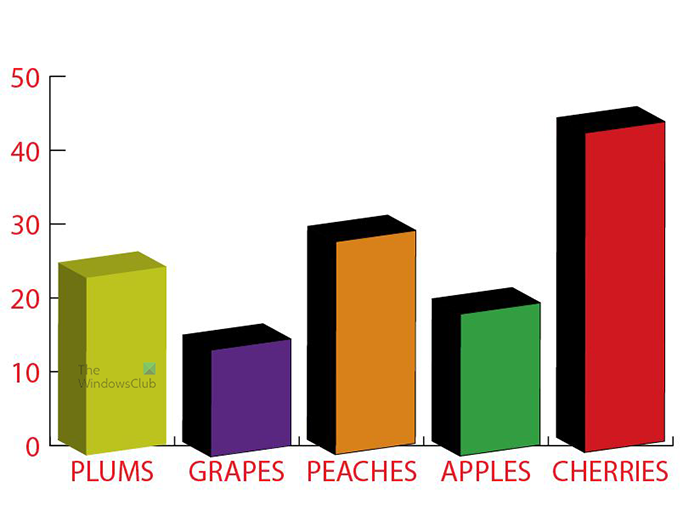
This is the bar graph with the categories under the corresponding bar with only the bars made in 3D.
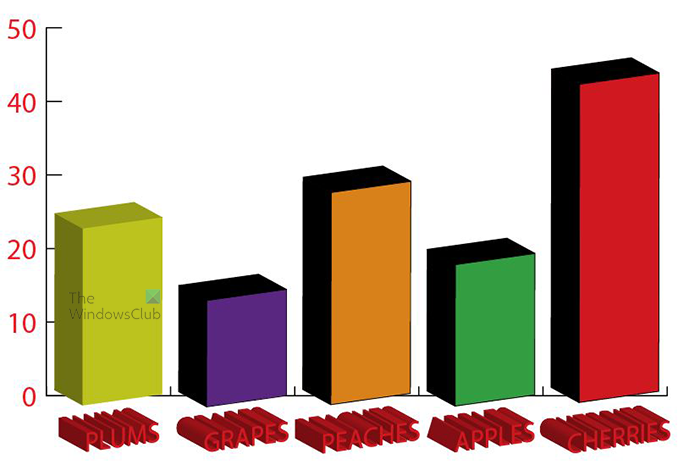
This is what the graph would look like if the bars and the categories are made in 3D. To make the X and Y axis line remain unchanged, you will have to change the bars and the category names separately. Use the Direct selection tool to select the bars and then change to 3D, you then repeat the steps for the category names.
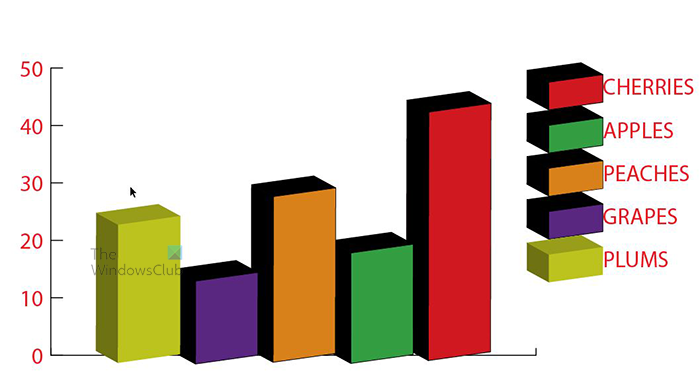
This is the graph with the bars and the legend swatches made in 3D.
5] Export for use in other software
This is where you get to use your 3D graph in other software such as Powerpoint, Microsoft Word, and others. To save for use you will need to use the export option.
To export the 3D graph go to the top menu bar and press File then Export.
The Export window will appear, here you will choose the save location, name the file if you want to and choose the file format. When all this is finished choose Save. You can save the file as JPEG so that it is smaller and easier to share. You may also save it as a PNG which will be a bit larger but will have better quality and will not have a background.
Read: How to create 3D Globe with the World Map in Illustrator
How can I customize a graph in Illustrator?
A graph that is already created in Illustrator can be customized. Right-click on the graph and you will see that you can customize the Type, Data, or Design. If you click Type then you will be able to change the type of graph that is there (for example a bar graph can be turned into a Pie graph). If you click Data you will see the data window with the information for the graph you have. You can edit the data and then click Apply to change the graph. If you chose Design you will get an error. Note that if your graph is 3D and you customize it, the graph will go back to being flat. You will have to then make it 3D again after customizing. This is why it is important to get the graph correct before making it 3D.
How can I scale a graph in Illustrator?
You can scale a graph in Illustrator using the Scale tool. Select the graph then select the Scale tool in the left menu bar. You can then drag the graph to scale it. you can also try a different method. With the scale tool active, press Alt while you press on the graph. The Scale options window will appear, here you can choose the percent by which you want to scale the graph. You can also choose if you want to scale the strokes and effects. When you are finished choosing, press Copy or Ok.
Leave a Reply