This article will show you the easy way to make a color image look like a sketch both in black & white and color in Photoshop CS6. With so many uses for photos, people are looking for more ways to make their photos more interesting. From photos for social media profiles, gaming profiles, identity stickers for items and so many more. Making the image look like a sketch in Photoshop is a way to make photos stand out. This process can be used on any image, photos of persons, landscapes, foods, and fruits.

How to make a Color Photo look like a Sketch in Photoshop CS6
Photoshop is one of the best graphic software available and can be used for a lot of photo manipulation. Making a colored image look like a sketch is just one of the many things that Photoshop can do. Before beginning the edit, remember to fully lock the original image to prevent any edits from being done on it. Here is how to make a color image look like a sketch in Photoshop CS6. This article will show you how to make a colored Image look like a sketch in Photoshop CS6. Two sketches will be demonstrated, color and black and white.
- Open and Prepare Image
- Add Adjustment Layer
- Invert the Image (Optional)
- Change Color Mode of Background Copy
- Convert Layer to Smart Object
- Apply Gaussian Blur Filter
- Add a Levels Adjustment Layer
- Change Levels Layer Blend Mode
- Lower Opacity (Optional)
- Make Color Sketch
- Duplicate Original Background Layer
- Move the Color Layer to the Top
- Change Blend Mode
- Lower Opacity on Color layer
- Save
1] Open and Prepare Image
Open the image in Photoshop by going to File them Open or pressing Ctrl + O. You will see the Open dialogue box. Search for the image then click it and press Open. You can also open the image by finding it on your computer, then right-clicking on it and selecting Open With and choosing Adobe Photoshop CS6. This method of making an image look like a sketch can be done with any image, the image that will be used in this article a photo of a person.
You will see that when the image is opened, it is opened as a background and is locked. You can choose to duplicate the layer to keep the original protected. You can duplicate the image by right-clicking the image and pressing Duplicate Layer, or by going to the top menu bar and going to Layer then Duplicate Layer, give the layer a name, and press OK. You can also duplicate the layer by going to the Layers panel and dragging the layer down to the Create a new layer icon then releasing it. Dragging the layer down to the Create a new layer icon will duplicate the layer and be named Background copy. You can also create a new layer by pressing Ctrl + J on the keyboard. Pressing Ctrl + J will duplicate the layer and be named Layer 1 automatically.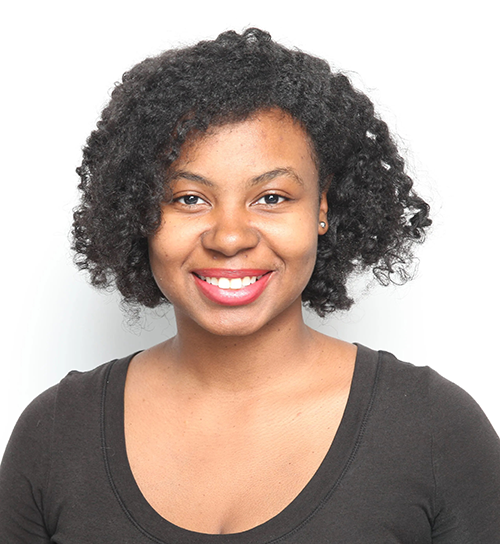
[Original image that will be adjusted]
2] Add Adjustment Layer
The next step is to add an Adjustment to the image. Whenever you go to do an adjustment, Photoshop will automatically add an Adjustment layer. This adjustment layer will ensure that the image is protected by making adjustments to the adjustment layer. The adjustment that will be made is Hue/Saturation. This will remove the color from the image. To do this go to the top menu and press Layers then New Adjustment Layer then press Hue/Saturation.
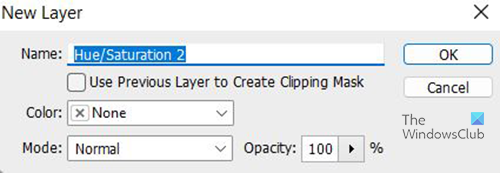
A New Layer dialogue box will appear for you to name the Adjustments layer. You can press OK to keep the default name or you can give it a name and press OK. When you press ok, a Hue/Saturation window will appear over by the Layers panel.
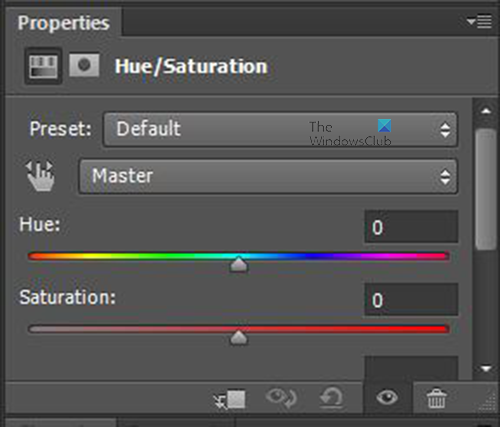
The Hue/Saturation window will show two sliders namely Hue and Saturation, drag the Saturation slider to the left until the value reaches -100, or you could just type -100 in the value box. You can get to the Hue/Saturation by pressing Ctrl + U, and a Hue/Saturation dialogue box will appear on the screen, but not in the layers panel. Drag the Saturation slider to the left until the value reaches -100, or you could just type -100 in the value box. Whichever method you use. You will see color removed from the image.
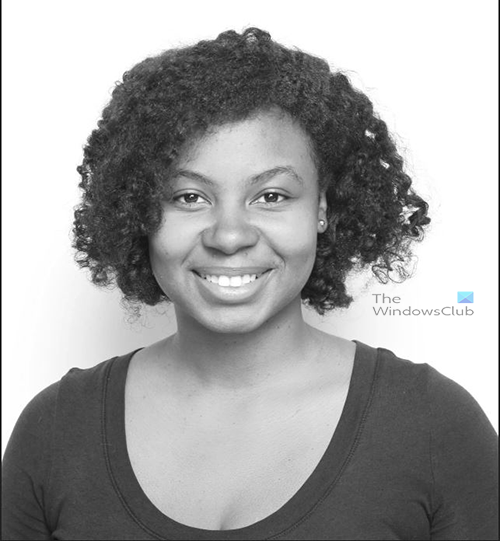
[Image with Saturation of -100 applied]
3] Invert the Image (Optional)
The next step is to invert the image. To do this, make sure that you are on the copy of the image, which in this case is the Background copy. Go to the top menu bar and press Layers, then New Adjustment Layer, then Invert. This step is optional, and depending on the image that you have, it might not work out the way you want. If it is not giving you the effect that you are looking for you can just turn off this adjustment layer. To turn off the adjustment layer, click on the Visibility Icon (Eye Icon) at the left of the layer. If you use this step then you may have to turn down the Opacity very low or it may overshadow the other effects. Remember to watch your image as you progress and see if you are getting the effects right. Experiment with different levels and effects until you get it right.
4] Change Color Mode of Background Copy
The next change that will be made is to the color mode of the image. Make sure that the image copy (Background copy) is selected in the layers panel then go to the top of the layers panel, in the same line as the Opacity to the left, you will see Normal. That is the Color Blend Mode of the selected image. Click on Normal and a drop-down menu will appear. From the drop-down menu select Color Dodge.
Depending on the image you used, the result will be different so don’t worry if it looks different. Some images may be completely white with hardly any black. Just keep working and it will turn out just as it is supposed to.
5] Convert Layer to Smart Object
Whenever you want to use a filter on a layer, it is best to make the layer a Smart Object. You will be able to then apply the Smart Filter. Smart filters are editable, you can make changes later if you need to.
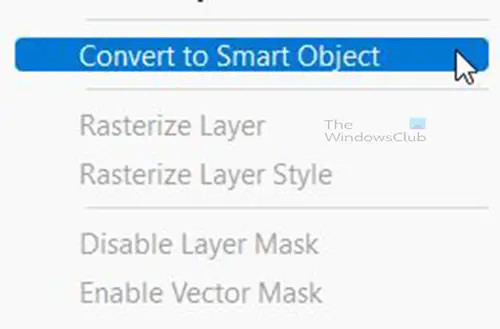
To make the layer a smart object, select it in the Layers panel, in this case, you will be using the Copy layer. When the layer is selected, right-click on it and choose Convert to Smart Object. You may also click the Menu button at the right edge of the Layers panel, a drop-down menu will appear, choose Convert to Smart Object.
An icon will appear on the lower right-hand corner of the selected image, showing that it is a smart object. You can hover over the image with the mouse and you will see the Smart Object thumbnail show up.
6] Apply Gaussian Blur Filter
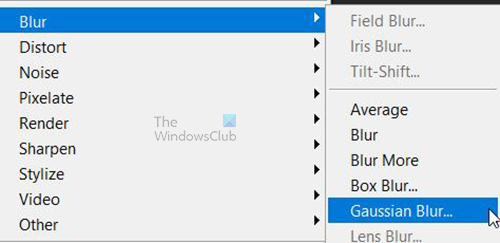
The next step is to apply the Gaussian Blur filter to the selected image (Background copy). To apply the Gaussian Blur go to the top menu bar and press Filter then Blur then Gaussian Blur.
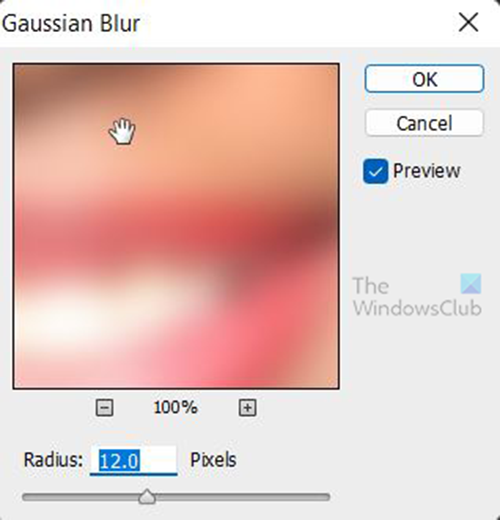
The Gaussian Blur window will show up, it will show a preview of the image. Make sure that the preview option is checked so that you will be able to see changes to the image as you make them. You can apply the amount of blur you need by clicking the slider at Radius and dragging it, or clicking in the Radius value box and then using the Up or Down arrow on your keyboard to increase or decrease the blur. For this project, you will just need a little blur to get the desired effect. There is no fixed number that needs to be in the Radius value box, it will be based on your image and how much you are satisfied with.
When you are finished press Ok to conform and keep the changes. If you look in the layers panel you will see the Gaussian Blur adjustment layer under the image as a part of the Smart filter. You can go back and make edits if you are not satisfied with the results. This is the advantage of applying the smart filter in Photoshop, you can make edits after. Just be sure to save your work as a Photoshop PSD so that you have an editable copy. You can then save copies as other file formats if you need to share or use them online. If you need to edit the blur, just double-click on the word Gaussian Blur and the Gaussian Blur window will open for you to edit.
[Image with Gaussian Blur applied]
7] Add a Levels Adjustment Layer
It is now time to make the image a little darker, you can do this by adding a Levels Adjustment Layer. You can add the Levels Adjustment Layer by going to Layer then New Adjustment Layer then click Levels. A Levels option box will appear for you to name the Levels Layer and choose other options. You can give the layer a name or keep the default name. You can also make the new Levels Adjustment Layer by going over to the Layers panel and go to the Adjustment Window and click the Levels Icon. A Levels properties window will appear for you to make adjustments. Photoshop will place the New Levels Adjustment Layer above the Background copy layer.
8] Change Levels Layer Blend Mode
Change the blend mode of the Levels Adjustment Layer to Multiply. Do this by clicking on the Levels Adjustment Layer and then go to the top of the layers panel, in the same line as the Opacity to the left, you will see Normal. That is the Color Blend Mode of the selected layer. Click on Normal and a drop-down menu will appear. From the drop-down menu select Multiply. You can go through the different options and see what the image looks like with them.
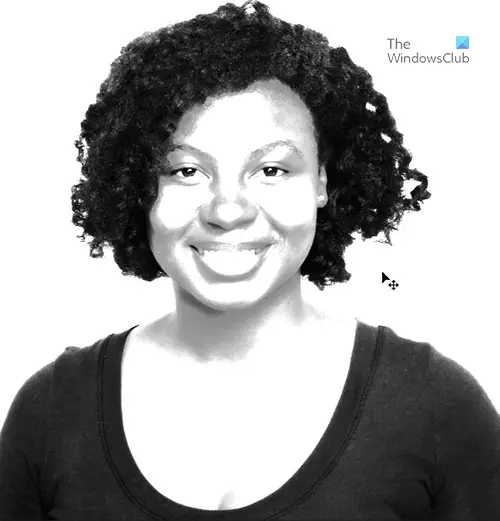
[Image with levels layer with multiply blend mode added]
9] Lower Opacity (Optional)
Depending on the image that you used, it may be too dark after applying the adjustment layer and the Blend Mode. You can fix this by lowering the Opacity of the Levels layer. Just click the levels layer, then go to the Opacity above it on the Layers panel, click the number that is there and a drop-down slider will appear, use this slider to adjust the Opacity. Watch the changes in the image as you adjust the opacity, and stop adjusting when you are satisfied with the results.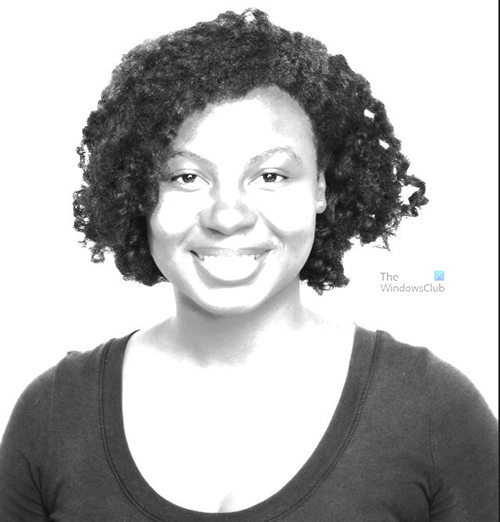
[Completed Image in Black and White]
10] Make Colored Sketch
The following steps will be used to make a colored sketch of the image. Most of the hard work is already done so this part will just be building on the previous steps.
11] Duplicate Original Background Layer
Go to the Layers panel and duplicate the original Background layer. You can duplicate by right-clicking the image and pressing Duplicate Layer, or by going to the top menu bar and going to Layer then Duplicate Layer, give the layer a name, and press OK. You can also duplicate the layer by going to the Layers panel and dragging the layer down to the Create a new layer icon then releasing it. Dragging the layer down to the Create a new layer icon will duplicate the layer and it will be named Background copy. You can create a new layer by pressing Ctrl + J on the keyboard. Pressing Ctrl + J will duplicate the layer and it will be named Layer 1 automatically.
You will give this new copy layer the name Color. If the step you used to duplicate the layer did not give you the option to name the layer then you can easily rename it. Go to the Layers panel and click the layer’s name twice and you will get the ability to type in the name. You may also change the layer’s name by clicking the layer then go to the top menu bar then click Layer then Rename Layer. This will enable you to type the name that you choose.
12] Move the Color Layer to the Top
You will need to move the new layer named Color to the extreme top. You can do this by holding it and dragging it to the top until you see a white bar appear above the topmost layer. At this point you let the layer go. You can also move the layer to the top by holding Ctrl + ], keep pressing ] until the layer gets to the top. You can get the layer straight to the top by pressing Shift + Ctrl + ], the layer will move to the top automatically.
13] Change Blend Mode
Select the new layer that you named Color and go to the top of the Layers panel and change the Blend Mode to Color. This will allow only the color to show through and hide the tonal information.
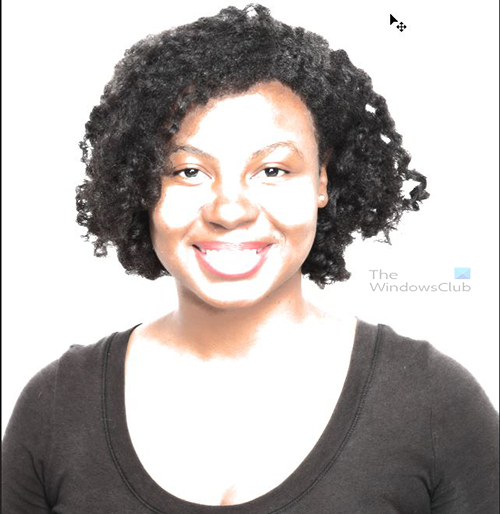
[Image with color and Multiply Blend mode]
14] Lower Opacity on Color layer
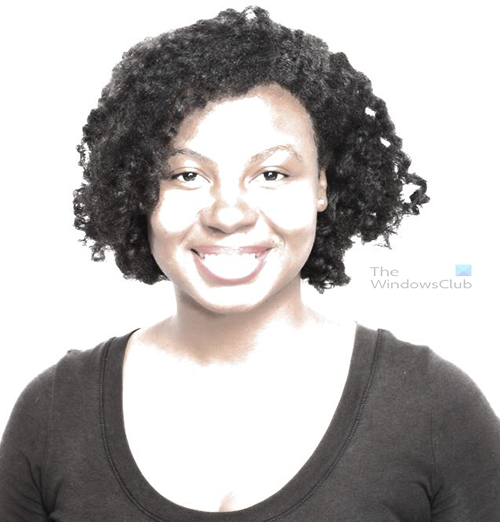
If the color layer is too intense, you can lower the Opacity to a point that is comfortable for you. Just observe the image to see that it is at a level that you are comfortable with. This image has an Opacity of 50.

Here is the completed sketch picture in color.
15] Save
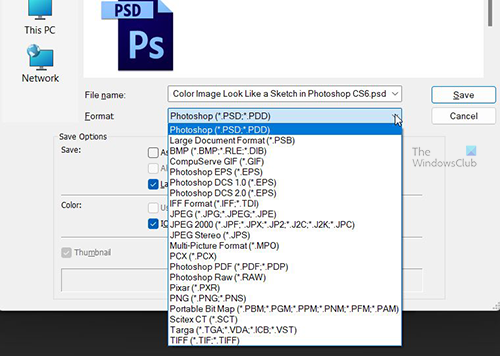
Save the document as a Photoshop PSD so that you can make changes if you need to. If you need copies to share or put online you can save them as JPEGs. To save go to File then Save then Save As. Enter the file name and choose the file format.
Read: How to reduce Noise in Images using Photoshop
How do you turn a photo into a sketch in Photoshop CS6?
This first step part of the instruction will create the black and white sketch. Open and prepare the image in photoshop. You can duplicate the layer so that you can keep the original safe. You then add the Adjustment Layer. Adjustment layers keep you from doing adjustments on the image just in case you need to undo the adjustment later. You then invert the image this is optional and if it is done with some images, the opacity will have to be turned way down. Change the color mode of the background copy to Blend Mode. Convert the background copy layer to a smart object. This will allow the smart filter to be edited whenever you want. Apply Gaussian Blur Filter to the smart filter layer. Add a Levels Adjustment Layer to the image so that you can make the image a bit darker without changing the image itself. Just go to Layer then New Adjustment Layer then Levels. Change Levels Layer Blend Mode to Multiply. You then turn down the Opacity on the Levels layer this is optional and depends on if the layer is too bright.
You can then create the colored sketch by Duplicate Original Background Layer. You then move the Color Layer to the top and change Blend Mode to Color. Lower the Opacity on the Color layer then save.
If you want to show the black and white, you can just make the color layer at the top invisible and then save. You can then make the colored layer at the top visible again and save a copy of the colored sketch.
Where is the sketch filter in Photoshop?
In photoshop you have some filters that can change your image into a sketch or close to looking like a sketch. You access these by going to Filter then Filter Gallery. You then click on the Sketch folder icon, and you will see the options. Click on them and watch the image change. Experiment and see if you are satisfied. These can look generic, however, so it is good to know how to add your style to make the image look like a sketch.
Leave a Reply