This post shows how to create a live countdown timer in your PowerPoint presentation. You can make one natively or use an add-in to add a countdown timer in PowerPoint.
Imagine starting your PowerPoint presentation with a countdown; that would be spectacular. Creating a countdown is an effective way to display a countdown timer for the beginning of a speaking training or workshop session, and countdowns can be used for a quiz that you want to give to your audience at the end of your presentation. A Countdown timer is a design element used to countdown to a particular event.
How to create a Countdown Timer in PowerPoint
Open PowerPoint.
If your Slide Layout is a Title slide or any other slide, change it to a Blank slide.
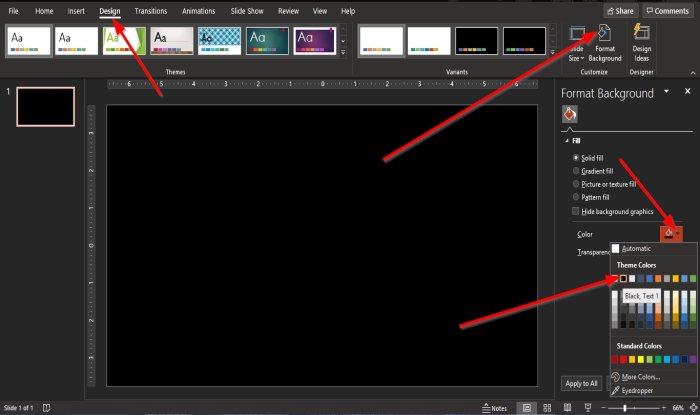
Now, we are going to format the background. To do this, click the Design tab and click the Format Background button in the Customize group.
A Format Background Pane will appear on the right.
Inside the Format Background Pane, where you see Color, select a Color.
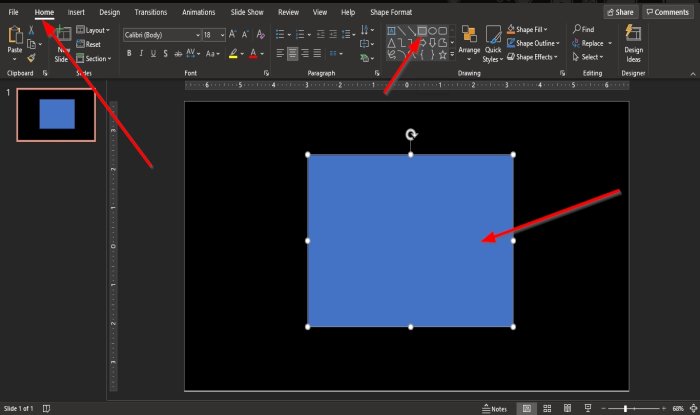
We will go to Shapes on the Home tab and select a shape from the Shape list box in the Drawing group.
Draw the Shape into the slide. This shape will be the outer rectangle.
We want the shape to look unique and artistic.
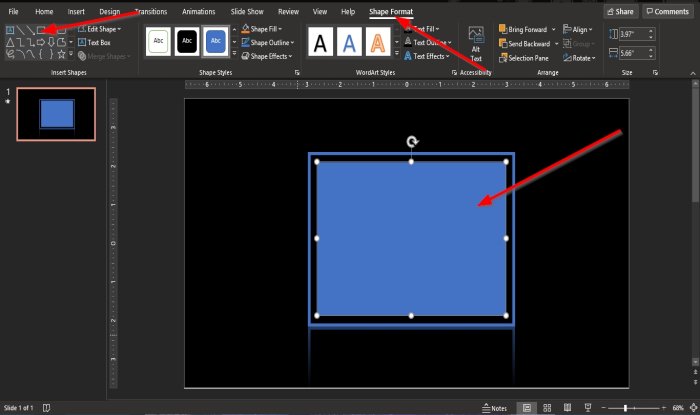
Click the shape; a Shape Format tab will appear on the menu bar.
Click the Shape Format tab
On the Shape Format tab, we are going to format the shape.
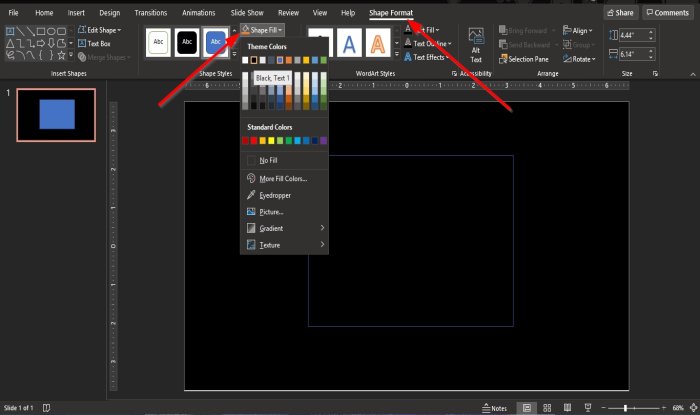
To change the shape’s color, click the Shape Fill button in the Shape Styles group and choose a Color.
We want the Outline of the Shape to have a different color and thickness.
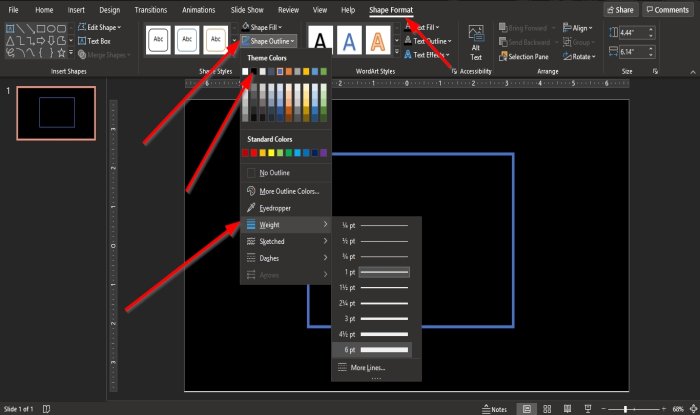
To do this in the Shape Styles group on the Format tab, click the Shape Outline button.
In the drop-down list, choose a Color and then select the Weight you want for the shape.
Now we are going to add some Shape Effect.
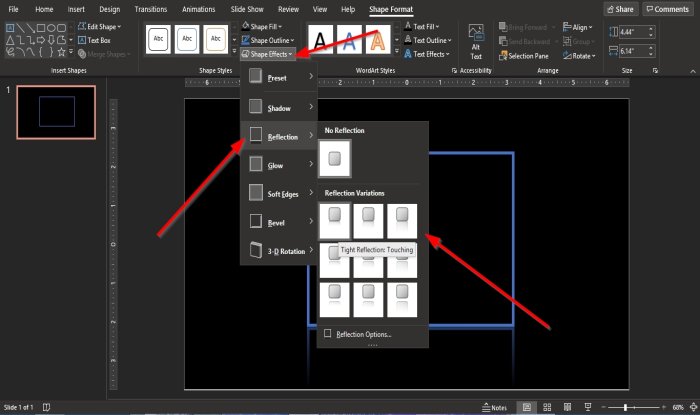
In the drop-down list, select any of the Shape Effects you would want for your shape. In this tutorial, we choose one of the Reflection Effects.
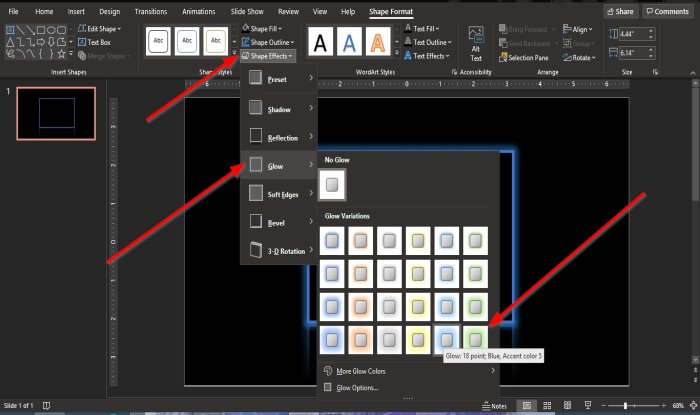
Then we are going to click Shape Effects again to add a glow to the shape.
In the drop-down list, hover the cursor over the Glow Effect and choose a Glow Effect from the list.
We will add another rectangle to the shape on the slide.
On the Format tab, in the Insert Shapes group, select the rectangle shape from the list box and draw it within the shape on the slide. This shape will be called inner rectangle.
We will add some animation to the shape.
click the outer rectangle.
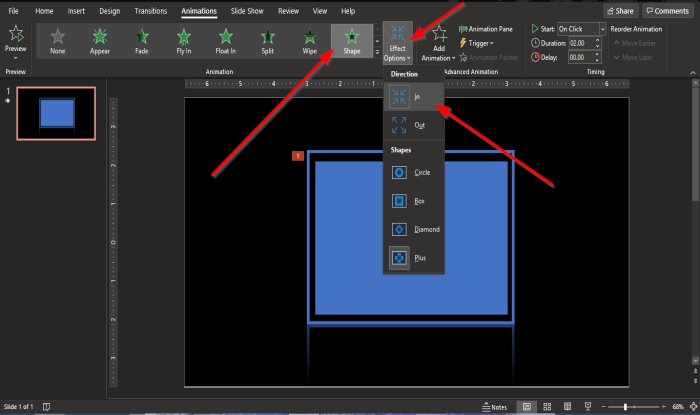
On the Animation tab, click an animation from the Animation list box in the Animation group.
After you select an animation from the list box, click the Effect Options button.
The Effect Options button is a feature that allows you to apply an animation effect to the shape.
In the drop-down list of the Effect Options button, select an effect.
In the Advanced Animation group, click the Animation Pane button.
An Animation Pane window will appear on the right.
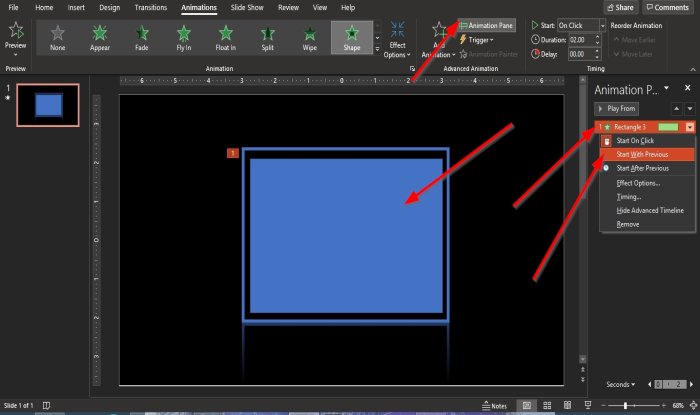
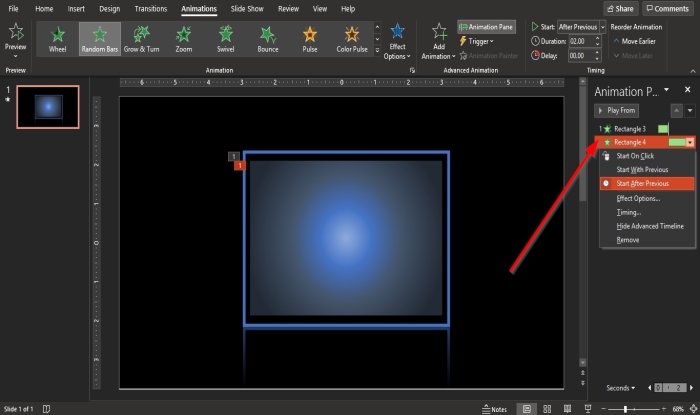
Ensure that it is the inner rectangle is selected.
On the Animation Pane, right-click the inner rectangle displayed.
In the drop-down list, click Start after Previous or any option you would rather.
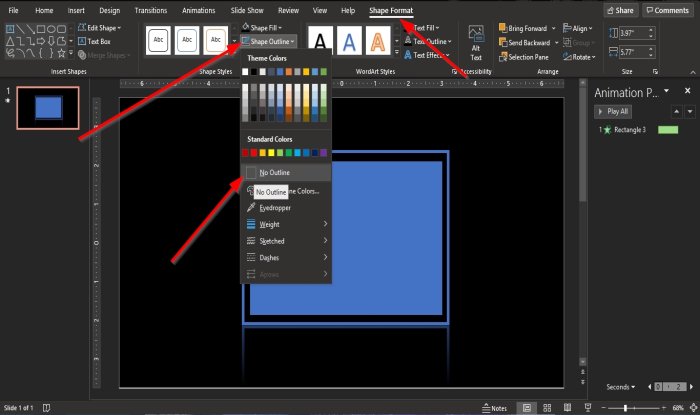
Click on the inner rectangle and then click the Format tab.
In the Shape Styles group, click the Shape Outline button.
And click No Outline.
Now we want to fill the inner rectangle shape with some unique effects.

Click the Shape Fill button.
In the drop-down list, hover the cursor over Gradient and click More Gradient.
A Format Shape Pane will appear on the right of the window.
On the Fill and line section, click Gradient.
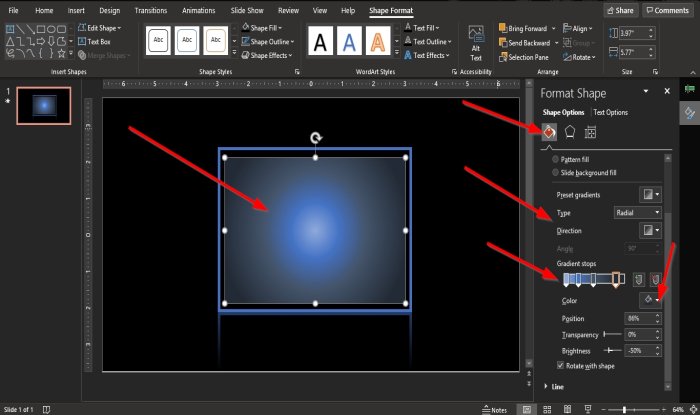
A Gradient Settings will appear below the Format Shape Pane.
In the Type section, choose Radial or any type you like.
In the Direction section, choose the direction you like.
Add colors to the Gradient Stop by clicking on the Gradient Stops on the bar and choose a color for each stop.
You will see the colors from the Gradient Stop added to the inner rectangle.
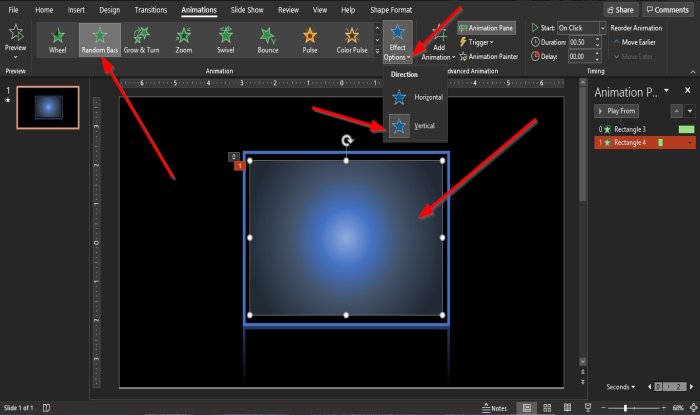
Then go to the Animation tab and select an Animation Effect from the Animation group.
Click the Effect Options button and choose an option from the list, to add to the inner rectangle.
On the Animation Pane window, you can right-click any of the rectangles.
In the drop-down list, you will have options to start on click, start with previous and start after previous.
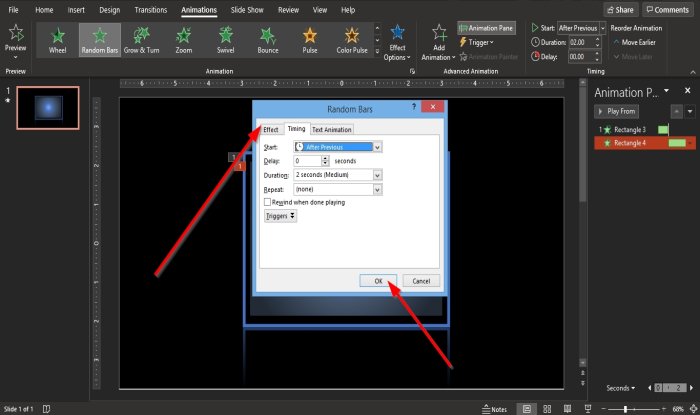
If you click the Effect Options or Timing, a dialog box will appear.
In the dialog box, you can change the settings for the Effect Option or Timing.
Then, click Ok.
Now we are going to place numbers into the shape.
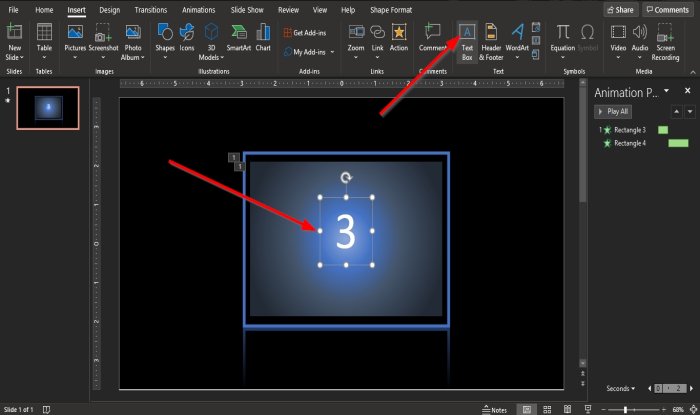
Click the Insert tab in the Text group click the Text Box button.
Draw the Text Box on the slide, enter the number inside the text box and place it inside the rectangle within.
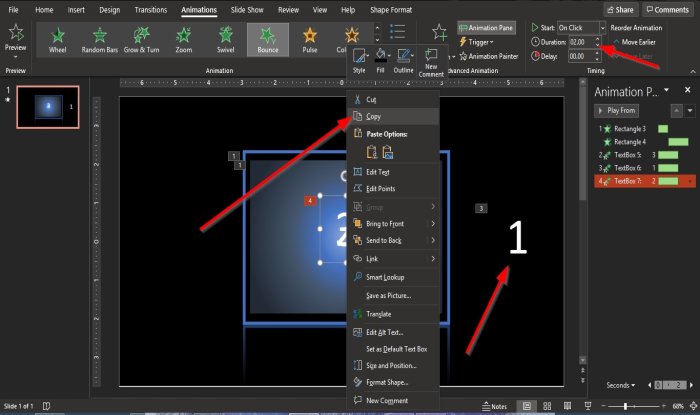
Click on the text box with the number and add an animation to it.
If you want to add a duration to the numbers, click the Duration list box in the Timing group on the Animation tab
Please copy the text box with the number, paste it on the slide, change the number inside it, and place it over the other number.
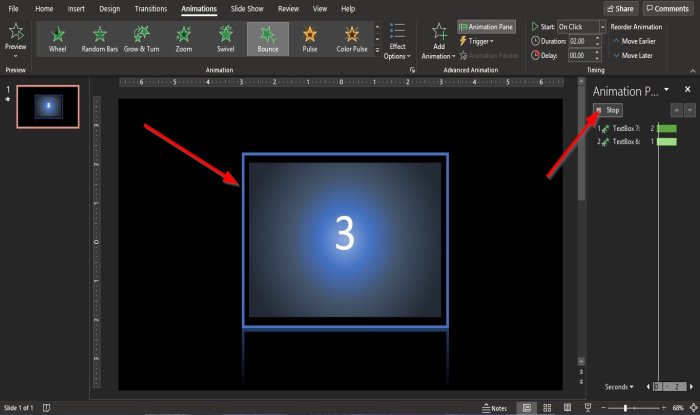
If you want to play or stop the feature of your countdown, click the Play or Stop button on the Animation Pane.
How to add Countdown Timer in PowerPoint using Add-in
You can add a timer in your PowerPoint slide using the Get Add-ins feature. The Get Add-ins feature helps office users find apps that can assist them with their work.
Follow the steps to insert a countdown timer in PowerPoint.
- Launch a PowerPoint presentation
- Add a blank slide layout.
- On the Insert tab, click Get Add-ins.
- In the search engine, type Timer, then press Enter.
- Choose an app, then click Add.
- Click Continue
- Timer inserted into slide.
Launch your PowerPoint presentation.
Then add a blank slide layout.
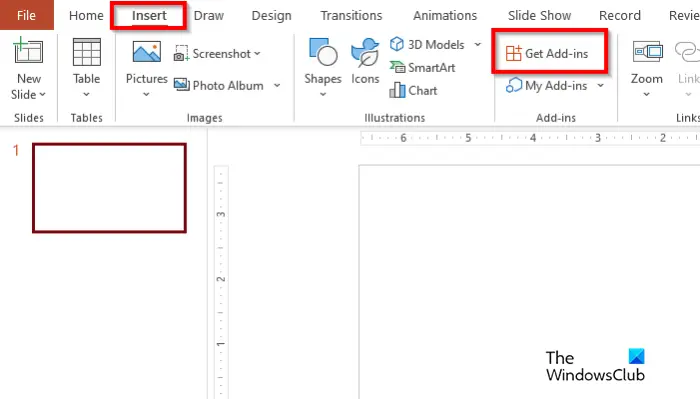
Go to the Insert tab and click Get Add-ins.
An Office Add-in dialog box will open.
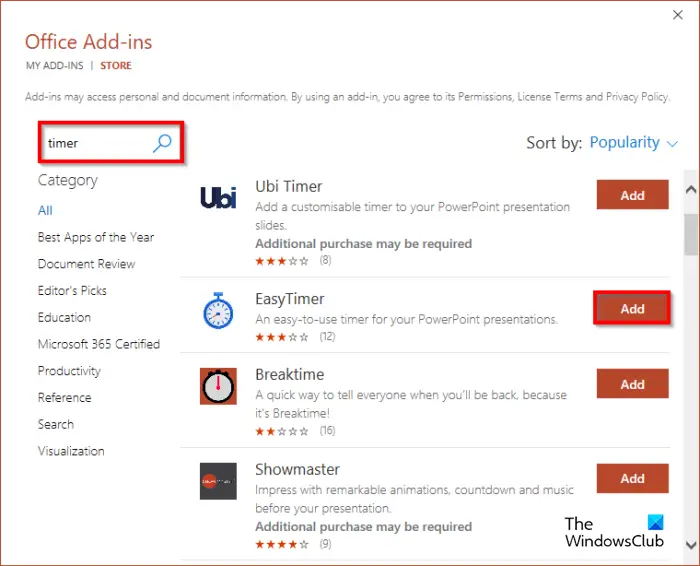
In the search engine, type Timer, then press Enter.
Now you will see a list of timer apps. Choose an app and click the Add button. In this tutorial we chose the app Breaktime.
A dialog box with the license and private policy of the app will pop up. Click Continue.
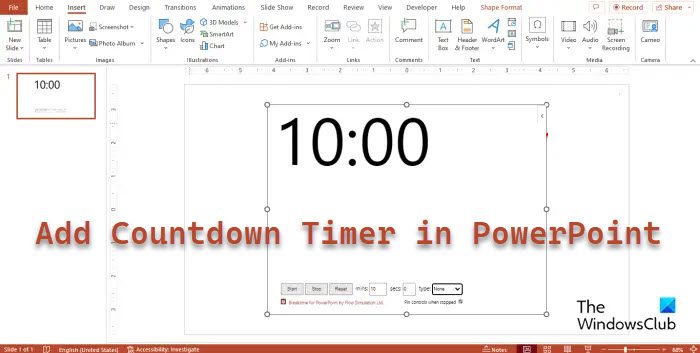
The Timer is inserted into the slide.
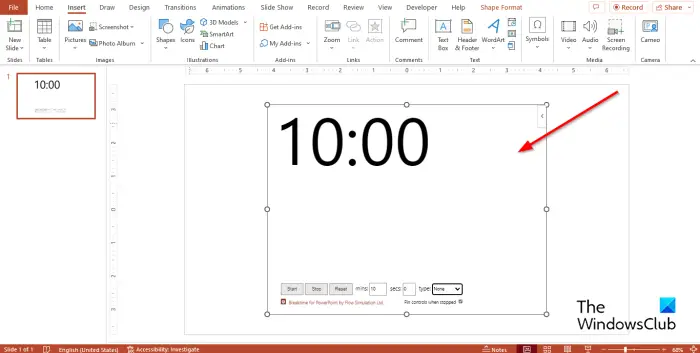
The Breaktime app allows users to set the minutes and seconds and the type. The app also allows users to start or stop the countdown. You can also reset your timer. See photo above.
We hope you understand how to insert the countdown timer in PowerPoint.
How do I create an animated countdown timer in PowerPoint?
- Insert a textbox into your PowerPoint slide. Then customize the textbox into a small box.
- Press Ctrl D to copy the text box. Make a copy of nine boxes.
- Add numbers to the text boxes, make it 1-10.
- Now we will animate these text boxes to disappear one at a time.
- On the Animations tab in the Advanced Animation group, click the Add Animation button, scroll down to the Exit section, and click Disappear.
- Press and hold the Shift key to select the other text boxes, click the Add Animation button, then select Disappear. They will have the same effect as the previous.
- On the Animations tab in the Advanced Animation group, click the Animation Pane button.
- An Animation Pane will appear on the right.
- You can rename the text boxes, so you can know which text box you are customizing.
- Select text box 10. On the Animations tab in the Timing group, leave the settings as Start: On Click, Duration: 01 and Delay: 1.00.
- Set the same settings for the other text boxes.
- Click the Slide Show button to view the countdown.
READ: How to add Slide Numbers, Date and Time to PowerPoint
How do you loop a timer in PowerPoint?
- Click the Slide Show tab.
- Click the Set Up Show button in the Set up group.
- A Set Up Show dialog box will appear.
- Under the Show Options section, check the check box for Loop continuously until ‘Esc.’
- Then click OK.
READ: How to insert Infographics in PowerPoint?
We hope this tutorial helps you understand How to make a countdown timer for a PowerPoint presentation; if you have questions about the tutorial, let us know in the comments.

Leave a Reply