In this post, we will show you how to make a gradient in GIMP. Gradients are color transitions that create striking backgrounds and fill effects. Gradients can be applied directly to fill an overlaying shape or blended with images to create smooth color transitions. In this post, we will show you how to create and use gradients in GIMP – a free photo editor software for Windows.
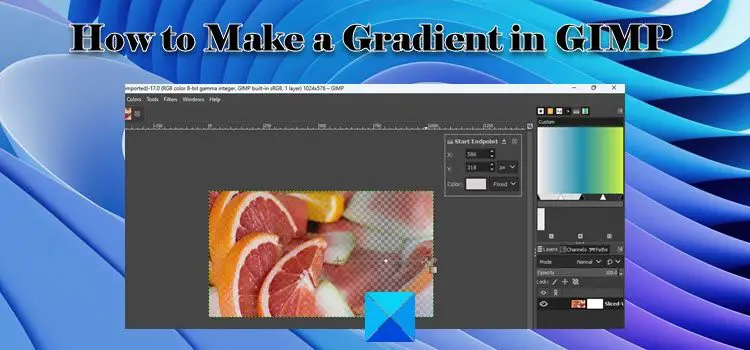
How to Make a Gradient in GIMP
GIMP allows you to create your own gradient effects and seamlessly combine photos using a transparency gradient.
How to create a gradient in GIMP
Launch GIMP and select Windows > Dockable Dialogs > Gradients. A Gradients window will show up in the upper right corner. The window lists all the gradients that come pre-installed with GIMP. To create a new gradient, right-click anywhere within this window and select the New Gradient option from the menu that shows up.
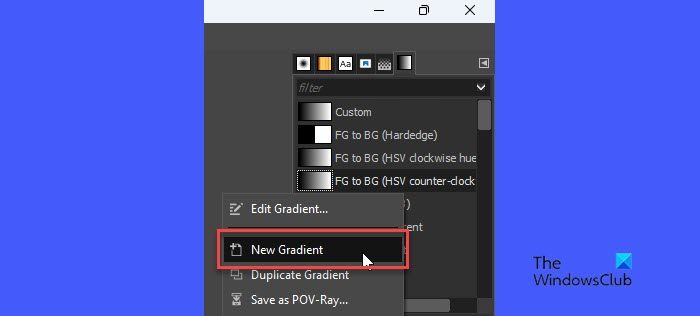
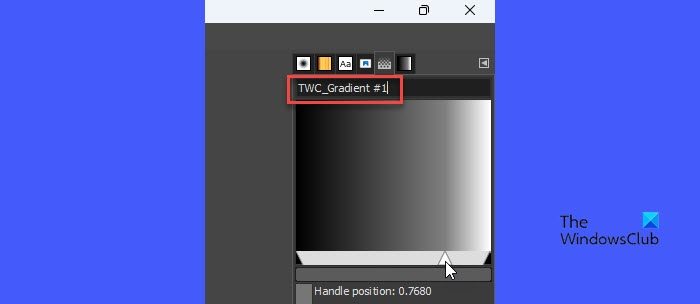
An Untilted gradient window (also known as a gradeint map) will appear, with Black and White as primary colors. The window shows two black triangles at the left and the right corners at the bottom and a white triangle in the middle.
The black triangles mark the positions of the primary colors used to create the gradient. The white triangle marks the midpoint of the blend of the two primary colors. Give a suitable name to this gradient. Now you’ve created a new gradient in GIMP. Let’s see how to give it a custom look.
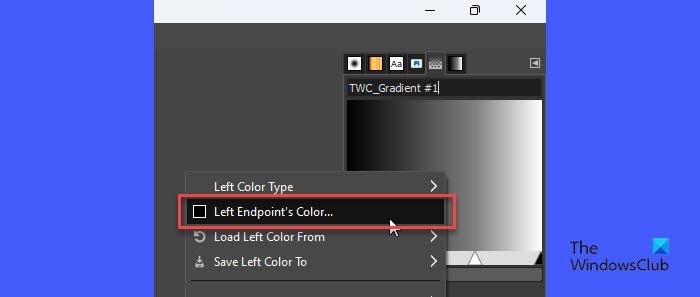
To change the colors, right-click on the gradient preview and select the Left Endpoint’s Color option. Then from the color selection window that appears, select a desired color. Click on the OK button to confirm the selection. The color of the left endpoint (black) in the gradient preview will be replaced by the chosen color.
Again, right-click on the gradient preview and select the Right Endpoint’s Color option. Repeat the above process to replace the white color in the gradient preview with the desired color.
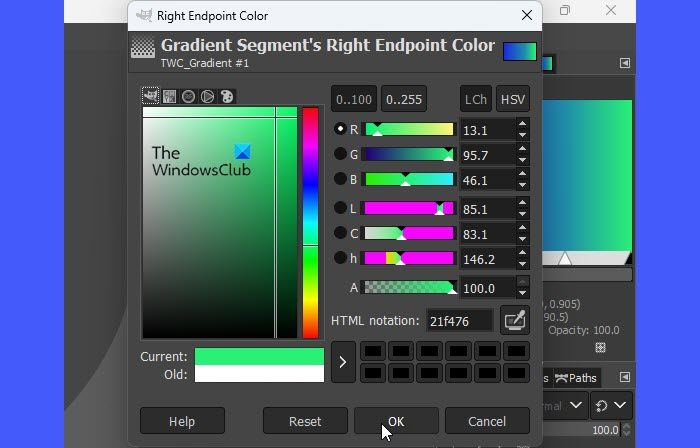
You can move the white triangle to the left or right to change the effect of the gradient.
This is a simple gradient effect. To make it more complex, you may add more colors to it. Right-click anywhere in the gradient preview and select the Split Segment at Midpoint option. This will split the midpoint (the white triangle) into two segments. Both of these segments will be treated as separate gradients.
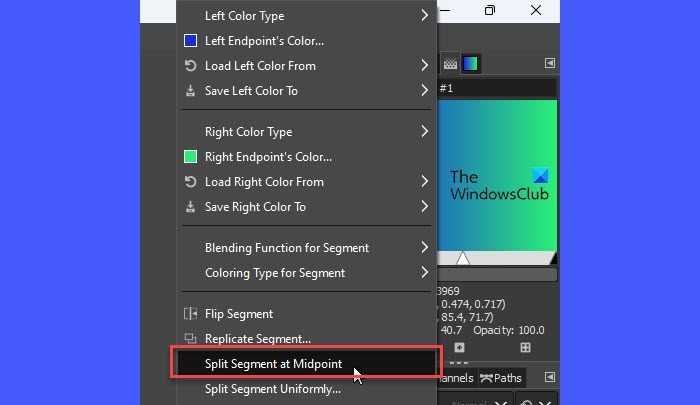
Double-click on a white triangle to select a segment and make it the active segment. You may now follow the above steps to change the left endpoint’s color and the right endpoint’s color of the active segment. Repeat this process to introduce more colors to the gradient.
How to use a custom gradient in GIMP
To apply the gradient you have created to a blank canvas, click on the File > New option to create a new image file in GIMP.
Then right-click on the Bucket Fill tool in the tools section in the top-left corner. Select the Gradient option from the menu that appears.
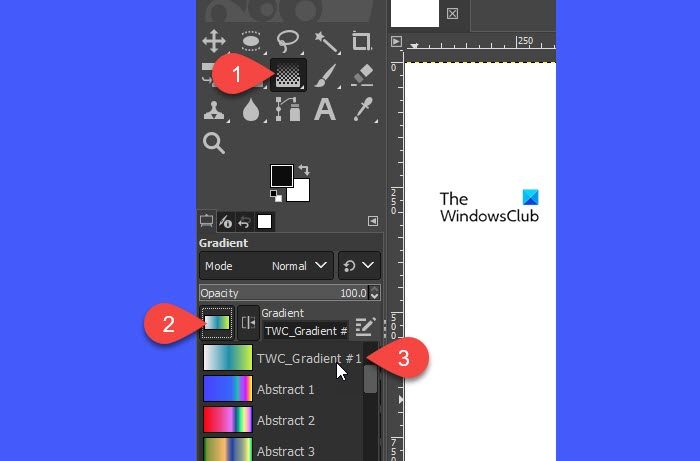
In the Tool Options window, look for the Gradient option (a square with a gradient fill effect) in the left panel and click on it. From the list that appears, select the newly-created gradient.
Now take your cursor on the image canvas. Left-click and drag the cursor toward the right in a linear or radial direction to create the desired gradient fill effect. Press Enter to apply the effect.
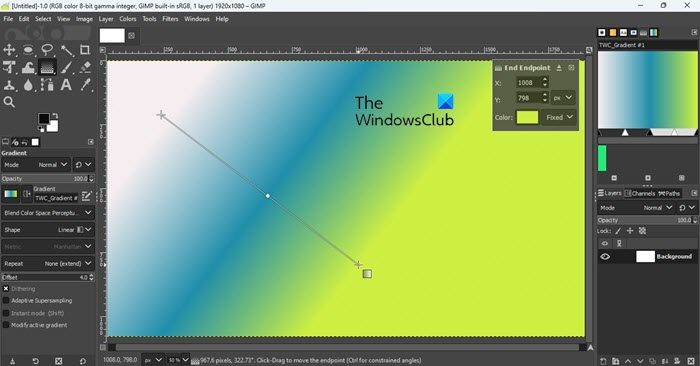
How to create a transparent gradient in GIMP
Now that you know how to create and use your own custom gradient effects, it would be interesting to further learn how to add a transparent gradient in GIMP.
Transparent gradients can be used to blend images together or smoothly fade out an image to transparency.
To add a gradient overlay to an image, open or drag the source image into the canvas of GIMP. Then right-click on the image in the Layers menu and select the Add Alpha Channel option. This is essential to fade out the image to transparency; otherwise, it will fade to a solid color.
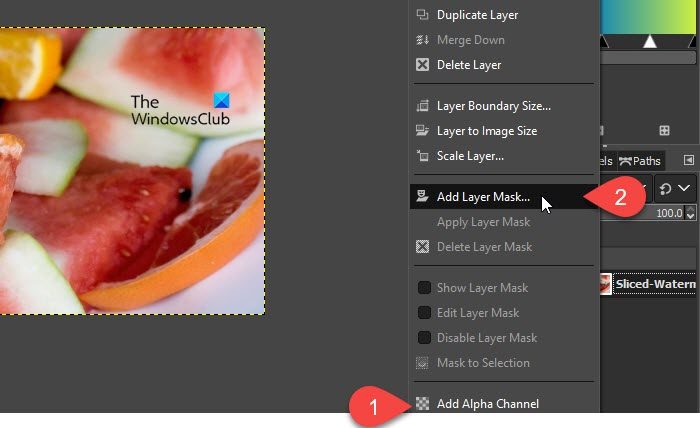
Again, right-click on the image layer and select the Add Layer Mask option. In the Add Layer Mask dialogue window, make sure White (full opacity) is selected under the Initialize Layer Mask to section, and then click on the Add button. Notice the white box next to your image layer. This is your layer mask.
Now select the Gradient tool from the tools menu or press the ‘G’ key on your keyboard. From the Tool options window, select a gradient type (Abstract, Blinds, or a gradient you’ve just created). You may optionally change the foreground and background color of the gradient using the color swatches available just below the toolbox.
Next bring your cursor on the image canvas and draw a gradient as explained above. To draw a linear line, press the Ctrl button while drawing the gradient. Press the Enter key to apply the transparent gradient overlay to your image.
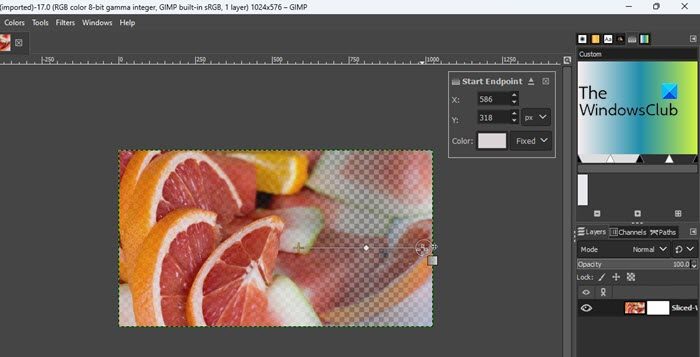
This is how you create and use gradients in GIMP.
Also read: How to scan an Image with GIMP.
How do I make a 3 color gradient in GIMP?
Select Windows > Dockable Dialogs > Gradients. The Gradients window will show up on the right side containing a list of pre-installed gradients. Right-click anywhere on this list and select the New Gradient option. A gradient map will show up with 2 primary colors, black and white. Right-click on the map and select the Split Segment at Midpoint option. Double-click at the bottom of the left segment. Then right-click on the map and select Right Endpoint’s Color. Select a color, copy its HTML notation, and press OK. Then double-click at the bottom of the right segment. Right-click on the map and select Left Endpoint’s Color. Paste the copied value in the HTML notation field and press OK.
How to fix GIMP gradient not working?
If GIMP gradient is not working, make sure the Opacity is set to 100%, Mode is set to Normal, Gradient is set to FG to Transparent, Offset is set to 0.0, Shape is set to Linear, and Repeat is set to None in the gradient tool options. If the values differ, reset them to the indicated values and try using the gradient tool again.
Read next: How to convert Images to Black and White on GIMP.