Photoshop and its tools and features will make your designing graphics for any use more attractive. Art is made of lines that are placed in a way to make them form something attractive. This is true for graphics, and this is why it is important to learn to make lines more attractive. Learning how to draw a patterned line in Photoshop is a very important skill.
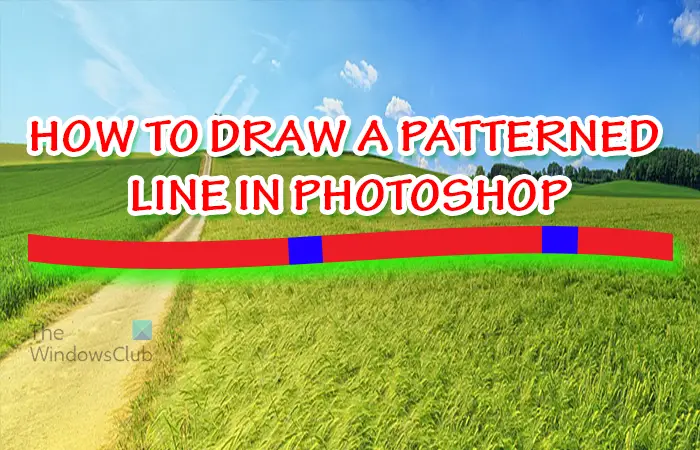
How to make a Patterned or Textured line in Photoshop
Drawing a patterned or textured line in Photoshop is also adding some uniqueness to your artwork. Persons will have different ideas for patterns, and they can customize them. There are two ways to draw the patterned lines, and both will be discussed in the article
- Open a document in Photoshop
- Draw the line
- Adding a pattern using the Layer style option
- Adding a pattern using the Stroke
- Use a Shape to make a patterned line
1] Open a document in Photoshop
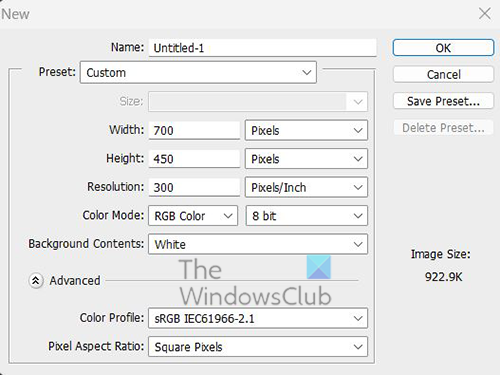
I deliberately named this first step open a document in Photoshop. This is so because in some cases the patterned line will be created in a new document or added to a document that was already created.
Open a new document
To open a new document open Photoshop then go to File then New or press Ctrl + N. The New document options window will open up so that you can define what you want for your document then press OK to confirm.
Open an existing document
To open an existing document, open Photoshop then go to File then Open or press Ctrl + O. You can also find the document and drag it into Photoshop. You can also find the document and double-click on it or right-click it and choose Open with then Adobe Photoshop (version number).
With the canvas now prepared or the pre-existing document opened, it is time to make the patterned line.
2] Draw the line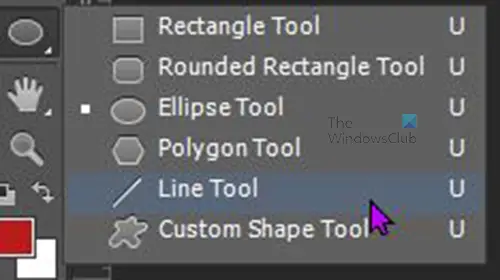
To draw the line go to the left tools bar and then select the Line tool. The line tool is in the same group as the Rectangle tool, Rounded rectangle tool, and others. With the line tool selected go to the canvas and click and hold the primary mouse button and then drag to create the line. If you want to be sure that the line is straight hold Shift as you drag.
You can also create the line by clicking the rectangle tool and then clicking on the canvas. You will see the Create rectangle dialogue box. Enter the dimensions that you want for the rectangle then click Ok to confirm and create the rectangle.
Make the line more visible
By default, the line will be thin and take the current color of the foreground. The above picture is the line when it is just drawn, the H (height) value is 1px
![]()
With the line still selected and the line tool still active, you will see a menu on the top menu bar. Here you can change the line’s Fill color, Stroke color, Weight (thickness), and much more.
You can go to the H (height) value box and change the value to a number that will make the line thicker. Type in the new value then press enter and the height of the line will increase. The line above has a Height value of 10px.
You can also change the length of the line by choosing a larger value for the W (width). Type in the value that you want then press Enter and the length will change.
3] Adding a pattern using the Layer style option
With the line made to be bigger, it is now time to add the pattern.
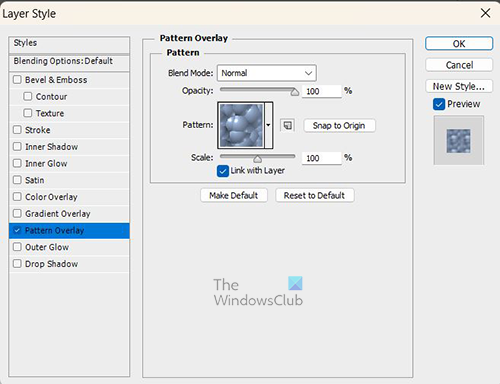
You can add the default patterns in Photoshop to the line using the Layer styles. To add the pattern go to the layers panel and right-click on the layer that is for the line, a menu will appear, click Blending options. When the Layer style window appears, click the word Pattern overlay.
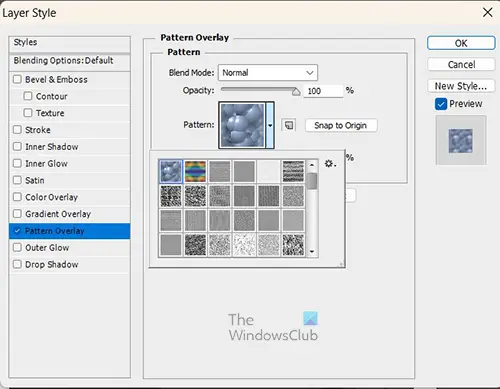
Go to the options for Pattern overlay and choose the pattern that you want. You can add more styles to the line by clicking on the other style names. However, for this article, the pattern is the focus so only a pattern will be added.
To make the pattern more visible to you, I will make the line much wider. The line height is 30 px and the pattern is more visible.
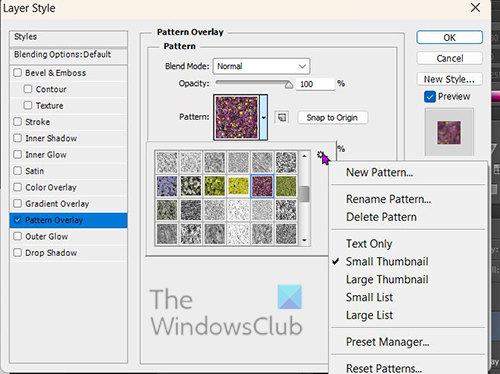
If the patterns in that list are not to your liking and you want to add more you can do so. Just click the drop-down arrow beside the pattern swatch to display the patterns. you will notice a small gear icon at the upper right of the pattern swatches, click it to reveal a menu. You can scroll down and select a new pattern category such as Nature patterns or any other.
When you click the pattern that you want, you will be asked if you want to the current patterns with the new categories. You can click Ok to replace them or Append to keep the old ones and also add the new ones to the list or click Cancel to close without making any changes.
If you want custom patterns that are not available, you can click the same menu and load patterns that you downloaded or made.
While still in the patterns menu, you can change the opacity and the size of the pattern. To change the opacity of the pattern drag the Opacity slider up or down or type in a value. To change the size of the pattern drag the Scale slider to the left or right or type in a number in the value box. When all is done, press Ok to keep the pattern options and close the Layer Style options window.
4] Adding a pattern using the stroke
While the Line tool is selected, go to the top menu bar and look for the line options bar. Add a Fill color to the line if you had none. You then apply a Stroke color as well. With the stroke added, you then change the stroke type to a dash or dots. The stroke will form a pattern on the line. The pattern will be much clearer the wider the line is and the design will change as you make the line wider.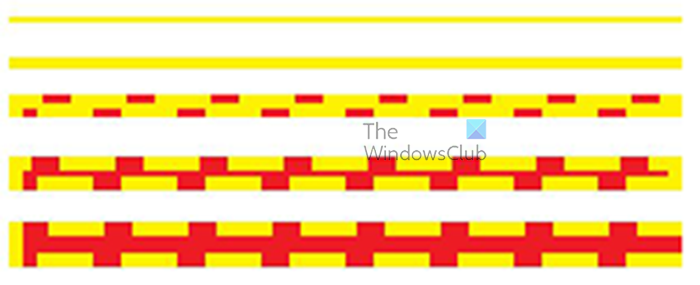
These are the lines at different heights the first line is 5px, then the next is 10px the second line is 20px the other 30px, and the last 40px. You notice that the first two lines do not show the dashes even though they are there.
This makes the method of drawing patterns on a line quite unreliable. The pattern does not show if the line is too narrow and the dash is used. However, it will show the dots even if it is 5 px.
5] Using a shape to make a patterned line
This method of making patterned lines uses shapes. Specifically the Rectangle or the square. This method is quite easy to do. To use the shape to make a patterned line, go to the left tools panel and select the Rectangle tool. The rectangle tool is in the same group as the Line tool. With the rectangle tool selected, draw a rectangle on the canvas.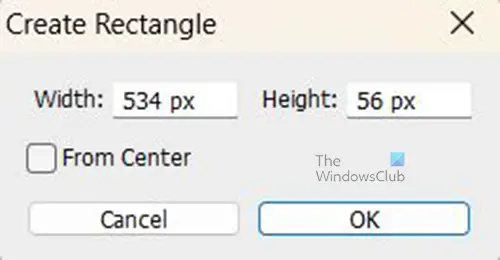
You may also draw a rectangle by clicking on the screen. The create a rectangle options box will appear. you just need to put in the measurements and click ok to create the rectangle. The rectangle can now be adjusted to make the line thinner or thicker. To adjust the size of the rectangle, click it then press Ctrl + T to bring up the transform box around the rectangle.
Hold the top or bottom handle on the rectangle and pull it up or down depending on if you want to make the rectangle thicker or thinner. You would hold the Shift + Alt while you drag to make the adjustments.
To add the pattern to the rectangle line, select the rectangle a go to the layers panel. Right-click on the rectangle layer and when the menu pops up, select Layer styles.

Click on the word Pattern overlay to add the pattern to the rectangle. You can choose the pattern that you want by clicking on the down arrow beside the pattern swatch. When you are finished, press OK to confirm the patterns.

This is the line made of a rectangle and covered with a pattern.
Note: Each time you draw a shape or a line, the line, stoke, and fill settings you used here will be the default.
Read: How to add a Border to an Image in Photoshop
Can custom patterns be added to Photoshop?
You can create custom patterns and add them to Photoshop. You can create the pattern in Photoshop or place an image in Photoshop and use it or parts of it as a pattern. When the image is ready, select it or part of it with the Rectangular marquee tool. When the image or part of it is selected, go to Edit then Define pattern. The Pattern name option box will appear; name the pattern and click OK. The pattern will be available in the patterns swatch whenever you want to add a pattern to an artwork.
How do I add patterns to objects in Photoshop?
To add the pattern to anything in Photoshop, select the object, then right-click it in the layers panel. The menu will appear; click Blending option. The layers style window will appear; click the word Pattern overlay. You will see the pattern swatch; click the drop-down arrow beside the pattern swatch to see additional patterns that you can choose from.
Leave a Reply