Knowing how to create silhouettes in Photoshop is a useful skill to learn. Silhouettes are useful for logos and other artwork when you don’t necessarily need to show features. Surprisingly silhouettes can be used to create shadows if you need to create shadows of objects in an artwork. Photoshop is one of the top raster graphic apps available to both professionals and hobbyists. Photoshop can be used for photo corrections, photo retouches, image manipulations and so much more. Photoshop can do just about anything that you need to get done once you learn the tools and features.

A silhouette is the image of a person, animal, object, or scene represented as a solid shape of a single color, usually black, with its edges matching the outline of the subject. Photoshop offers more than one way to make silhouettes. This article will be looking at creating silhouettes using two methods. One method will look at using the color channels and the other method will use the image’s outline. Some images will work best with one method and not another.
What is a silhouette?
A silhouette is the image of a person, animal, object, or scene represented as a solid shape of a single color, usually black, with its edges matching the outline of the subject. A silhouette is an outline of the subject that is in total contrast to the background.
This is the original image that will be used in both methods.
How to make a Silhouette in Photoshop
1] Method 1
Place the image in Photoshop
To work on the image, it will have to be placed in Photoshop. You can open Photoshop then go to File then Open then search for the image, select it and press Open. You may also find the image file where it is saved, right-click on it and choose Open with then Open with Adobe Photoshop (version). The image will be opened in Photoshop as a layer named Background.
Duplicate image
The next step is to duplicate the image. This is important as it is best to keep the original image protected from editing. To duplicate the image, go to the layers panel and click on the background layer and then click Ctrl + J. You can also duplicate the layer by clicking it and dragging it to the bottom of the layers panel on the Create new layer icon then release it. You can also duplicate the layer by clicking on it then going to the top menu bar and clicking Layer then Duplicate layer. The duplicated layer created will be placed above the original layer.
Go to channels pallet
The next step is to go to the channels panel in the layers panel. Make sure that the copy layer (background copy) is selected then look at the top of the layers panel and you will see the channels tab. You will see four channels RGB, R, G, B. Red Green Blue. RGB is the original image channel colors. Red is the red channel; Green is the green channel and Blue is the blue channel. Click on each and look for the one that shows the image the darkest. When you have identified it you then duplicate it. The Blue channel is the darkest channel for this image. To duplicate this channel right click on it and choose duplicate. You can also duplicate the channel by clicking it and dragging it to the Create new channel icon at the bottom of the layers panel. The duplicated blue channel will go to the bottom of the other channels. When you have made the copy of the channel, turn on both the Blue and the Blue copy channels by clicking the Eye icon.
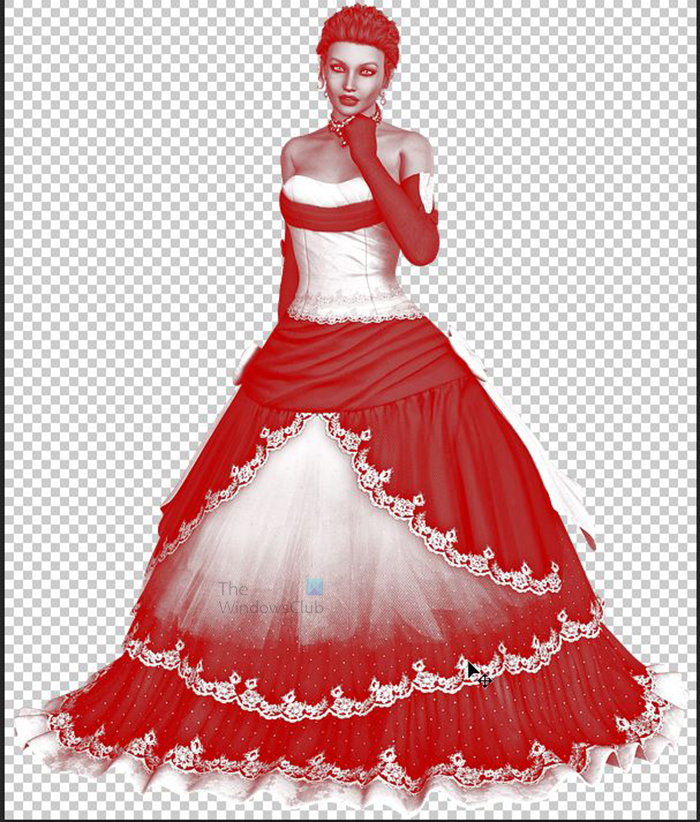
The image will begin to look red when the channel is turned on.
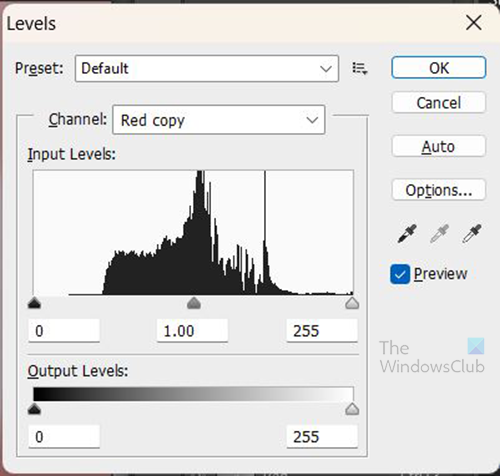
The next step is to make that channel layer darker. This can be done by using Levels. Press Ctrl + L to turn on levels.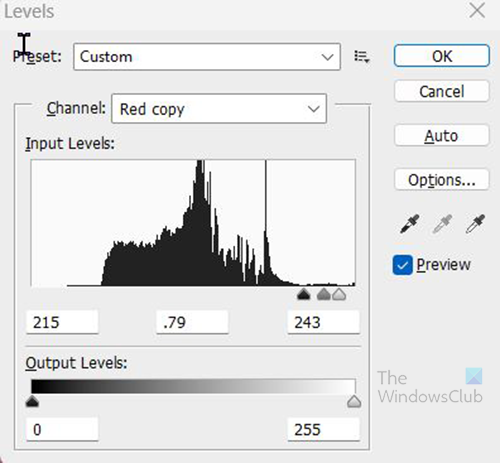
When the levels window is opened, adjust the three tabs to what they look like in the picture above. When you are done press OK to confirm.
Click and drag the Blue copy channel (Whichever channel was your choice as the darker one) down to the bottom of the panel onto the Load channel as selection icon. This will make the image have a selection around it. You then go back to the layers panel.
You will need to invert the selection. To do this go to the top menu bar and click on Select then Inverse.
Go to the bottom of the layers panel and click the Create new fill or adjustment layer. A color picker will appear, click Solid color, choose black and press ok. You will see the silhouette.
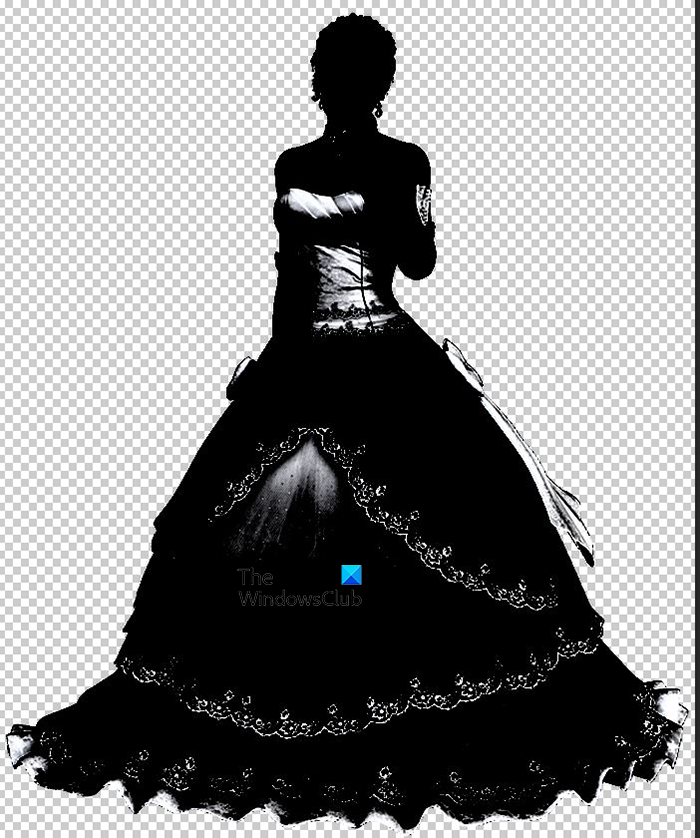
For this image that was used, you are seeing some of the whites from the details on the dress still showing through. This may work for some purposes. However, if you want to make it all black then there is another step to add. Note that the following step may not be necessary for all images. Some images will be fully back after the above steps. However, if you have colors still showing through, follow the next step.
Add adjustment layer (Optional)
This step is necessary if the above steps are done but some colors or details are still showing through instead of just the outline.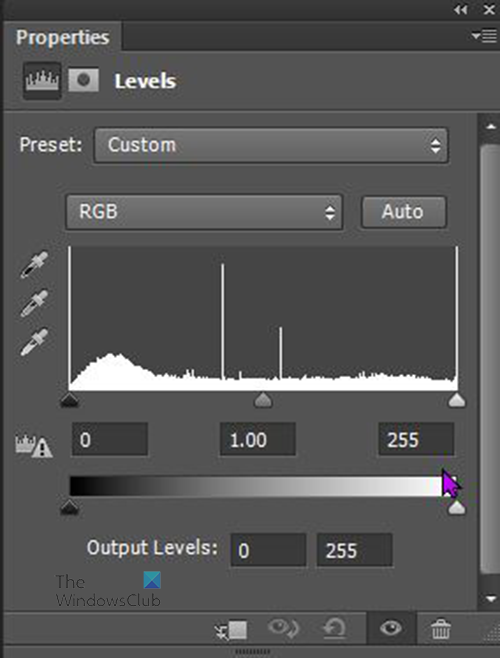
To add the Adjustment layer, click on the copy layer then go to the bottom of the layers panel and click the Create new fill or adjustment layer icon. This will bring up a menu, click Level. This will place an Adjustment layer above the image copy layer.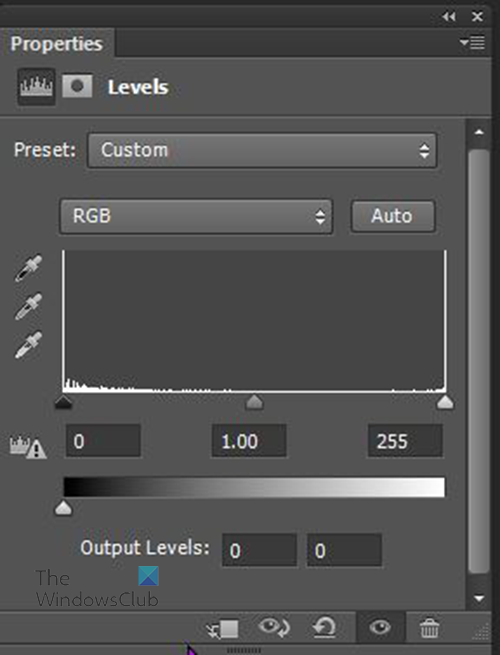
On the Levels adjustment layer look for the slider at Output levels. Change the values on the right to 0 or move the white slider on the right to the left into the black until the value changes to 0. You can watch the image change as you adjust. You can stop as soon as you reach a satisfactory value.
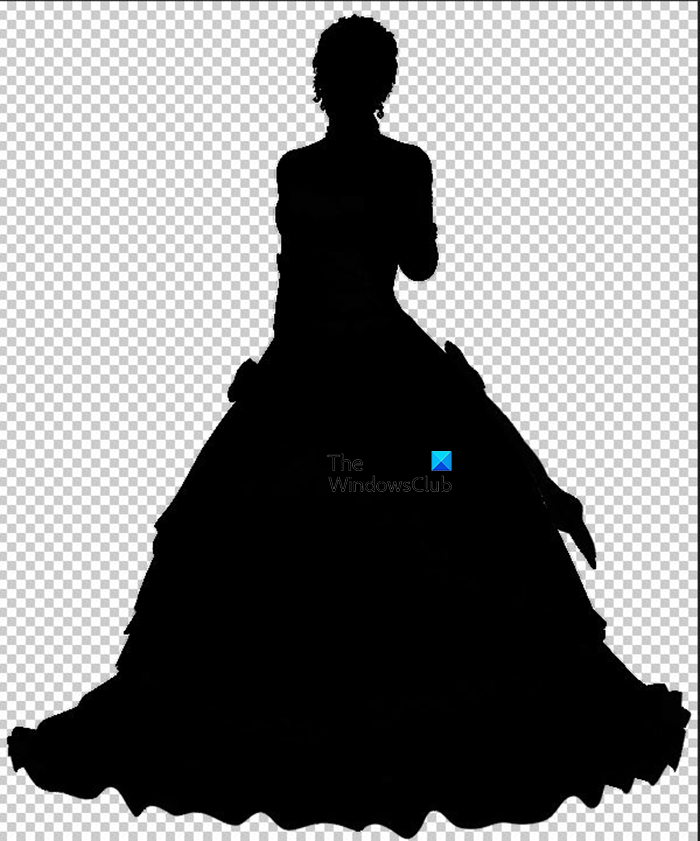
This is the image when the levels adjustment layer is adjusted.
Add background layer (Optional)
In this step, a new layer will be created to become the background. Press Ctrl + Shift + N to create the new layer. Name the layer and click ok. You will need to make the layer a bright color. While on this new layer, go to the right tools panel and click the paint bucket and choose a bright color for the foreground color then click on the canvas. Make sure that the last new layer created is the one selected. The new layer will become whatever color you chose and it will block out everything. Go to the layers color mode and choose Multiply. This new layer can remain on top or you can move it between the color fill layer and the levels adjustment layer. Note that adding a background layer is optional as the no background or white background that your image already has may work for you.
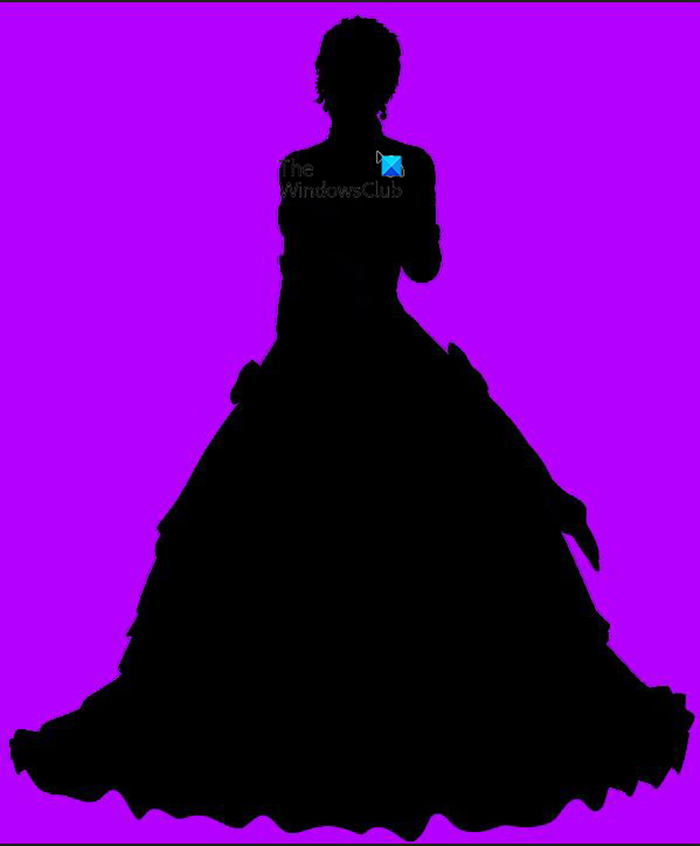
This is the silhouette with a colored background. You will be able to see if there are any stray colors. If there are any stray colors, clean them up with the eraser tool.
Method 2
This method is straightforward and will be easy to remember.
Place the image in Photoshop
To work on the image, it will have to be placed in Photoshop. You can open Photoshop then go to File then Open then search for the image, select it and press Open. You may also find the image file where it is saved, right-click on it and choose Open with then Open with Adobe Photoshop (version). The image will be opened in Photoshop as a layer named Background.
Duplicate image
The next step is to duplicate the image. This is important as it is best to keep the original image protected from editing. To duplicate the image, go to the layers panel and click on the background layer and then click Ctrl + J. You can also duplicate the layer by clicking it and dragging it to the bottom of the layers panel on the Create new layer icon then release it. You can also duplicate the layer by clicking on it then going to the top menu bar and clicking Layer then Duplicate layer. The duplicated layer created will be placed above the original layer.
Create new layer
Press Ctrl + Shift + N to create a new layer, this layer will be above the other layers. You can also create a new layer by going to the top menu bar and clicking Layer then New then Layer. You can give the new layer a name or just keep the default name. Place the new layer below the image copy layer.
Select image
Select the layer with the image copy and then go to the left Tools panel and select the Quick select tool. The Quick selection tool is in the same group as the magic wand tool. Use the Quick select tool to select the outline of the image. Remember that you are making a silhouette so you will need the outline and not the details. Hold the Shift key as you use the Quick select to make selection easier. You can hold Alt while you click if you need to make corrections. Alt will make the Quick select tool have the minus (-) sign so you can bring the selected spot in. Holding Shift while you select will bring the selection out.
Note: Ensure that only the outline is selected and not the details inside the image. The details sometimes get selected, and you may not notice. Zoom into the image and observe the different parts, especially those parts that are close in color to the background, if these are white, they are sometimes hard to see if the selections are around them. If you find a stray selections around any of the details of the image, you can just use the quick selection tool and click it and it should deselect. If any of the details get selected, it will affect the results when you apply the black to create the silhouette.
Create Layer mask
When the selection is completed create a Layer mask. You create a layer mask by clicking the Add layer mask icon at the bottom of the layers panel. You will see an icon to the left of the image layer with a white outline, this is the selection. When the layer mask is created you will see some controls that you can adjust if you wish.
Select layer mask
Hold Ctrl and click on the layer mask icon to select it. The layer mask icon will be next to the image on that layer.
Create new layer
With the layer mask selected (hold Ctrl and click the layer mask icon), create a new layer. Press Ctrl + Shift + N to create a new layer, this layer will be above the other layers. You can also create a new layer by going to the top menu bar and click Layer then New then Layer. You can give the new layer a name or just keep the default name.
Add color to new layer
When the new layer is created you will add color to it. With the new layer selected go to the left tools panel and select the paint bucket tool. You then click on the Foreground/Background icon on the left tools panel and make sure that the foreground color is black.
Note: make sure that the layer mask is selected before you create the new layer and add the paint. If the layer mask is not selected, it will put the paint over the new layer and the image will be behind the black paint. When the layer mask is selected you can look at the image and see the outline around it, that is when you create the new layer and add the paint from the paint bucket.
Finished silhouette
The silhouette of the image will be on the new layer. The silhouette will still have the selection around it. To remove the selection, click the Quick selection tool from the left toolbar then right-click on the canvas and choose Deselect.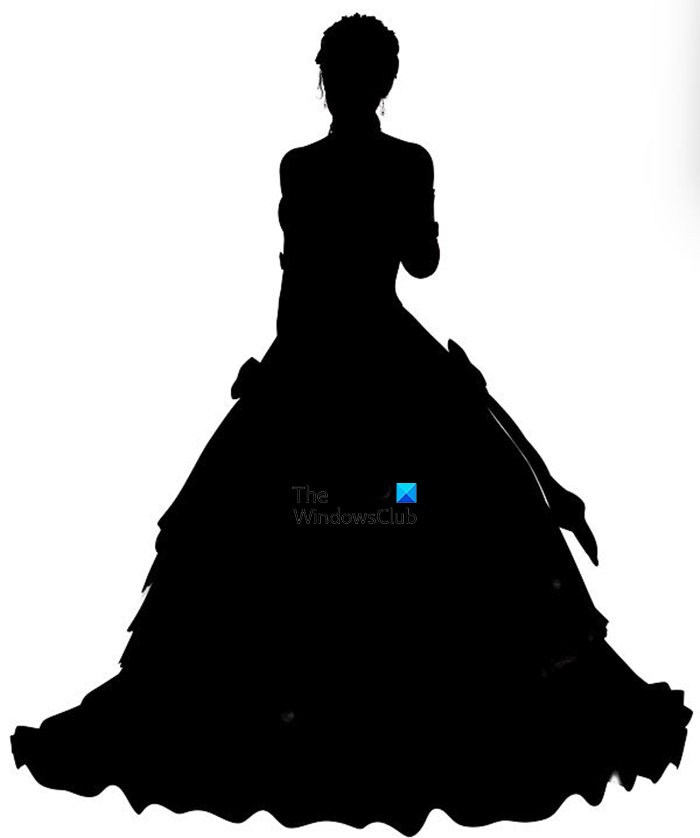
This is the finished silhouette with method number 2
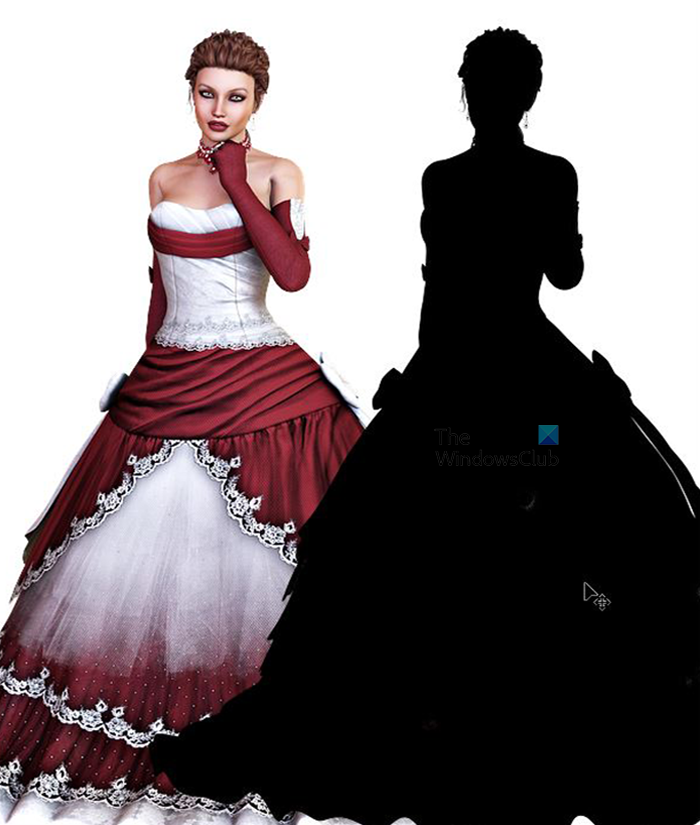
The silhouette is on a separate layer from the actual image so the silhouette can be moved.
Save the project
To save the finished project go to File then Save as, save first as a Photoshop PSD file so that you can make changes later if you need to. You can then save it as another file format. Save as JPEG if you intend it for screen only, save as PNG to print or if you want to exclude the background.
Also read: How to create a Silhouette in Illustrator
How can silhouettes be made?
There is a third method to making a silhouette and that is using the Pen tool.
- Use the pen tool to outline the image that you have in Photoshop
- Give the outline a solid color fill
- Place it on a background that is a different color from the outline
Why are silhouettes mostly black?
Silhouettes are mostly black because they are usually created by shadows in the real world. However, silhouettes can be any solid color outline on a contrasting surface. Some silhouettes may even have some amount of details or decorations on them. However, adding too much detail may take away from it being a silhouette.