The Read Only attribute in Windows 11/10 protects a file from being overwritten, modified, or deleted. As the name implies, when you set the Read Only attribute to a file or folder, you can only view its contents instead of modifying them. Hence, you can use this attribute to add write protection to your file or folder. In addition to the files or folders, you can also set this attribute to the disks and disk partitions. In this article, we will show you how to make Disk or Partition Read-Only in Windows 11/10.
How to make a Disk Read-only in Windows 11
You can make a disk read-only by using a built-in command line utility in Windows 11/10, Diskpart. Follow the instructions provided below carefully.
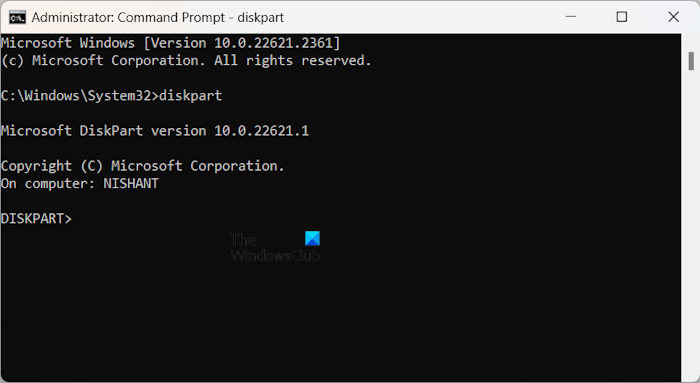
Launch the Command Prompt as an administrator. Now, type Diskpart and press Enter. This command will open the Diskpart utility in the elevated Command Prompt.
Now, type list disk and hit Enter. The Diskpart will list all the available disks on your computer. The disks will show a number, like Disk 0, Disk 1, and so on.
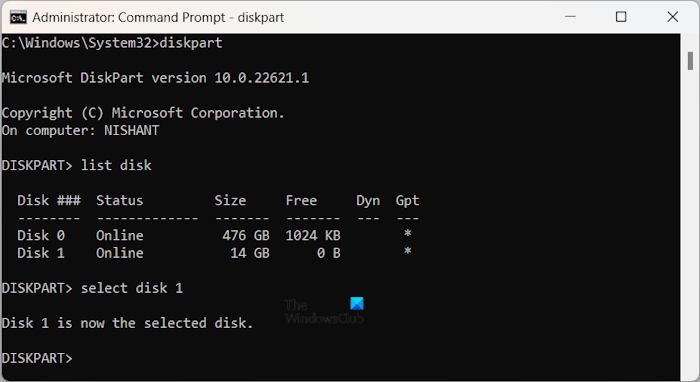
You have to select the disk that you want to make read-only. For this, type the following command and hit Enter.
select disk #
In the above command replace # with the correct disk number. For example, if you want to set the read-only attribute for disk 1, type select disk 1.
After selecting the disk, you will see the following message.
Disk 1 is now the selected disk.
The disk number may be different in your case.
Now, type the following command and press Enter.
attributes disk set readonly
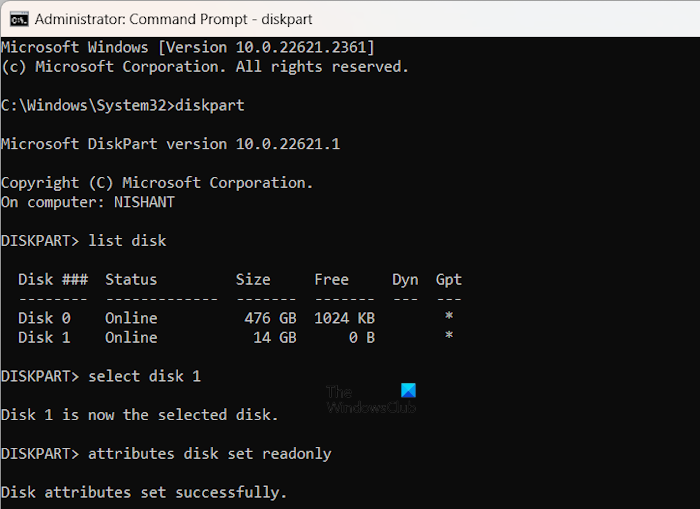
After the successful execution of the above command, you should see the following message in the Command Prompt.
Disk attributes set successfully.
You have made the targeted disk read-only. Now, you cannot modify or delete any file on that disk. Also, the right-click context menu will not show the Rename and Delete options. Moreover, if you try to delete a file from that disk by pressing the Delete key on your keyboard, it will not work.
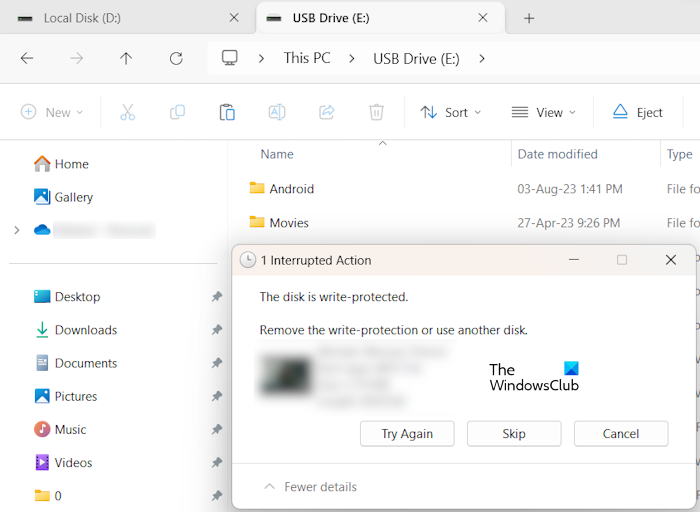
If you copy or move any file from another disk to that disk, the action will be terminated and the following message will be displayed:
Remove the write-protection or use another disk.
You can also use the Diskpart utility to make an external hard disk read-only. Connect the hard disk to your computer and execute the above-mentioned commands in the elevated Command Prompt.
Remove the Read-Only attribute from the disk
If you want to remove the read-only attribute from the disk, follow the below steps.
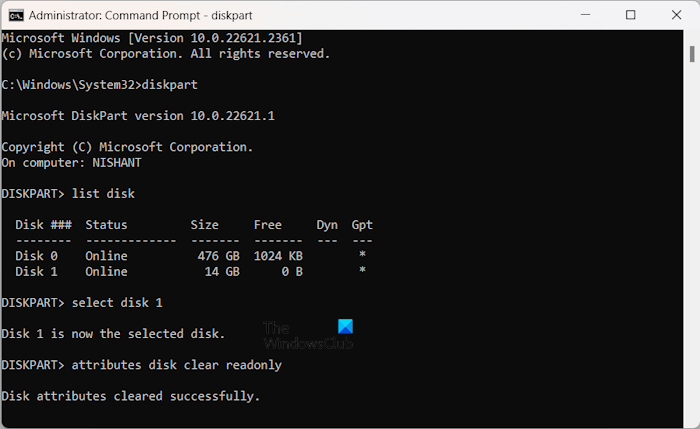
Open an elevated Command Prompt. Type diskpart and press Enter. Now, type the following commands one by one and press Enter after typing each command.
list disk
select disk #
attributes disk clear readonly
After executing the above commands, the Command Prompt will show the following message.
Disk attributes cleared successfully.
How to make Partition Read-only in Windows 11
You can set the read-only attribute to a specific partition of a hard disk. For this, you have to use the same command line utility, Diskpart. The following instructions will help you with this.
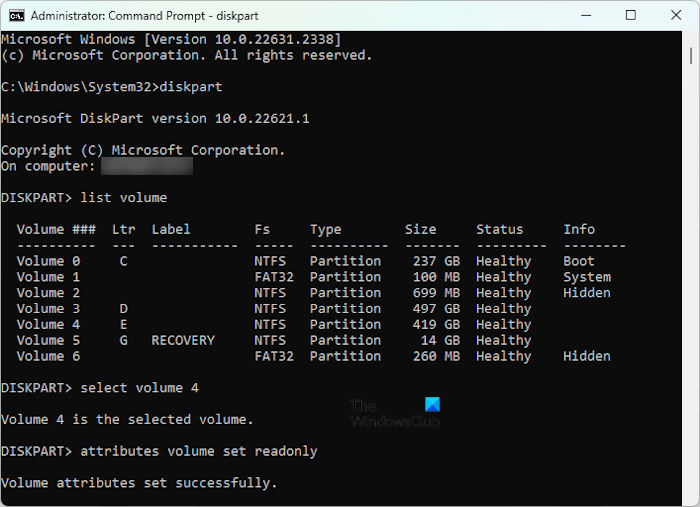
Open the Command Prompt as an administrator, type the following commands one by one, and press Enter after typing each command.
diskpart
list volume
select volume #
attributes volume set readonly
In the above command, replace # with the correct disk partition number. After executing the above-listed commands, you will see the following message in the Command Prompt.
Volume attributes set successfully.
Now, your targeted disk partition is write-protected. You cannot copy files only to that specific disk partition. Also, the options to rename and delete files will be removed from the right-click context menu automatically after you make the partition read-only.
Remove the Read-Only attribute from the disk partition
If you want to remove the read-only attribute from the disk partition, open the elevated Command Prompt type the following commands one by one, and press Enter after typing each command.
diskpart
list volume
select volume #
attributes volume clear readonly
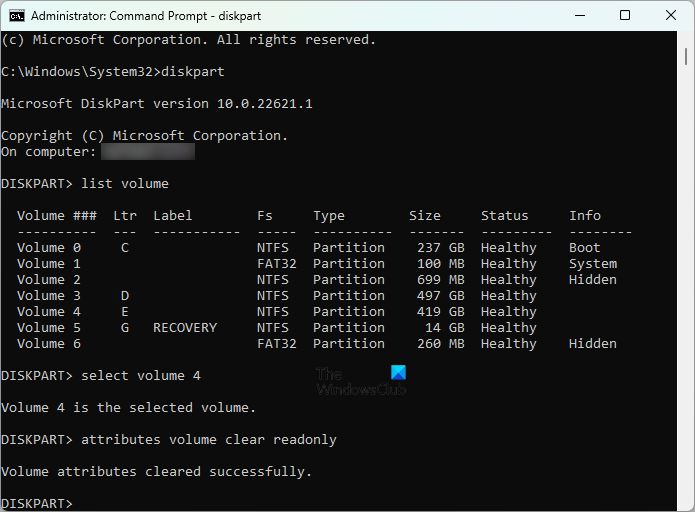
Type the correct disk partition number in the above command in the place of #. The following message will appear after the read-only attribute is cleared.
Volume attributes cleared successfully.
You have successfully removed the read-only attribute from the disk partition. Now, you can copy, move, modify, and delete files in that partition.
Read: Remove Media is Write Protected message in Windows
How to view the Disk and Disk Partition attributes
You can also view the attributes defined to a particular disk and disk partition by using the Diskpart command-line utility.
View the disk attributes
If you want to view the attributes defined to a particular disk, type the following commands in the elevated Command Prompt and hit Enter after you type each command.
diskpart
list disk
select disk #
attributes disk
In the above command, replace # with the disk number you want to view the attributes of.
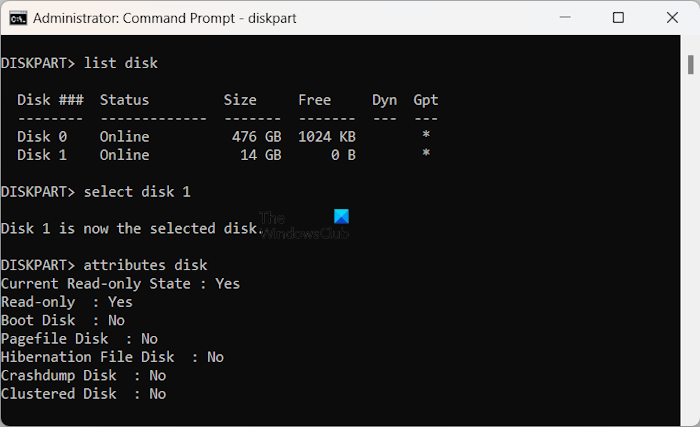
After executing the above commands, you will see the attributes defined for the selected disk. You can see in the above screenshot that the current read-only state and read-only attribute are true for the selected disk.
View the disk partition attributes
If you want to view the attributes defined for a particular disk partition, open the Command Prompt as an administrator and follow the instructions mentioned below.
diskpart
list volume
select volume #
attributes volume
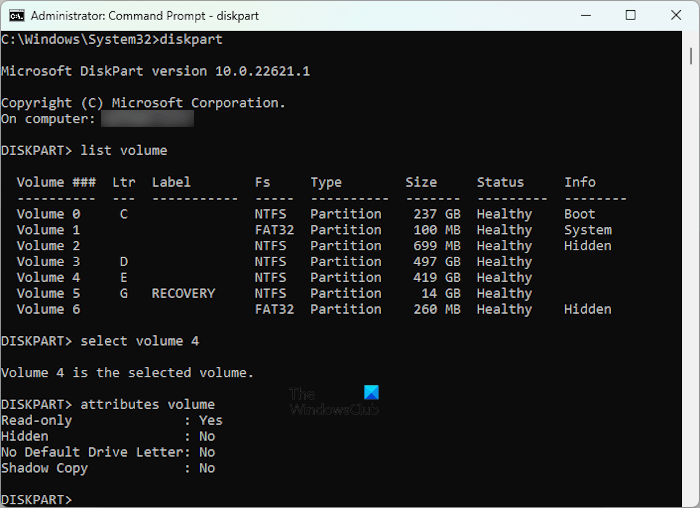
In the above command, replace # with the disk partition you want to view the attributes of. After executing all the above-mentioned commands, the Command Prompt will show you the attributes defined for the selected disk partition.
That’s it. I hope this helps.
Read: How to Format Write-protected USB Pen Drive
Does Windows 11 have a partition manager?
Windows 11 has a built-in tool to manage disk partitions. This tool is Disk Management. You can use it to create new partitions, merge existing partitions, extend a partition size, etc. In addition to this, you can also use the built-in Command-line utility, Diskpart to manage your hard disk partitions. You can launch the Disk Management tool via Windows 11 Search or the Run command box. However, third-party free Partition Managers are also available.
Read: Diskpart has encountered an error, The media is write protected
Why Windows 11 doesn’t recognize partition?
There can be many reasons why Windows 11 is not showing your hard disk partition(s). The problem may be associated with your hard disk driver. Open the Device Manager and expand the Disk drives branch. Any warning sign on your hard disk driver indicates that the driver is not working correctly. In addition to this, it is also possible that the drive letter is not assigned or the hard disk partition is hidden.
Read next: How to disable or enable USB Read/Write Protection on Windows?
Leave a Reply