Want to make Photoshop your default Image Editor? In this post, we will show you how to set Photoshop as the default app for opening and editing image files on a Windows 11/10 PC.
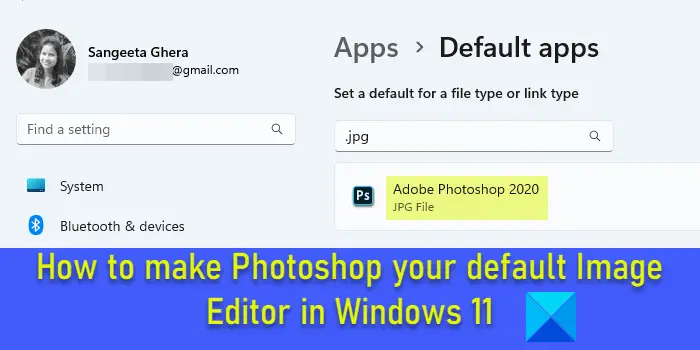
Image files in Windows 11 are set to open with the Photos app by default. This is fine as long as you’re only opening the images for viewing. But if you edit images more than you view them, you might be wondering how nice it would be to have your images open directly in the Photoshop app with a mouse double-click. This is possible if you configure Windows to open images automatically in Photoshop.
How to make Photoshop your default Image Editor in Windows 11/10
You can use the following methods to make Photoshop your default Image Editor in Windows:
- Use Windows Settings.
- Use the Image Properties window.
- Use the ‘Open with’ option in Image’s right-click menu.
- Use Windows Registry.
Once you associate Photoshop with certain image file types on your Windows 11 PC, the images will automatically open in Photoshop on a double-click.
Let us see this in detail.
1] Use Windows Settings
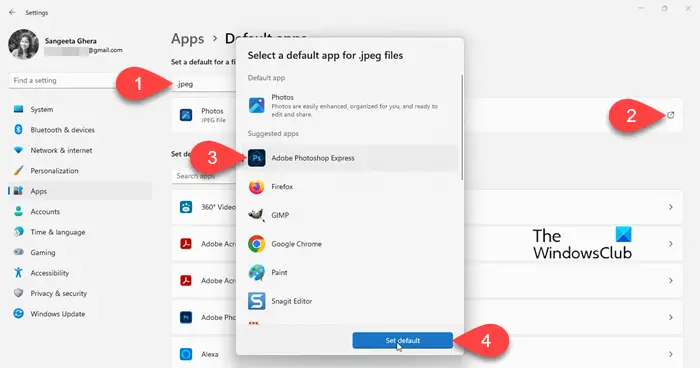
Windows 11 allow you to set defaults for file types and link types. You can access the Windows Settings page to change the app association for image file types from Photos to Adobe Photoshop. Here’s how:
Right-click on the Start button and select Settings from the WinX menu. On the Settings page, click on Apps in the left panel. Then click on Default apps in the right panel.
Type ‘jpg’ in the search bar on top and select .jpg from the search results. Photos will show up as the current default app for .jpg file type. Click on the arrow at the extreme right of the Photos app.
A popup window will appear for selecting a default app for .jpg files. Select Adobe Photoshop from the list of Suggested apps. If you have more than 1 version of Photoshop installed, select the appropriate version. If you can’t see Photoshop in the list, scroll down a bit and look under More options. If you still can’t find Photoshop, scroll down to the bottom of the window and click on the Choose an app on your PC option. Then navigate to the folder where Photoshop is installed (C:\Program Files\Adobe\), select Photoshop.exe, and click on the Open button.
This will bring you back to the app selection popup. Click on the Set default button at the bottom. Photoshop will be set as your default app for opening files with a .jpg extension.
Note: You have to follow the same process to set Photoshop as the default Image Editor app for other image file types. You don’t have to do this for all the image file types, but only the common ones (such as .jpeg, .png, etc.), which you generally open in Photoshop.
2] Use the Image Properties window
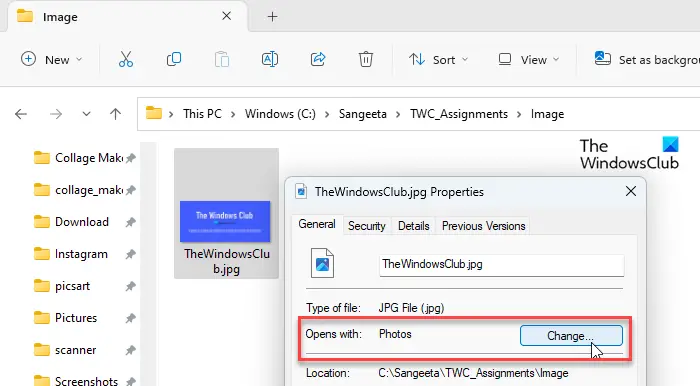
Another way of setting the Photoshop app to open images by default is by using the Image Properties window.
Open File Explorer and navigate to an image file on your Windows 11 PC. If you can’t see the file extension, click on the View menu on top and select Show > File name extensions.
Right-click on the file and select Properties. In the Image Properties window, click on the Change button next to the Opens with option. The same app selection popup will appear. Select Adobe Photoshop from the list of apps as explained in the previous section and click on the Set default button.
Click on the Apply button and then on the OK button in the Image Properties window to save changes to the system.
3] Use the ‘Open with’ option in Image’s right-click menu
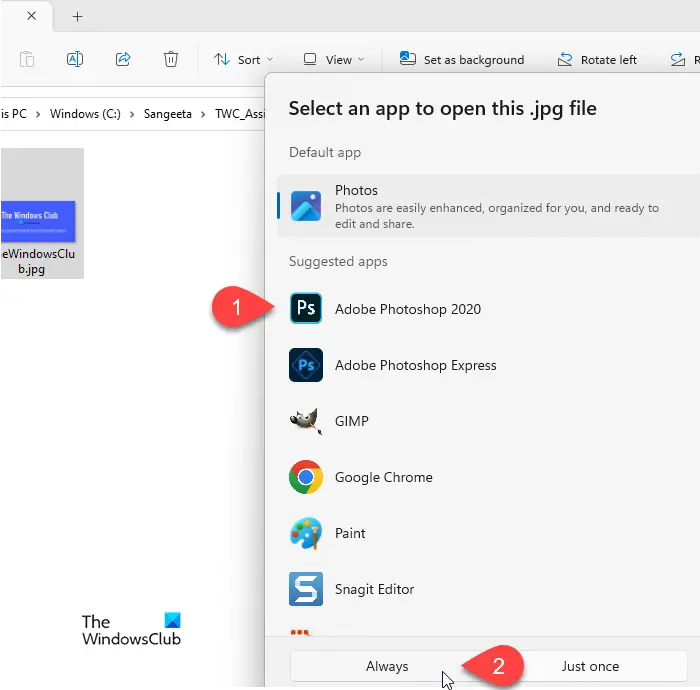
Navigate to the image in the File Explorer window and right-click on its thumbnail. Select Open with > Choose another app.
Select Adobe Photoshop from the list of available apps and click on the Always button.
4] Use Windows Registry
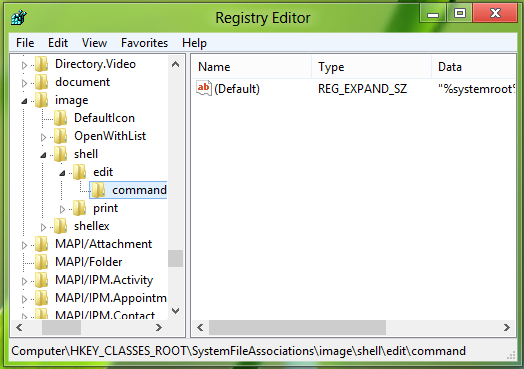
You can also use the Registry to change the default Image Editor in Windows 11/10.
Press Win+R and type regedit in the Run dialogue box. Press the Enter key. Click on Yes in the User Account Control prompt.
In the Registry Editor window, navigate to the following key:
Computer\HKEY_CLASSES_ROOT\SystemFileAssociations\image\shell\edit\command
In the right panel, double-click on the Default string to change its value.
Change the value data from "%systemroot%\system32\mspaint.exe" "%1" to something like "C:\Program Files\Adobe\Adobe Photoshop 2020\Photoshop.exe" "%1" (pick the path according to the version of Photoshop installed on your PC).
Click on OK to save changes. Close the Registry Editor and reboot your system.
Note: This method is shorter than the other methods but requires extra caution since tweaking the registry could cause severe damage to your system if something goes wrong. So if you’re going to use this method, backup your registry first.
This is how you set Photoshop as your default Image Editor in Windows 11/10.
Also Read: Unable to change Default Program Extension on Windows.
What is the default image editor for Windows 11?
Photos app is the default image editor for Windows 11. It comes pre-installed on a Windows 11 PC and is free to use. When you double-click on an image file, it gets opened in the Photos app automatically. You may then click on the Edit image icon on top to edit the selected image.
Does Windows 11 have a built in editor?
Windows 11 has a built-in image editor known as the Photos app, and a built-in video editor known as Clipchamp. Both of these apps are Microsoft’s in-house apps that comes pre-installed on a Windows 11 PC. Clipchamp is also available to users of Windows 10 via the Microsoft Store.
Read Next: Best free Portable Image Editor software for Windows.
Leave a Reply