In this post, we will show you how to make a Natural Shadow for a composite image under an Object or Person in Photoshop. You can improve shadows to make them more realistic with lighting. Shadows are more important to artwork than you may think. The correct shadow in relation to the light source and the subject’s movement and posture can make your work look more realistic. If the subject and lighting are not matched with a correct shadow placement, the whole artwork can look fake.
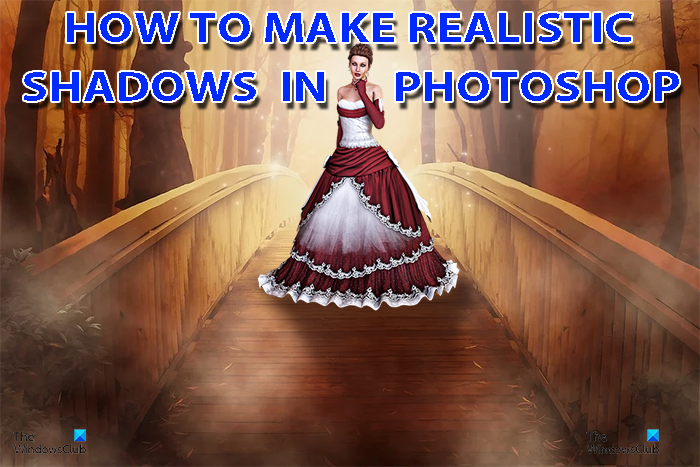
How to make Natural Shadow for a composite image in Photoshop
The natural shadow can be added to an image already on a background. You may also put together a person or object on a background and then add the shadow.
- Place object or objects in Photoshop
- Place objects in order
- Resize the images
- Create a new layer below the subject image
- Use the Quick selection tool to create a selection of subject
- Make the selection black and place it on the new layer
- Turn off the selection
- Rotate the shadow
- Change the shadow’s color, color mode, and opacity
- Match shadow and subject’s perspective
- Convert the shadow to a Smart object
- Blur the shadow
- Add a Layer mask to the shadow layer
- Apply a gradient to the shadow
- Save
1] Place object or objects in Photoshop
The shadow can be placed on one image, or it can be placed on a composite image (an image made from a combination of images). One image could be a photo that you want to add some perspective to. A composite image could be taking an image, removing the background, or full surroundings. You then place a different background and other things on the image. You may want to add a shadow to make the image look more realistic.
In this article a composite will be used, a mixture of different images will be put together then the shadow added.
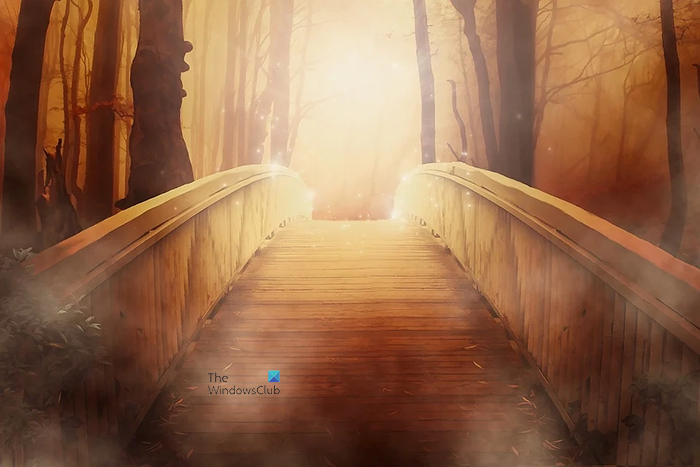
Here is image 1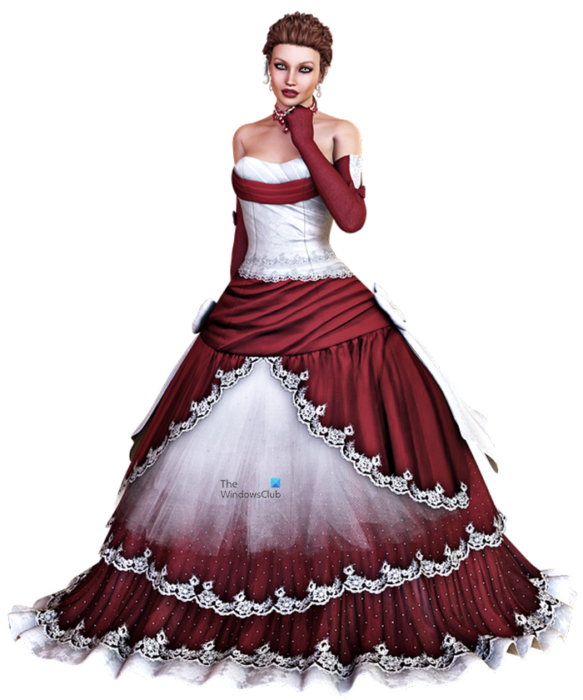
Here is image 2
You can have one or more images for your project. In this case, you can remove the background from one or all the images to make them fit in naturally with each other. This article will show you how to remove backgrounds in Photoshop. This article will show you how to remove backgrounds in Illustrator.
To place the images in Photoshop, find their location, then right-click on the first image, and choose Open with then Adobe Photoshop (version). With the first image in Photoshop, you can right-click on the others and drag them onto the first one in Photoshop.
Read: How to create a 3D pop-out effect in Photoshop
2] Place objects in order
In this step, the objects will be placed in the order that they will appear in the artwork. This step will only be necessary if you are using multiple images. Place the background image at the bottom and all other images above it. To move the images if they are not in order, go to the layers panel. Click the layer and drag it up or down. when it is in the position you want, release the mouse button. You can also click on the layer that you want to move then press Ctrl +] to move it up or Ctrl + [ to move it down. In Photoshop, the layer at the bottom will be behind the layer at the top. If the layer at the bottom has a larger image, it can hide the layer at the bottom.
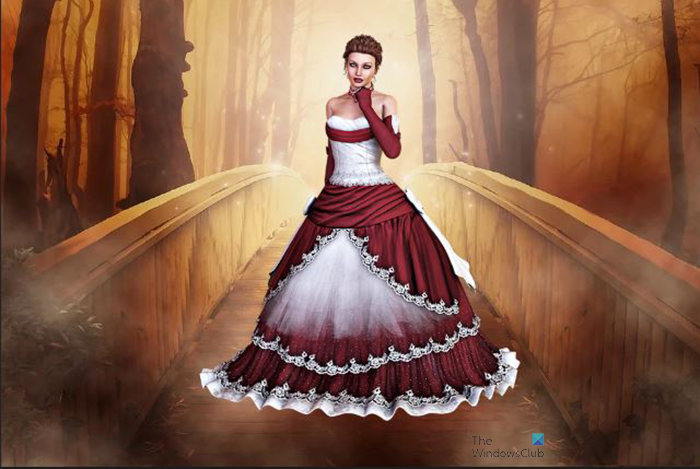
Images in order
Troubleshooting
If the images cannot move check to see that the image that is to be moved is the background. The background image will not move and if you try to put a layer below it, the layer cannot go below it. You can change the layer from being a background by double-clicking on it in the layers panel, the New layer window will open. Give it a name if you want to then press OK.
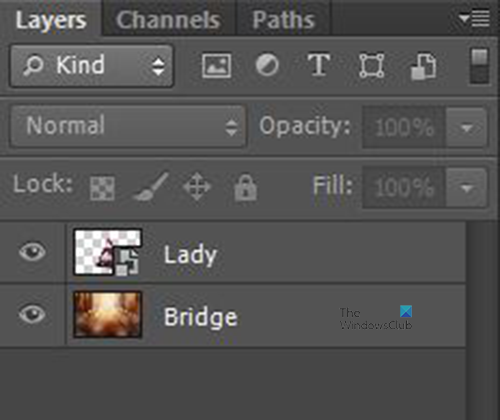
This is the layers panel with the layers in order. You will also notice that the layers are named. Giving the layers descriptive names will make them easy to find and work with.
3] Resize the images
In this step, you will resize the images so that they fit properly. Depending on what the images are, you will have to resize them properly so that the images can be in proper proportion. Images that are not in proper proportion to each other will not look very realistic.
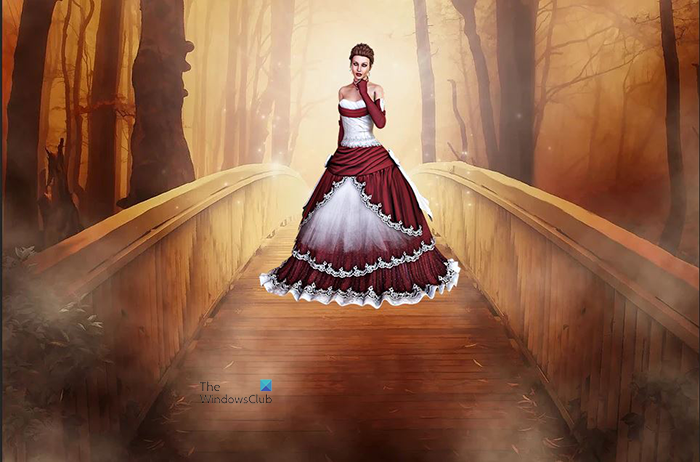
Know what the realistic perspective of the images would be in comparison to each other.
4] Create a new layer below the subject image
This is where you will create the layer for the shadow. The shadow layer would be below the subject image. The subject would be the image that is casting the shadow. Note that based on the things in the artwork, the objects in the artwork should have shadows that correspond with the light source.
To create the new layer below the subject layer, click the subject layer then hold Ctrl while you press the Create a new layer icon at the bottom of the layers panel. You will see a new layer appear under the subject layer, name this new layer Shadow.
Related: How to get Realistic Shadow for an Image in Photoshop
5] Use the Quick Selection tool to create a selection of subject
Now you want to get the shadow of the image onto the new Shadow layer. The shadow is a copy of the subject layer that has other effects applied to make it look like a shadow. To create the shadow, use the Quick Selection tool to select the subject.
Quick selection tool
The quick selection tool is located on the left tools panel. The Quick Selection tool is in a group with the Magic Wand tool.
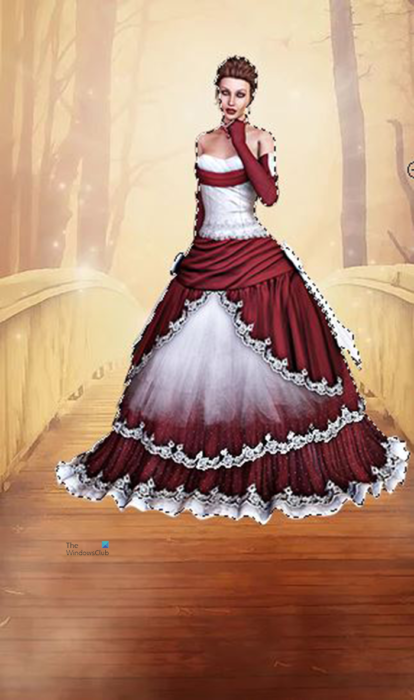
With the image selected and the Quick Selection tool active. Draw the mouse on the image to select its outline.
When you have outlined the image with the Quick selection tool, press Q to create a Quick mask.
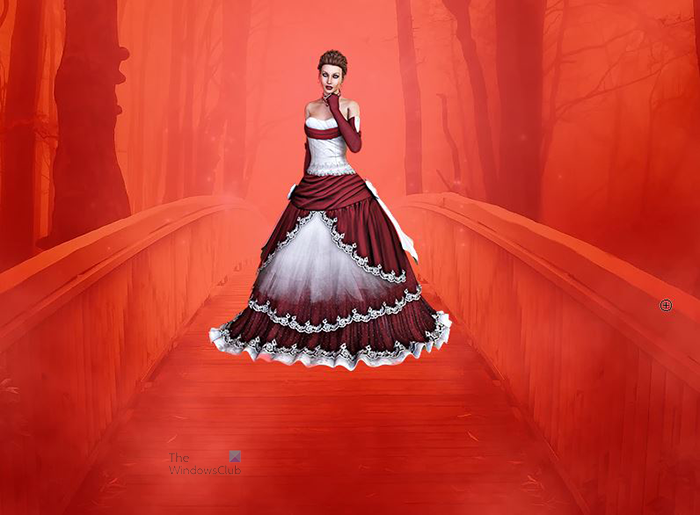
The Quick Mask will show you all the parts selected by the Quick Selection tool. The dull red parts represent the parts not selected and the vibrant color parts are the parts selected by the Quick Selection tool. Here you will see if any important pasts are missing. The Quick mask. Press Q again to turn off the Quick mask.
6] Make the selection black and place it on the new layer
The purpose of the selection that you made with the Quick Selection tool is to create a shadow based on the image. The shadow will be mostly dark so you need to make the selection black. To make the selection black click on the layer below the subject image. In this case, that layer was named shadow. You want to make sure that the Background/Foreground icon on the tools panel has the foreground as white and the background as black. You would then hold Ctrl then press Backspace.
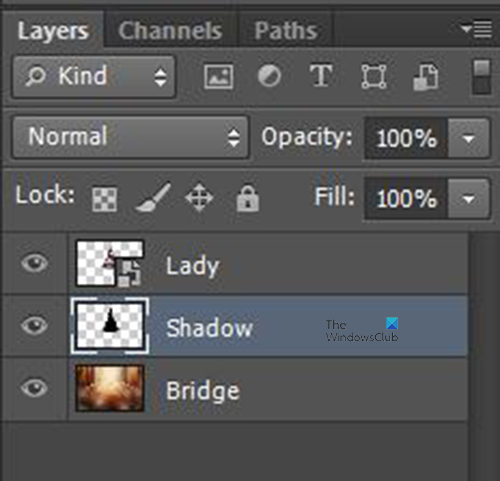
You will see the shadow appear on the shadow layer.
7] Turn off the selection
You will now turn off the selection that is around the image. you turn off the selection by pressing Ctrl + D. You can also turn off the selection by making any of the selection tools active the right-clicking on the image and from the menu choosing Deselect.
8] Rotate the shadow
When you look at the image you will not see the shadow, however, you see it on the layers panel. You will need to rotate the shadow so that it is at the bottom of the subject, turned in the opposite direction. There are a few ways that you can rotate the shadow.
Rotate using the Flip option
You can rotate the image by using the Flip option.
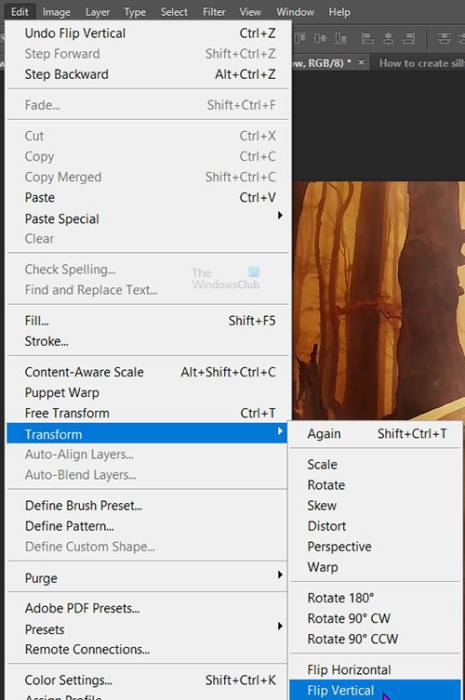
To use the flip option select the shadow layer and go to the top menu bar and press Edit then Transform then Flip Vertical.
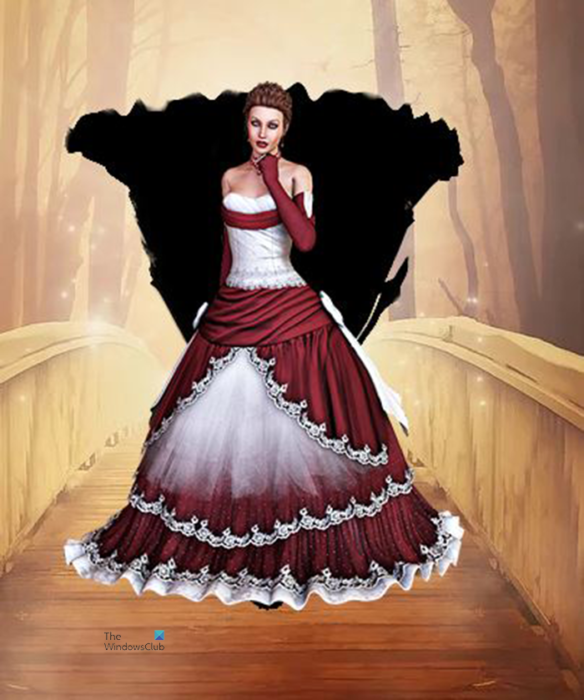
You will see the shadow flipped vertically; however, it will be behind the subject image. You should click it and drag it into the position below the subject image.
Rotate using the transform then drag option
You can flip the shadow by using the transform then drag option. To use this option click on the shadow layer then press Ctrl + T.
This will bring up the transform box around the image. Position the cursor above the top middle handle of the image until you see a vertical two-point arrow. When this arrow appears, click hold and drag the shadow down to the bottom of the image. The shadow will flip with the feet section directly below the feet section of the image.
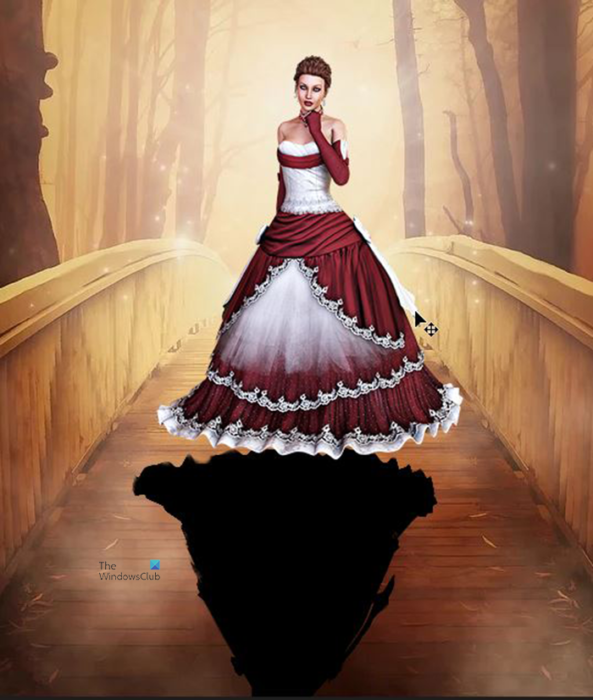
This is the shadow below the subject image. You will notice that the shadow is not fitted perfectly with the image. This will be fixed further down in the article.
9] Change the shadow’s color, color mode, and opacity
An important part of making the shadow realistic is the color. When shadows are analyzed, they are not completely black. Depending on where they are they can have a mixture of dark blue, a little brown, etc. These may not be detectable by the eyes separately, however, they add to the realistic look of the shadow when mixed.
Change the color
To get a realistic shadow color you can sample a shadow that is already in the image. To sample the color, select the shadow layer then select the Eyedropper tool in the left tools panel. Click on a shadow area in the image or another shadow that you want to sample. You will see the color in the foreground icon of the Foreground/Background swatch change on the left tools panel. You will realize that the color may not be fully black. When you have gotten a satisfactory color, press Shift + Alt + Backspace. You will see the color of the shadow change to whatever is the foreground color. If you wanted to fill with the background color, you would click Shift + Ctrl + Backspace.
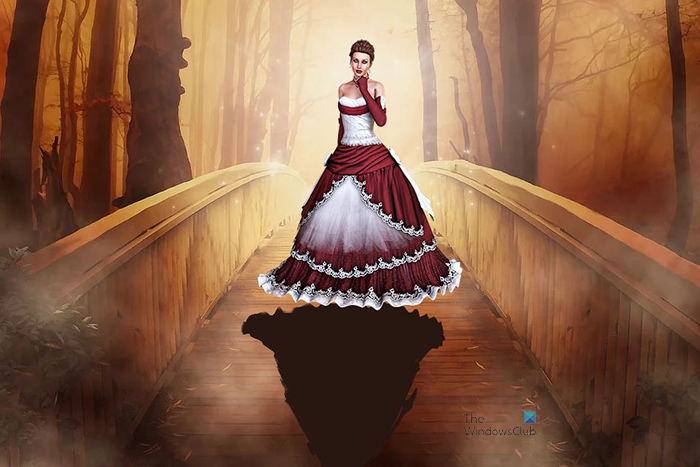
This is the shadow with the color changed. You will notice that the shadow is not as black as before.
Change the mode
To change the color mode of the shadow, click on the shadow layer and go to the top of the layers panel where you see normal.
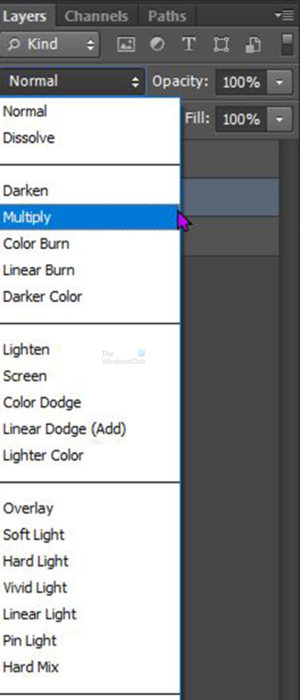
Click the word Normal to reveal the list of color modes. From the list press Multiply.
Lower the opacity
Across from the Color mode at the top of the Layers panel, you will see Opacity. Click the arrow on the side of the Opacity value box to reveal a slider or click directly inside the value box and change the value. Put the value to about 70% opacity, or choose a value that you feel comfortable with.
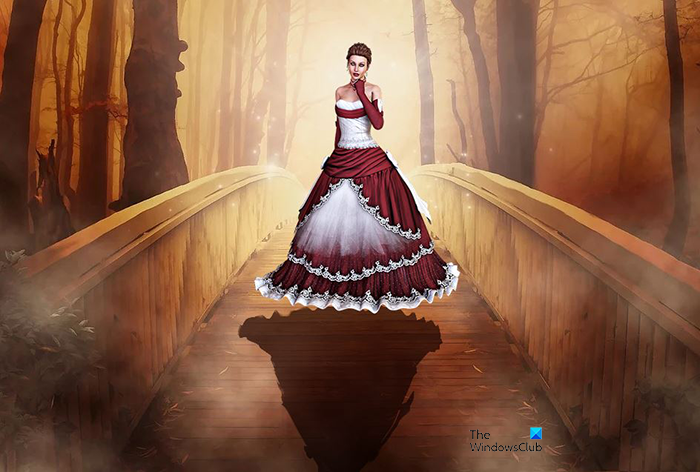
This is the image with the shadow color changed, the color mode changed to multiply and the Opacity changed to 70%.
10] Match shadow and subject’s perspective
This step is very important, you will need to fix the shadow so that it looks like a real shadow. You need to change the perspective of the shadow to the subject. You can do this using Free transform or Puppet warp. Note that the shadow would always touch the bottom of the subject if the person is on the ground. If you want the subject to look like it is in the air then you can leave a space between the shadow and the subject.
Free transform
The free transform allows you to use your hand and judgment to transform the image the way you want. Before using the Free transform, ensure that the image and the shadow are both aligned properly.
When you are ready to Free transform, select the shadow layer then go to the top layer and press Edit the Free transform or press Ctrl + T.
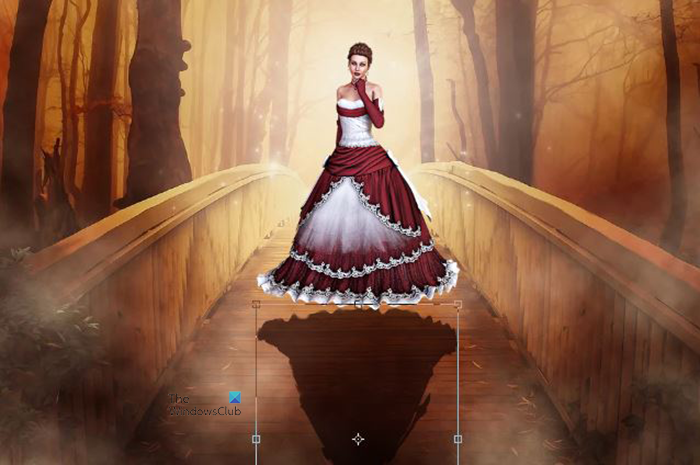
You will see the transform box appear around the image. these are what you will use to transform the image. The little squares are the handles and you use them to move any of the sides. If you want to move just a point and not the whole side hold Ctrl while you drag any of the handles. In this case, you want to transform the sections close to the lower part of the subject.
Note that if the shadow needs to be at an angle based on the lighting, you will need to slant the image in that direction.
Puppet warp
The Puppet warp is another way to transform the shadow to fit the perspective of the subject.
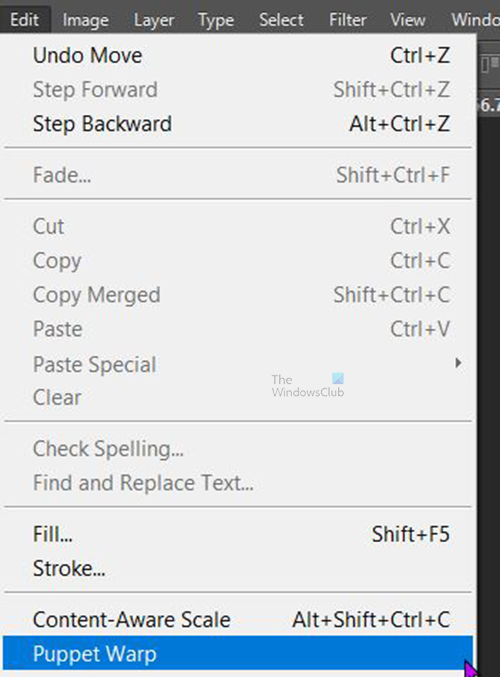
To use the Puppet warp select the shadow layer then go to the top menu bar then press Edit then Puppet warp.
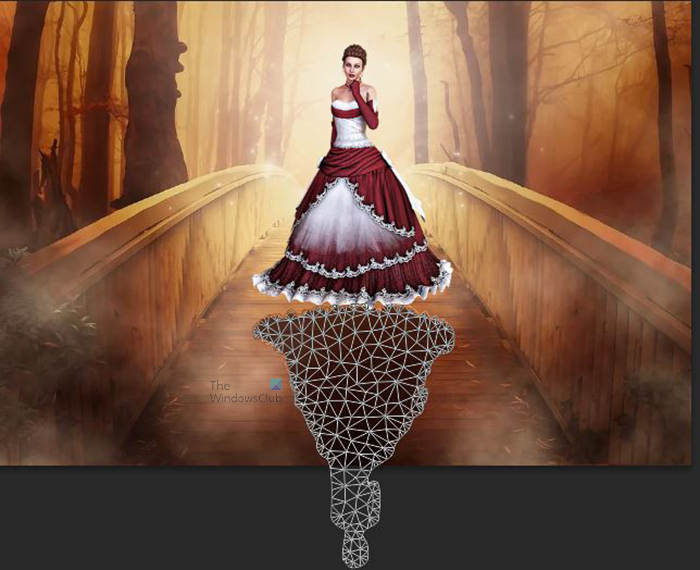
You will see some mesh appear in the shadow, these will help you to easily warp the image.
![]()
If you want to turn off the mesh then unselect the show mesh option.
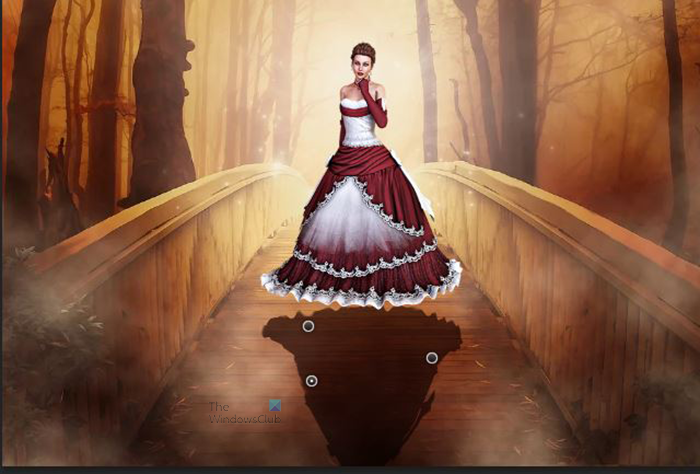
Using puppet warp is quite easy, any part that you want to remain unchanged you add pins, and these pins will keep those parts from moving. The rest of the image will rotate around the anchored parts.

To remove one or all pins or to select all pins right click on the image, bring up the menu then select the option that you want.
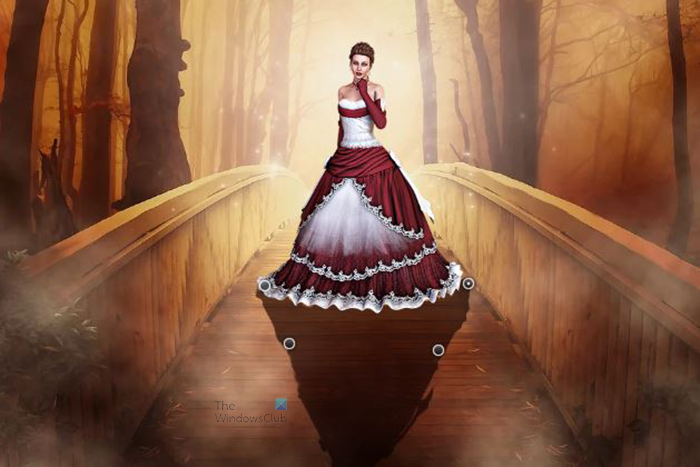
When you have anchored the parts that you want to remain in place, click and drag the parts that you want to move.
When you are satisfied with the results, click the Tick on the Puppet warp menu to accept the warp.
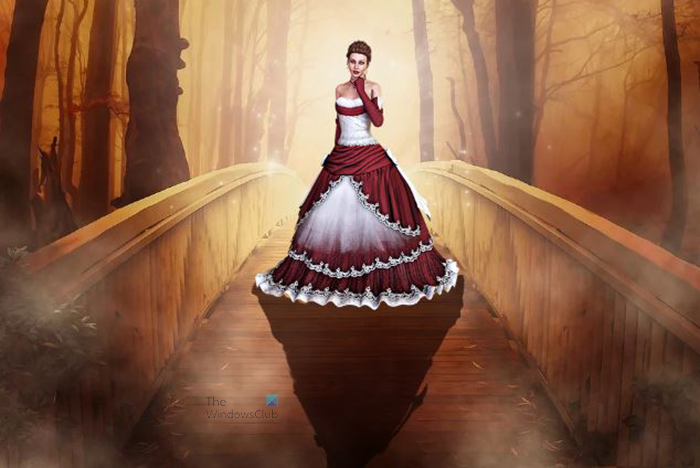
You may have to move the image and also use the Free Transform to make the shadow fit the subject.
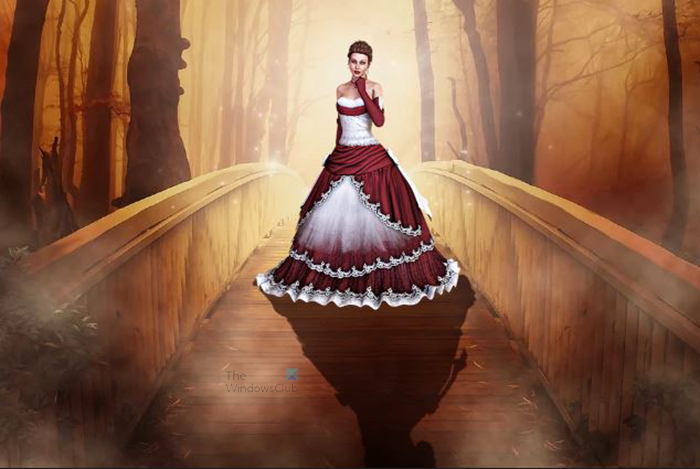
This is the image with the shadow changed to fit the perspective.
11] Convert the shadow to a Smart object
Before applying the blur to the shadow, it is good to convert the shadow to a Smart object. This is optional yet important. When a shadow is a smart object, it will be easy to edit the blur after you have clicked Ok to accept the changes. If the Shadow is not a smart object the blur will be applied destructively and will not be editable if you close the document.
To make the shadow a Smart object, right-click on the shadow’s layer then click Convert to smart object. When you apply the blur or filters, you will see them under the shadow layer. To edit them, click on the name and the window will open allowing you to edit.
12] Blue the shadow
This step is where you will blur the shadow to make it more shadowy. Shadows are not plain, they have blurred and are more like gradients. In this step, you will learn how to blur the shadow.
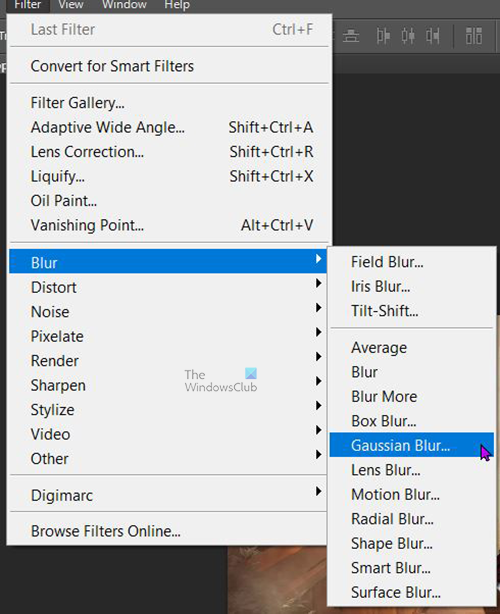
To blur the shadow go to the top menu bar then press Filter then Blur then Gaussian blur.
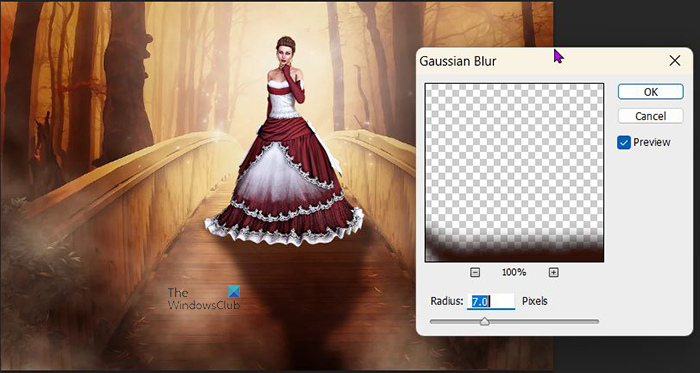
The Gaussian blur menu will appear, adjust the slider to a satisfactory blur value. Keep the preview on so that you can see live changes as you make them. When you have the blur value that you want press Ok to keep the changes and close the window.
13] Add a Layer mask to the shadow layer
You will add a Layer mask to the shadow layer before applying the gradient. If you do not add the Layer mask, you may have problems when applying the gradient to the shadow. To add the Layer mask to the shadow, click on the shadow layer then go to the bottom of the layers panel and click the Add vector mask icon. You will see an icon appear beside the icon of the shadow layer.
14] Apply a gradient to the shadow
Now it is time to add the gradient to the shadow to make it look even more realistic. To add the gradient to the shadow, select the shadow layer then go to the left tools panel and click the Gradient tool or press G.

The Gradient options bar will appear at the top, click the Gradient that is there to bring up the gradient picker. Click the Black to white gradient swatch and uncheck Reverse if it is checked.
With the Gradient tool active click at the bottom of the canvas (shadows head) then hold Shift and drag towards the top of the canvas (feet of the shadow).
If you are having trouble applying the gradient properly to the shadow, you may need to unlink the Layer mask from the shadow. To unlink the layer mask from the shadow layer, click the chain between the shadow layer icon and the layer mask icon. When they are unlinked, you can then drag the gradient tool to apply the gradient. You should notice a difference in how the gradient is applied to the shadow. When you are satisfied with the results, click between both icons to relink them.
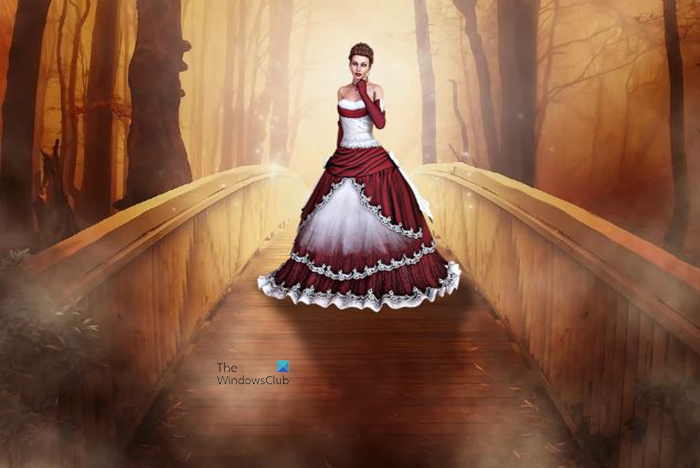
This is the final image with the shadow applied. Your image may look different based on the image used. You can keep experimenting until you get the look you desire.
15] Save
After all that hard work, you want to save the image for whatever uses you have for it. Before saving it as any other file format, you want to save it as a Photoshop PSD file so that you can edit it later. After saving it as a Photoshop PSD file, you will want to save it as a file format that is good for printing and sharing. The JPEG file format will compress the file so that it is easy to share and use digitally. The PNG file format will retain the high quality of the image. It will even keep from showing a background if you had disabled the background in Photoshop.
Go to the top menu bar and click File then Save as. In the Save window, give the file a name choose the file format that you want and save the location. You then click Save to commit the options.
Adding shadows to your artwork will make it look more realistic. Shadows will add interest and can make the image look more believable especially if there is a visible light source.
Read: How to use Layer Blending Modes in Photoshop
How to give texts a shadow in Photoshop?
A shadow can be added to a text, whether a letter or a whole word. To add shadow to text in Photoshop, right-click the text layer then choose Blending options. You will see the Layer style options window. Click the Drop shadow option. You can then choose other options that you want for the shadow. When you are finished choosing the options for the shadow, press Ok.
How do you add an inner shadow in Photoshop?
An inner shadow is an effect that adds a shadow inside the border of a text or image. The inner shadow makes it look like there is depth to the image. To create the inner shadow effect in Photoshop, select the image or the text then right-click on the layer. When the menu appears click Bending options. Layer style options box will appear, click Inner shadow. You can make changes to the inner shadow. When you have made the changes that you want. Click Ok.
Leave a Reply