In this post, we will show you how to make Sticky Notes open on Startup in Windows 11. Sticky Notes allow you to create quick notes and pin them to your desktop. However, sometimes, the app won’t launch on startup and your notes seem to disappear. This happens if you close the app when you shut down or restart your PC.
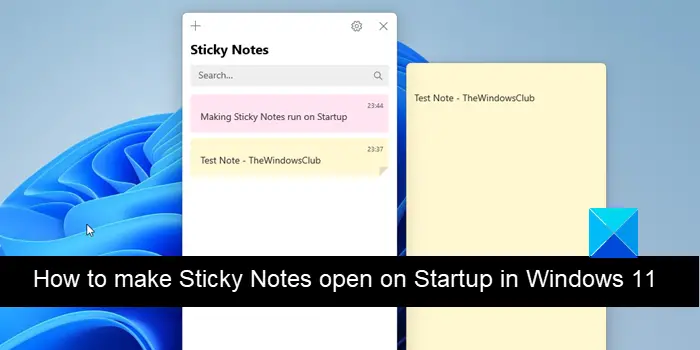
If you use Sticky Notes regularly, you might want to have your notes open on your desktop screen whenever you log in to Windows. In this post, we will show how to launch Sticky Notes on Startup on a Windows 11 PC.
How to make Sticky Notes open on Startup in Windows 11/10
One way to make Sticky Notes open on Startup in Windows 11 is to leave the app open when you shut down or restart your PC. When you do this, Windows remember that the app was open and your notes appear on the screen when you log in to your account. If you have a habit of closing all the apps before shutting down your PC, use the following methods to make Sticky Notes open on Startup in Windows 11:
- Add Sticky Notes to the Startup folder.
- Schedule Sticky Notes to launch on Startup.
- Edit Windows Registry.
Let us see this in detail.
1] Add Sticky Notes to the Startup folder
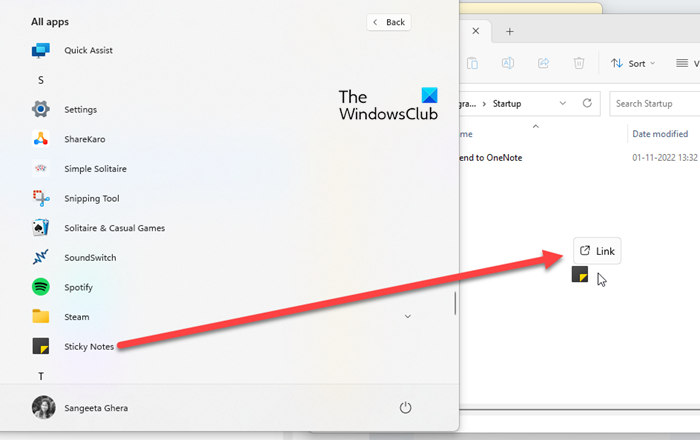
The Startup folder contains shortcuts to the applications that should launch automatically when a user turns on the PC. So you can add the Sticky Notes app to the Startup folder in Windows 11 to make it run automatically when Windows loads. Here’s how:
Press Win+R and type shell:startup in the Run dialogue box. Alternatively, you may open the File Explorer and type shell:startup in the address bar of the File Explorer window.
Press the Enter key. The Startup folder will open up. Take your cursor to the center of the tabs bar. Click and drag the folder to the right side of your desktop screen.
Click on the Start button icon and then click on the All apps button in the top-right corner. Scroll down to locate the Sticky Notes app. Click on the app and drag it to the Startup folder. You will see a ‘Link’ label above the app’s icon, which indicates that the shortcut will create a link to the app.
Note: Make sure to manually locate the app. If you use Windows Search to find the app, the drag feature won’t work.
Close the Startup folder once the app’s shortcut is created. Now your notes will appear pinned to the desktop when you sign into your account after starting your PC.
2] Schedule Sticky Notes to launch on Startup
The Task Scheduler app lets you automate tasks in Windows. It allows you to run a program or a script at the times you specify. Follow these steps to make Sticky Notes run at Startup using Task Scheduler in Windows 11:
Type ‘task scheduler’ in the Windows Search bar. Task Scheduler will appear on top of the search results. Click on it to open the app.
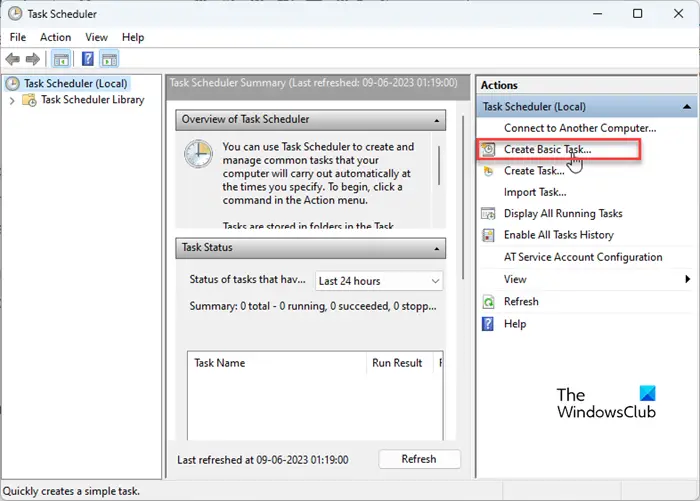
Click on Create Basic Task in the panel on the right side of the app’s window. Create Basic Task Wizard will open up.
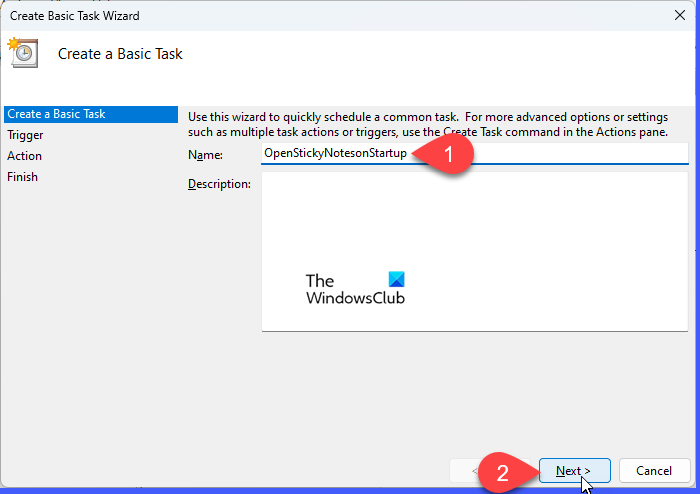
Give a suitable name to the task and click on the Next button.
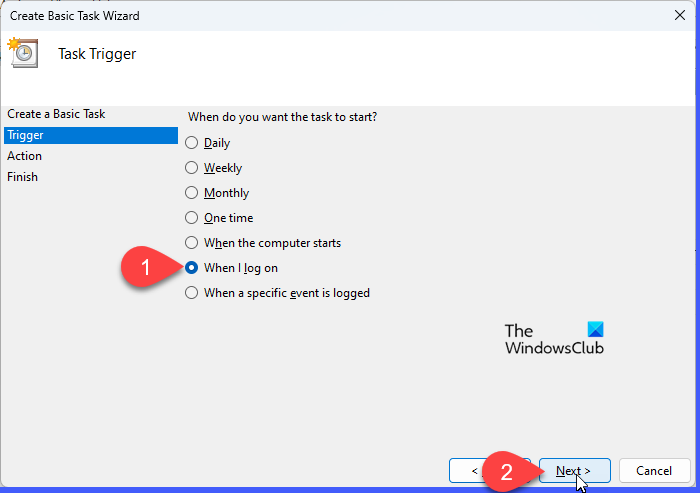
On the next screen, select When I log on under Task Trigger. Proceed further by clicking on the Next button.
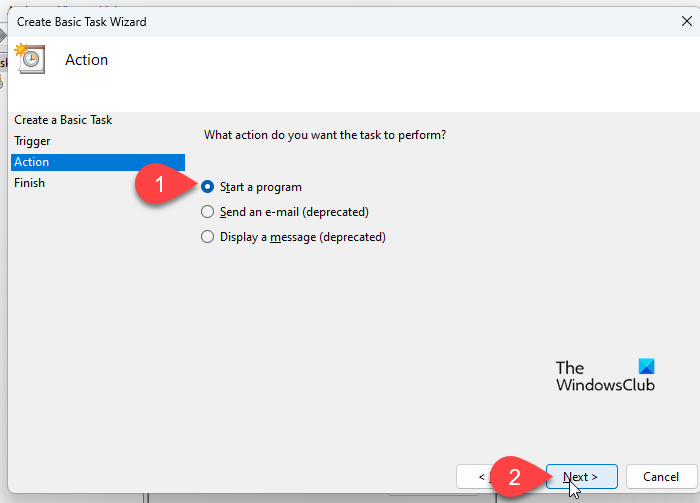
Select Start a program under Action.
On the next screen, copy-paste the following text in the Program/script field:
shell:appsFolder\Microsoft.MicrosoftStickyNotes_8wekyb3d8bbwe!App
Note: There have been many improvements in the Sticky Notes app in recent versions of Windows. It is now distributed as a Microsoft Store app, rather than the classic desktop app. So you won’t be able to locate the Sticky Notes EXE file on your system. However, you can use the shell:AppsFolder command to view all installed applications on your Windows 11/10 PC. The above command opens the Applications folder in the Windows File Explorer.
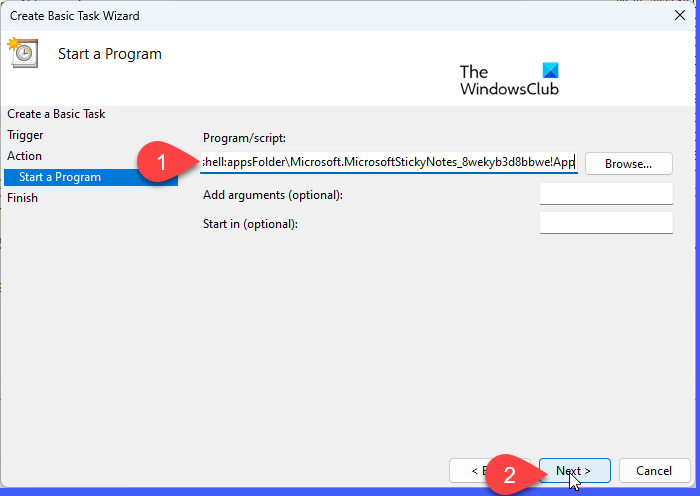
Next, click on the Next button in the Task Scheduler window.
Click on the Finish button to finish the task. Close the Task Scheduler app. Sticky Notes should now launch automatically when you start the PC and sign in to Windows.
3] Edit Windows Registry
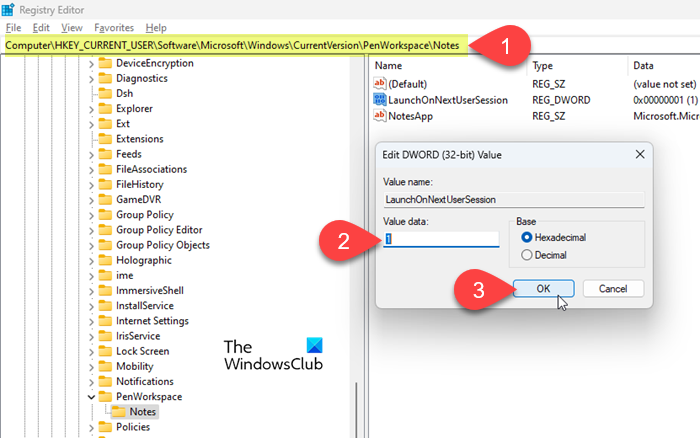
You can also make Sticky Notes open on Startup in Windows 11 by modifying Windows Registry. Here’s how:
Note: Create a system restore point before you make any changes to the registry.
Press the Win+R keys and type ‘regedit’ in the Run dialogue box. Press the Enter key. Click Yes in the User Account Control prompt.
Registry Editor will open up. Navigate to the following path:
Computer\HKEY_CURRENT_USER\Software\Microsoft\Windows\CurrentVersion\PenWorkspace\Notes
Double-click on the LaunchOnNextUserSession DWORD in the right panel. Change the Value data from 0 to 1 and click OK to save changes.
If the Value data was already set as 1, change it to 0, restart the PC, then again change it back to 1.
Exit the Registry Editor and reboot your PC. All your notes should now appear on your desktop screen.
I hope you find this useful.
Also Read: How to open Microsoft Store apps on startup in Windows.
How do I keep Sticky Notes on top of Windows 11?
Install Microsoft PowerToys on your system. Open the app and click on the Always On Top option in the left panel. Switch on the toggle for Enable Always On Top. Under the Activation section, look for the activation shortcut (Win+Ctrl+T). This is the shortcut you will be using to keep your notes on top of all open apps in Windows 11. Switch off the toggle for Show a border around the pinned window. Close PowerToys. Launch Sticky Notes. Press Win+Ctrl+T. You will hear a beep sound confirming that always-on-top for Sticky Notes has been activated. Use the same activation shortcut to reverse the changes.
Why is Sticky Notes not opening in Windows 11?
If the Sticky Notes app is not opening on your Windows PC, then the version of Sticky Notes you are using might have gone corrupted or it might be outdated. It may also fail to launch if you don’t have sufficient permissions to run the app. Updating Windows, updating the Sticky Notes app, and running the Windows Store Apps troubleshooter are some of the fixes to resolve the issue.
Read Next: Where are Sticky Notes saved in Windows?
Leave a Reply