In a Microsoft 365 group, at least one admin account can manage and bring necessary changes. However, if the owner’s account is deleted in Microsoft 365, the team in Microsoft Teams or a Microsoft 365 group and its related services can become ownerless. While nothing can be done if the group’s owner has been removed, a primitive measure can be taken. This post will share what you can do to manage ownerless Microsoft 365 Groups and Teams.

How to manage Ownerless Microsoft 365 Groups and Teams
The Global Administrator, Exchange Administrator, or Groups Administrator can create a policy that automatically asks the most active members of an ownerless group or team if they’ll accept ownership. If the member accepts the invitation, he becomes the owner.
What can be specified for the policy
- If you want to limit who can be invited to be an owner by specifying a security group
- The sender address of the notifications
- The number of weeks that the notifications will be sent
- Which groups or teams are part of the policy
- Guests are never invited to be owners.
- Notifications are sent weekly, starting within 24 hours of policy creation. Recipients can’t forward the notifications to others.
- Notifications and responses are tracked in the audit log.
- The action is logged in the compliance portal audit log.
- Up to two group members per group can accept the invitation to become an owner.
Steps to Create a Policy
- In the admin center, go to Show all > Settings > Org settings, and on the Services tab, select Microsoft 365 Groups.
- Select the When there’s no owner, email and ask active group members to become an owner check box.
- Suppose you want to keep the default configuration settings; select Save. Otherwise, select Configure policy and complete the following steps.
- On the Weekly notification options page, specify who can receive ownership notifications. If you allow or block certain members, search for and add the security group you want to use.
- Type the number of active members you want to notify and select the number of weeks to send the notification. (The notification list is created during the first notification and does not change.) Select Next.
- On the Who is this email coming from page, select a sender for the email, and then select Next. Note that shared mailboxes are not supported. The sender must be either a user mailbox or a group mailbox.
- On the Subject and message page, customize the email and optionally include a policy guideline URL, and then select Next.
- On the Select which groups to target page, select Specific groups and choose the groups and teams that you want to include in this policy, or select All groups.
- Select Next.
- On the Review and finish page, confirm your settings and click Finish, and then select Done.
What happens if group members decline the ownership in a notification?

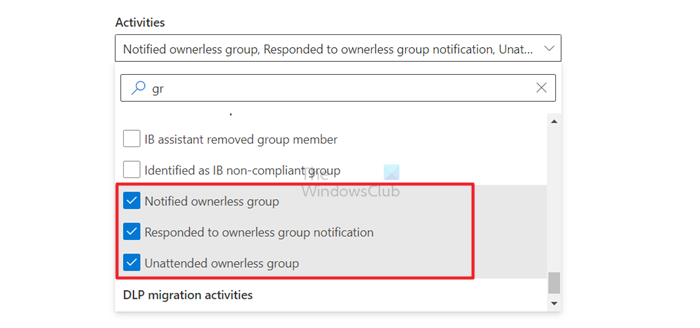
If all the members decline to accept the ownership, even after multiple reminders, in the Microsoft Purview compliance portal, admins can see which ownerless group is unattended in the audit log by selecting the Unattended ownerless group activity. Post this, Admins will have to contact the groups directly and convince someone to take ownership. Once they find some, they can make the person a Group or Teams admin.
Read: Microsoft 365 System Requirements.
The policy for the ownerless group is configured, but no member receives the notification.
This policy has a step where the admin needs t configure—Who is this email coming from. It needs to be ensured that the Sender uses a user mailbox or a group mailbox. The notification is not sent if you configure any sender other than a user or group mailbox. To confirm further, the admin can check the audit log to trace whether group email notifications were sent.
Leave a Reply