Windows Defender Firewall comes pre-installed on all Windows computers. You can create rules in Windows Firewall for different purposes, like blocking a particular application from accessing the internet. This article shows how to manage Windows Firewall Rues with PowerShell.
How to manage Windows Firewall Rules with PowerShell
You can easily configure Windows Firewall Rules via the Windows Defender Firewall and Advanced Security UI. You can launch it via the Control Panel. Now, you can also manage Windows Firewall Rules with PowerShell. In this article, we will show you how to do that.
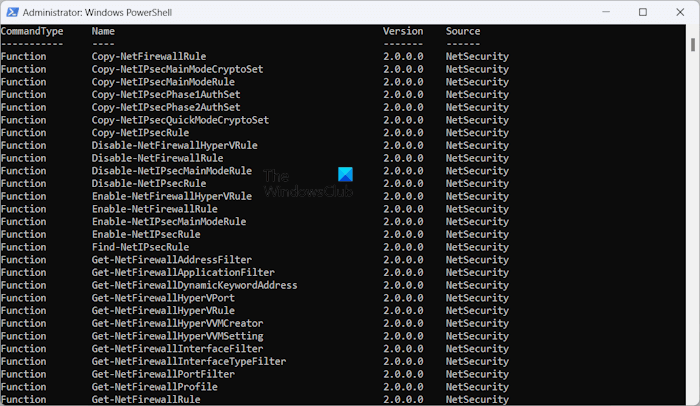
To manage rules in Windows Firewall through PowerShell, you have to use the NetFirewallRule cmdlet which is a part of the NetSecurity module. You can view all the NetSecurity cmdlets by executing the following command in Windows PowerShell:
Get-Command -Module NetSecurity
Windows PowerShell has the following three types of profiles:
- Domain Profile
- Private Profile
- Public Profile
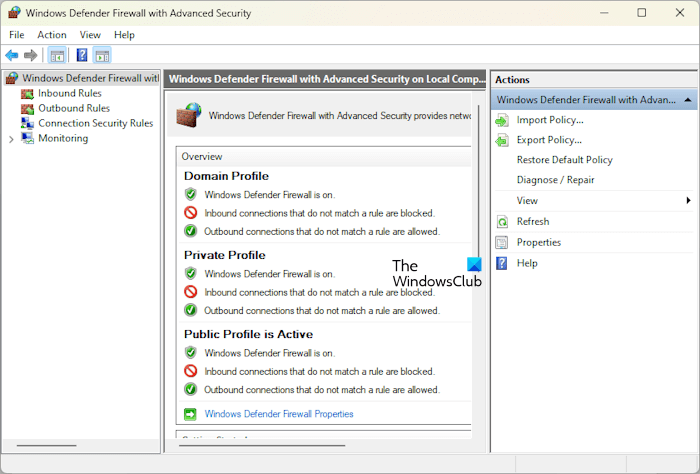
By default, Windows Firewall remains ON for all these three profiles. You can view this by opening the Windows Defender Firewall with Advanced Security UI via the Control Panel or by using the following command in the Run command box:
wf.msc
Do note that you have to launch Windows PowerShell as an administrator, otherwise, the commands will not execute and you will receive an error in PowerShell.
If you want to view the settings of a particular Windows Firewall Profile, use the following command:
Get-NetFirewallProfile -Name <name of the profile>
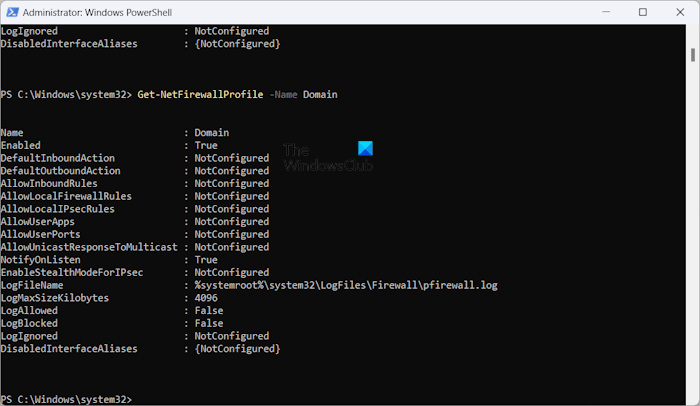
In the above command, enter the name of the profile correctly. For example, if you want to view the settings of the Domain profile in Windows Defender Firewall, the command will be:
Get-NetFirewallProfile -Name Domain
Enable or disable Windows Firewall by using PowerShell
Let’s see how to enable or disable Windows Firewall by using PowerShell. If you want to disable Windows Firewall for all the profiles, use the following command:
Set-NetFirewallProfile -All -Enabled False
If you want to enable or disable Windows Firewall for a specific profile, you have to replace All in the above command with that profile name.
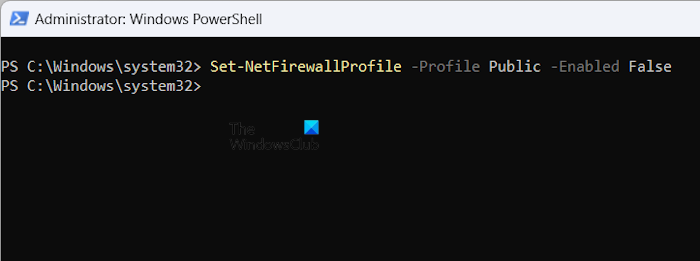
For example, if you want to disable the Window Firewall for Public Profile, the command will be:
Set-NetFirewallProfile -Profile Public -Enabled False
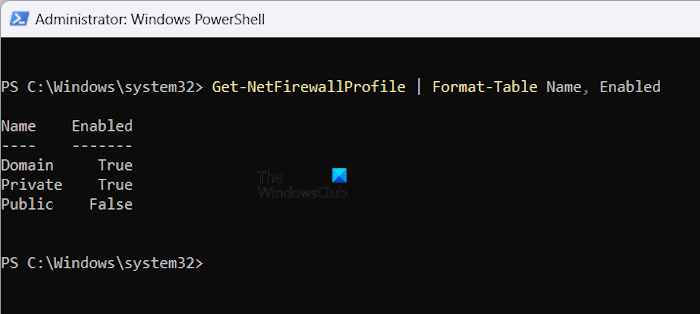
You can check the status of the Windows Firewall Profiles by using the following command:
Get-NetFirewallProfile | Format-Table Name, Enabled
As you can see in the above screenshot, PowerShell is showing the status of Windows Firewall Public Profile as False which means that the Windows Firewall is disabled for that profile.
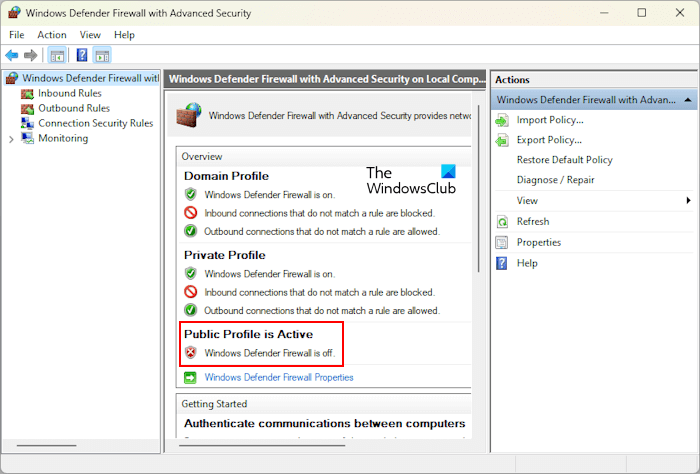
You can also check the same in Windows Defender Firewall with Advanced Security UI. If you want to enable the disabled profile, you have to use True in place of False. For example, here we have disabled the Public Profile in Windows Firewall. Now, to re-enable it, the command is:
Set-NetFirewallProfile -Profile Public -Enabled True
If you have disabled all the Windows Defender profiles and you want to enable all of them again, use the following command:
Set-NetFirewallProfile -All -Enabled True
Read: Best Free Firewall software for Windows.
Create and manage Windows Firewall Rules with PowerShell
Now, let us see how to create and manage Windows Firewall Rules with PowerShell. If you use a third-party antivirus and your Firewall is managed by that antivirus, the PowerShell commands will not work. You will be able to create rules successfully, but these rules will not work if your Firewall is being managed by a third-party antivirus.
If you want to create a new Windows Firewall Rule, you have to use the following cmdlet:
New-NetFirewallRule
Let’s say you want to block a program from accessing the internet on your WiFi profile; use the following command:
New-NetFirewallRule -Program “program path” -Action Block -Profile <profile name> -DisplayName “write display name here” -Description “write description here” -Direction Outbound
The above command will create an outbound rule for the required program in Windows Defender Firewall. In the above command, replace the program path with the correct path of the program and the profile name with the correct Windows Firewall profile. The Display Name is the name of the Firewall rule and the Description is optional.
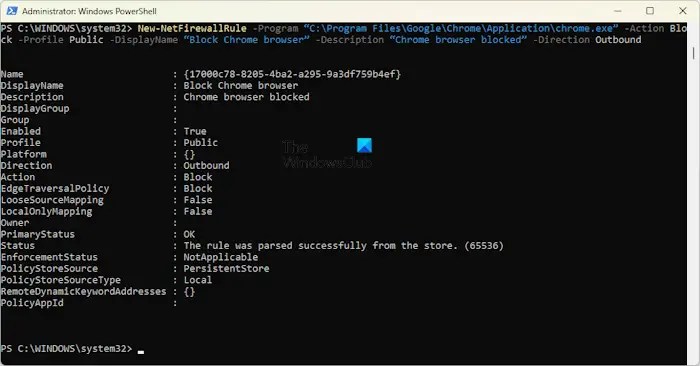
For example, if you want to block Chrome browser for the Private profile, the command will be:
New-NetFirewallRule -Program “C:\Program Files\Google\Chrome\Application\chrome.exe” -Action Block -Profile Public -DisplayName “Block Chrome browser” -Description “Chrome browser blocked” -Direction Outbound
If you do not want to add a description to your Firewall rule, you can remove the -Description “Chrome browser blocked” part from the above command. The above command will only work for the Public profile. Hence, if your network connection profile is not Public, this command will not work. You can view the profile of your WiFi connection in Windows Settings. The following steps will help you with that:
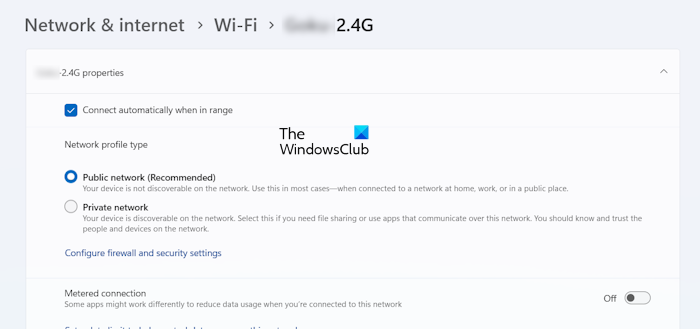
- Open Windows 11/10 Settings.
- Go to Network & internet > Wi-Fi.
- Select your internet connection.
- Expand your network connection Properties tab.
You will see the Network profile type there.
If you want to block a program, say Google Chrome for all Network profiles, type all the profile names separated with commas. Hence, the command will be:
New-NetFirewallRule -Program “C:\Program Files\Google\Chrome\Application\chrome.exe” -Action Block -Profile Domain, Private, Public -DisplayName “Block Chrome browser” -Description “Chrome browser blocked” -Direction Outbound
Do note that you must type the profile names in the exact order as written in the above command, i.e., Domain, Private, Public. Otherwise, you will get an error.
Similarly, you can create a rule in Windows Defender Firewall by using PowerShell to block a particular website. But for this, you should know the IP address of that particular website. You can get the IP address of a website by using the following command:
nslookup <website name>
If the website that you want to block shows more than one IP address, you have to write all these IP addresses. Separate all the IP addresses with commas.
The command used to create a rule for blocking a website in Windows Defender Firewall is:
New-NetFirewallRule -DisplayName "Block Website" -Description "Website Blocked" -Direction Outbound –LocalPort Any -Protocol Any -Action Block -RemoteAddress IP1, IP2
The above example shows how to separate the IP addresses of a particular website with commas.
Read: How to allow VPN through Firewall in Windows.
Enable, disable, and delete a Firewall Rule using Windows PowerShell
If you want to enable, disable, or delete a Firewall Rule, you have to use the following cmdlets in the PowerShell:
Enable-NetFirewallRule
Disable-NetFirewallRule
Remove-NetFirewallRule
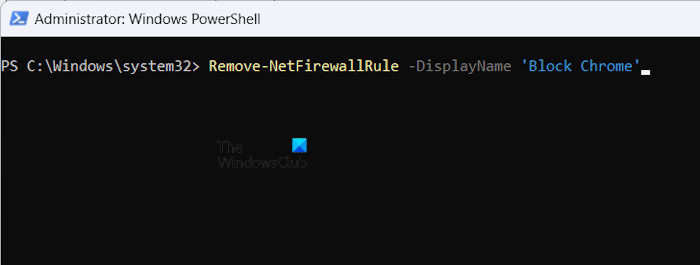
In each of the above cmdlets, you have to enter the correct name of the Firewall Rule. Let’s say you have created a Firewall Rule with the name Block Chrome and now you want to delete it, Then the command will be:
Remove-NetFirewallRule -DisplayName 'Block Chrome'
Read: Windows Firewall Service does not start in Windows.
How do I view Windows Firewall rules in PowerShell?
If you want to view the Outbound blocking rules created by you in Windows Firewall, you have to use the following command:
Get-NetFirewallRule -Action Block -Enabled True -Direction Outbound
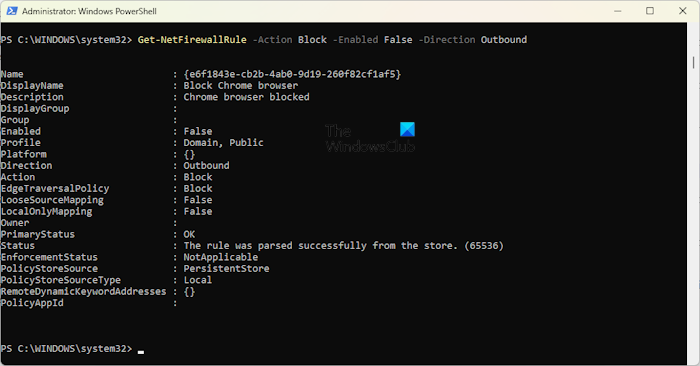
The above command will list only the active Firewall Rules. If you want to view the disabled Firewall Rules, replace True with False in the above command.
That’s it. I hope this helps.
Read: How to remove duplicate Windows Firewall rules
How do I set Firewall rules in PowerSell?
You can set Firewall Rules in PowerShell by using different NetFirewallRule cmdlets. For example, if you want to create a new Firewall Rule, you have to use the New-NetFirewallRule cmdlet.
Read next: How to Restore or Reset Windows Firewall settings to defaults.
Leave a Reply