Sometimes you might have to migrate your services from one Server to another because of security compliance, end-of-life, load increase, or more. In this post, we will discuss how you can migrate WDS and MDT to a new Windows Server.
How to migrate WDS and MDT to a new Windows Server?
You may be required to migrate WDS or MDT to a new server due to a change in security and compliance requirements by your organization. This could involve changes in deployment architecture, additional security measures, and migration of WDS roles to another server due to hardware changes. It’s important to include WDS migration in disaster recovery plans. Some firms may centralize their IT infrastructure for better management, efficiency, and security.
- Install Windows Deployment Services
- Get the source ready
- Download and install ADK and MDT
- Import and configure the Deployment Share Folder
- Initiate Deployment
- Update Deployment
- Create WDS Directory
To migrate WDS and MDT from Windows Server 2016/2019 to Windows Server 2022, you can follow the steps mentioned below.
Let us talk about them in detail.
1] Install Windows Deployment Services
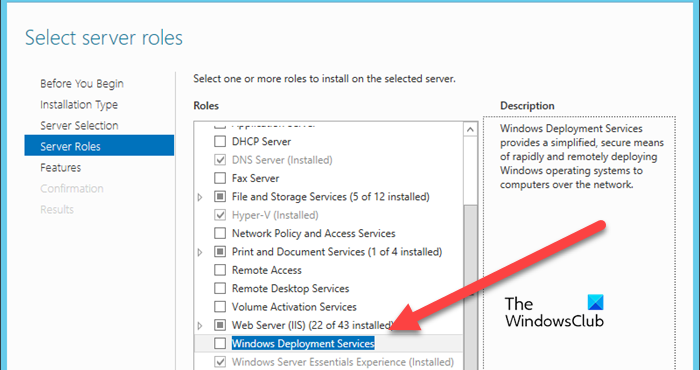
You need to ensure that WDS is installed on both machines since you are trying to migrate from an older machine, the service would most probably be running on it, so, let us install Windows Deployment Service on the target machine. To do so, follow the steps mentioned below.
- First of all, launch the Server Manager.
- Go to Manage > Add Roles and Features.
- Select the Role-based or feature-based installation option, and click the Next button.
- You need to select the server where WDS Roles will be installed, so click on Select a server from the server pole, and then hit the Next button.
- Now, when you reach the Server Roles tab, tick the Windows Deployment Services followed by clicking the Next button.
- Finally, follow the on-screen instructions to complete the installation process.
Finally, complete the installation process.
2] Get the source ready
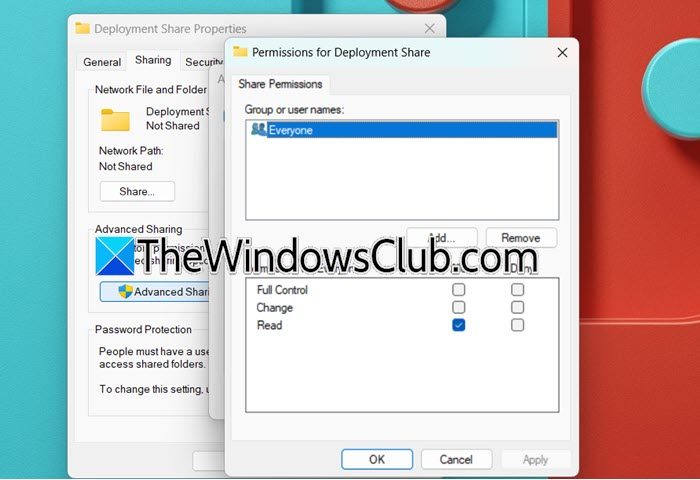
To get the deployment started, we first need to disable the Windows Deployment Service Server at the source. To do so, open the Services app on the source, look for Windows Deployment Service Server, right-click on it, and select Stop.
We also need to ensure that both the setups, the source, and the target, are congruent. In order to do that, go to the Deployment Share(s). You can go to Computer Management > System Tools > Shared Folder > Shares and check out the name of the Deployment Share folder as we will be recreating it.
Now, navigate to the folder, right-click on it, and select Properties. You will have to Sharing > Advanced Sharing > Permissions and take note of all the permissions. You have to take note of all the permissions as you need to set up the new folder in the same manner.
3] Download and install Windows ADK and MDT
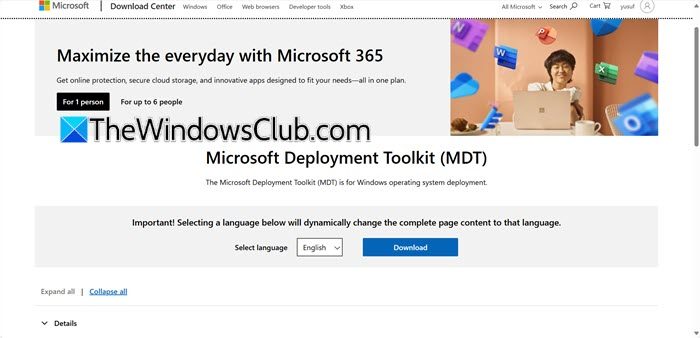
Next up, we need to install the Windows ADK and MDT on the target machine. You can go to learn.microsoft.com to install ADK (download ADK setup and ADK preinstallation environment setup) and microsoft.com to install Microsoft Deployment Toolkit.
4] Import and configure the Deployment Share Folder
Now, in the target server’s File Explorer, you need to go to the shared location, copy the Deployment folder, and paste it on the local drives of the target machine. Depending on the size of the folder, the time required will carry.
Once we are done, follow these steps.
- Go to the Deployment Share folder, change its name to that of the source, right-click, and then go to Properties.
- Go to Sharing > Advanced Sharing, tick the Share this folder icon, and change the Share name to that of the source.
- Click on Permissions, remove the pre-existing user, click on Add, in the “Enter the object name to select” field, type “administrator”, click on Check Names, click on Location, and select the server.
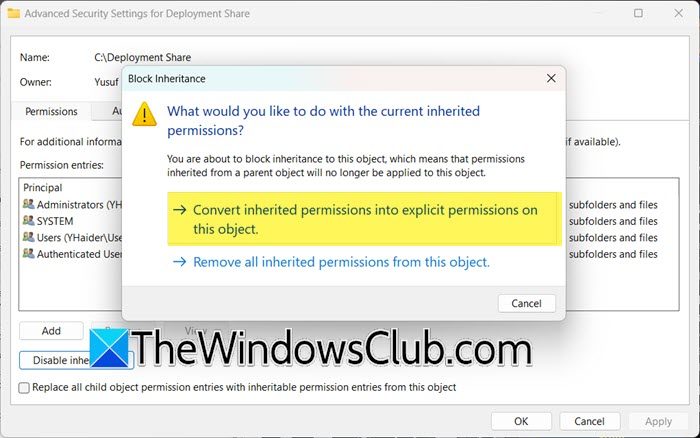
- Go to the Security tab, click on Advanced, click on Disable Inheritance, and click on Convert inherited permissions into explicit permissions on this object.
- Remove all the users that were not present in the source folder.
- And make sure that the user responsible for deployment has full control.
Now that we have configured the Deployment folder, let us start with deployment.
5] Initiate Deployment
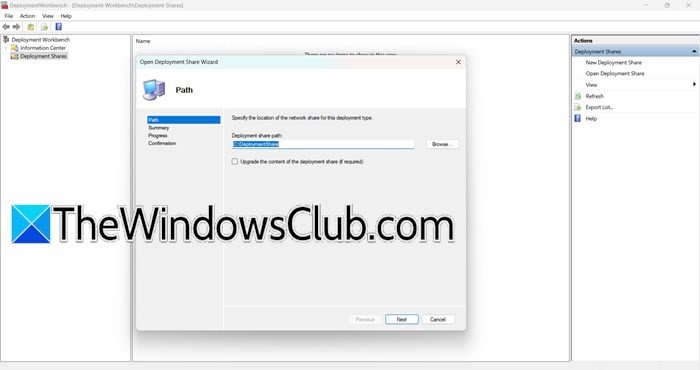
We have asked you to install the Microsoft Deployment Toolkit and Windows ADK(s). If you have done that, open the Microsoft Deployment Toolkit on the target machine and start the deployment. Follow the steps mentioned below to do the same.
- Open MDT.
- Right-click on Deployment Shares and click on Open Deployment Share.
- Just keep clicking on Next by keeping everything set to default and then complete the procedure.
Once done, you should check if everything is all right in there.
Even though the Deployment Share has been imported, since, we have copied it from an older server, so, right-click on the deployment share, click on Properties, and then correct the Network (UNC) Path. Then go to Rules > Edit Bootstrap .ini and change the DeployRoot field. Finally, click on Apply > Ok.
6] Update Deployment Share
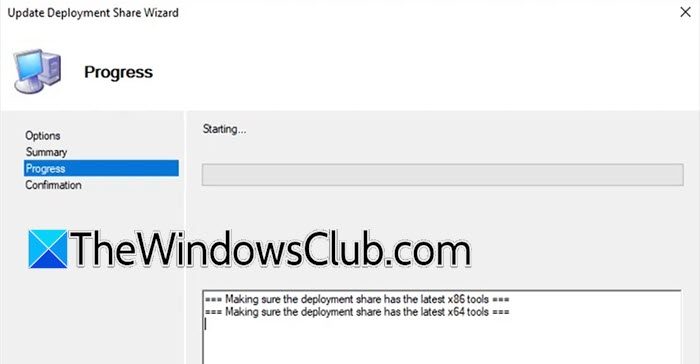
After creating a deployment share, our next job is to update it. Follow the steps mentioned below to do the same.
- Right-click on your Deployment Share and click on Update Deployment Share.
- Go with the default settings and keep clicking on Next.
- Click on Finish.
This should do the job for you, but we need to do one last step in order to make things perfect.
7] Create WDS Directory
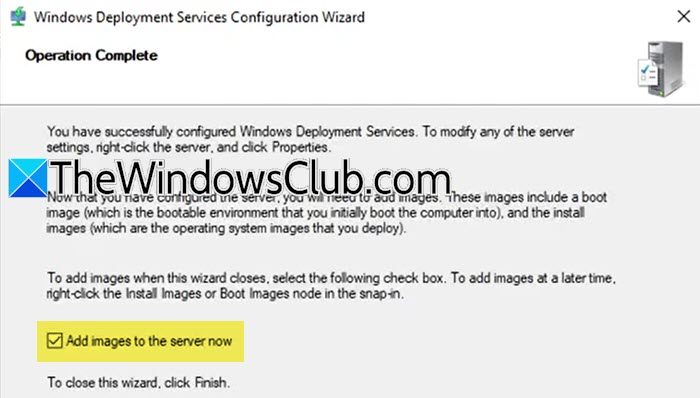
After configuring the deployment share, we will proceed with the creation of the WDS Directory. Follow the steps given below to do the same.
- Open the Windows Deployment Service utility.
- Expand Servers, right-click on your server, and click on Configure server.
- Keep clicking on Next until you reach “PXE Server initial settings”, select Respond to all client computers, and click on Next.
- On the last screen, tick the Add images to the server now, and click on Finish.
- This will open Add image wizard, click on Browse, go to the Deployment Share, and select the image from the Boot folder (assuming that the image is stored in there, you should check with your organization if you are not sure).
- Give that image a name and wait for the process to complete.
Once done, you can proceed with testing and installation of the image.
That’s it!
How to migrate a WDS server?
In order to migrate a WDS server, you need to install the WDS feature on your computer. You need to stop WDS Service on both servers, you need to copy open the \OldServer share and copy the files to the \NewServer share. Finally, restart WDS the service.
Read: How to install and configure File Server on Windows Server?
What is the difference between Windows MDT and WDS?
Both Windows Deployment Services (WDS) and Microsoft Deployment Toolkit (MDT) are tools for deploying Windows operating systems. WDS focuses on network-based deployment, while MDT provides tools for customization and automation. Using these tools together creates a comprehensive deployment solution.
Also Read: Windows deployment services encountered an error 0xc0000023.
Leave a Reply