Adobe is the creator of some well-known and well-used graphic, audio, and video software. These include but are not limited to Adobe Photoshop, Adobe Illustrator, Adobe aftereffect, Adobe Premier pro, and many more. With the wide userbase of Adobe software, people will inevitably want to migrate (move or copy), items across their Adobe software. Knowing how to migrate or transger Adobe presets, actions, and settings from one installation to another or from one computer to another will save time.

How to move Adobe Presets, Actions, and Settings to another computer
Most users will customize at least one thing on their Adobe software. You might think that you don’t, but any changes you make to the workspace, tools, preferences, or settings are customization. It means that you have moved from the presets to having customized to suit your needs. Customizations may have been made over the years and things are comfortable and optimized to make your work quickly and efficiently. All customizations are made to make your software fit how you work most comfortably. When things are set in a way that is easy and convenient, you will automatically work faster. For this reason, it is an advantage when you know how to migrate Adobe presets, settings, and actions to a new installation on the same computer or to a new computer. This article will show you how to migrate Adobe presets, actions, and settings.
- How to migrate Presets
- How to migrate Actions
- How to Migrate Settings
1] How to migrate Adobe Presets
Presets are collections of items and values that are applied to artwork in Photoshop. You can save and load presets or replace them with custom values at any time. Actions, brushes, and keyboard shortcuts are examples of presets. Photoshop comes with presets, but you can also create your own.
You can migrate your custom collection of presets. And also, some Photoshop presets, from one version of Photoshop to another on the same computer. Here is a list of some of the presets that you can migrate:
- Actions
- Brushes
- Black and White (Adjustment)
- Channel Mixer (Adjustment)
- Color Range
- Color Swatches
- Contours
- Curves (Adjustment)
- Custom Shapes
- Doutone (Mono, Duo, Tri, Quad)
- Exposure (Adjustment)
- Gradients
- HDR Toning (Adjustment)
- Hue and Saturation (Adjustment)
- Keyboard Shortcuts
- Levels (Adjustment)
- Lighting Effects
- Lights (3D)
- Materials (3D)
- Menu Customization
- Patterns
- Render Settings (3D)
- Repousse (3D)
- Selective Color (Adjustment)
- Styles
- Tools
- Volumes (3D)
Migrating Presets while updating Photoshop
By default, when you update Photoshop using the Creative Cloud desktop app, your presets, settings, and preferences are migrated from the earlier version of Photoshop. When you launch Photoshop for the first time, you are asked if you want to migrate the available presets from the most recent version of Photoshop installed.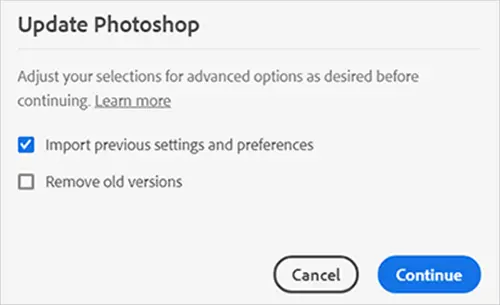
You can choose to continue without migrating the presets, settings, and actions by deselecting Advanced Option – Import previous settings and preferences on the confirmation screen that appears when you click Update in the Creative Cloud desktop app.
Migrating Presets after installing/updating Photoshop
You can choose not to migrate the presets when you updated Photoshop, or if you were facing issues while trying to migrate presets. At a later time, you can migrate the Presets, Settings, and Preferences by going to the top menu bar and selecting Edit then Presets then Migrate Presets. Photoshop will look for an older version of Photoshop on the same computer and prompt you to migrate presets.

To migrate the presets go to the top menu bar then press Edit then Presets then Migrate Presets.
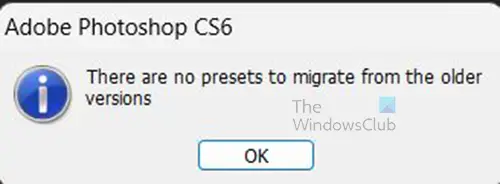
If there are no presets to migrate, the message will pop up to tell you that there are no presets to migrate from the older version.
Export and import presets
You can take presets from one computer and put them on another, or to an offline computer, by saving to a removable media and then importing them to it. The Export/Import Presets are not only to computers running Photoshop as part of the Creative Cloud.
On the computer that has the presets that you want you would do the following:
Open Photoshop
Go to the top menu bar and click Edit then Presets then Export/Import Presets
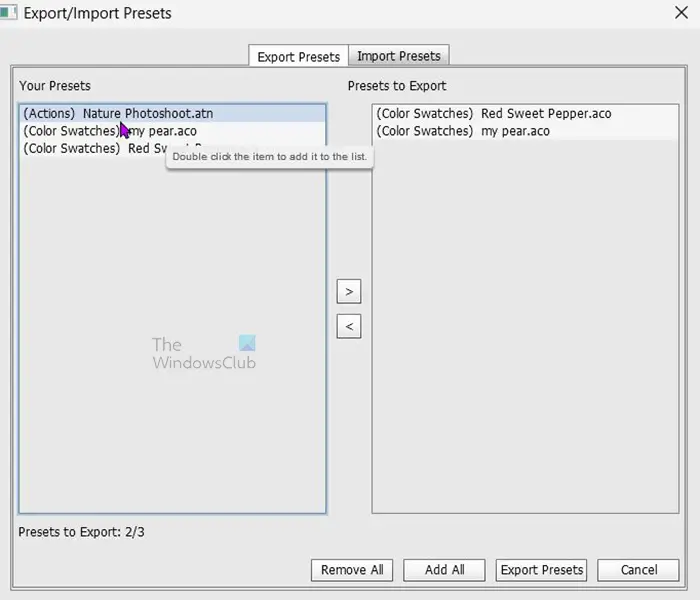
The Export/Import Presets window will appear, and you will see two columns. One column will show Your Presets that are present on the computer and the other column for you to put the presets that you want to export.
Double-click the preset or presets that you want to export, and it will go to the other column. If you want to remove it from the second column, just double click and it will be deleted.
When you have selected the preset or presets that you want and placed them in the right column, click Export Presets to export them.
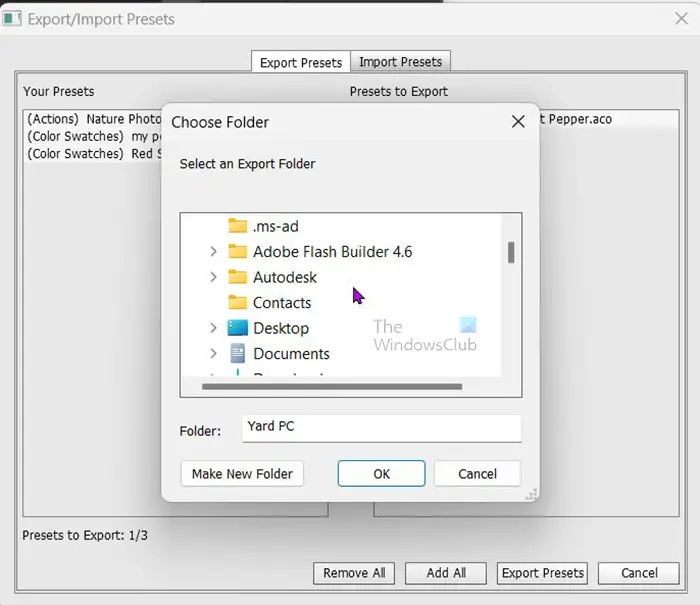
The window will appear for you to choose the place where you want the Presets saved. When you have selected the folder, click Ok to confirm or Cancel to stop the process.
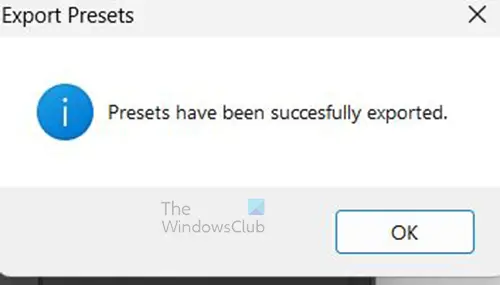
When you click OK, a confirmation prompt will appear telling you that the presets have been successfully exported.
On the computer that you want to put the presets on you would do the following:
Open Photoshop
Go to the top menu bar and click Edit then Presets then Export/Import Presets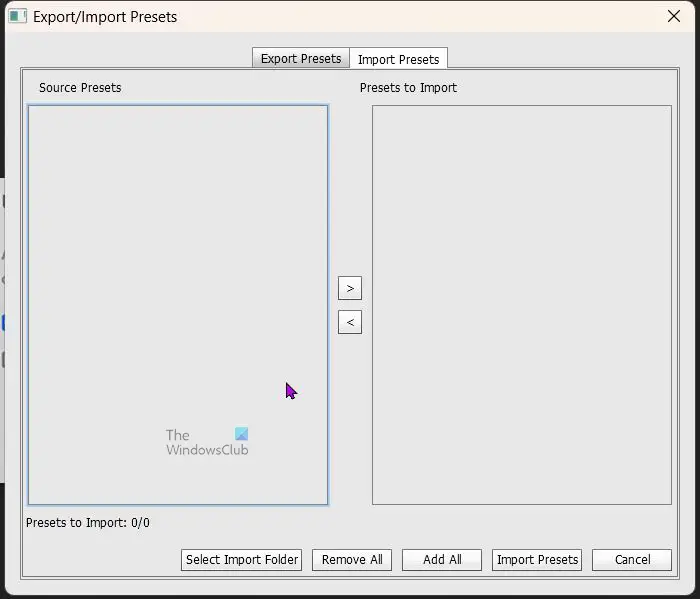
The Export/Import window will appear. Choose the Import Presets tab at the top.
If the list of presets shows up in the left column (Source Presets), double-click on the ones you want and they will go into the right column (Presets to Import).
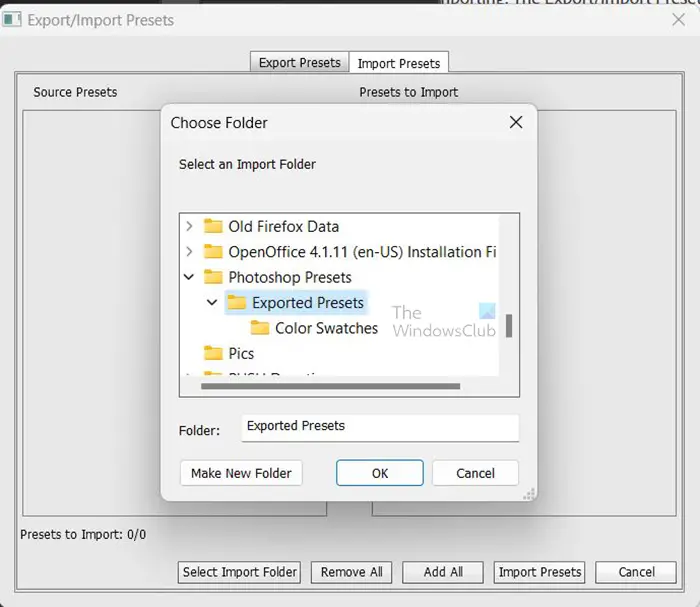
If the presets were saved in a folder other than the default folder, choose Select Import Folder from the bottom of the window, a window will pop you up for you to choose the folder with the presets, select the folder that has the presets then press Ok.
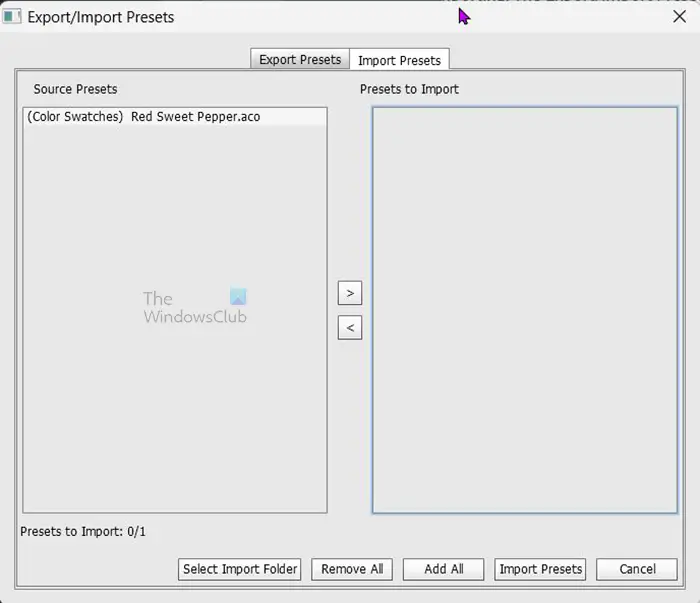
The saved presets will then be in the left column (Source Presets).
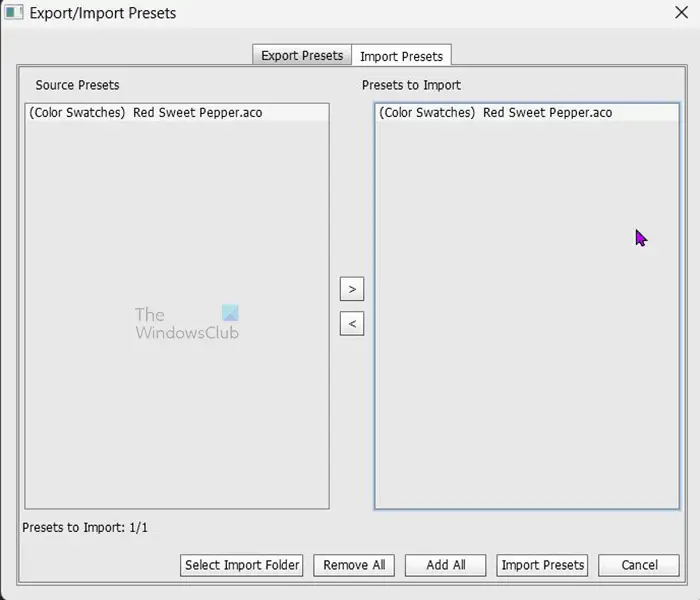
You will then double-click the presets you want, and they will go to the right column (Presets to Import). When this is done click Import Presets.
Save and load presets
Photoshop allows you to move actions and presets across different versions of Photoshop on the same of different computers by saving them on the source computer and loading them into the application folder of the target computer.
On the computer that has the presets that you want do the following:
Open Photoshop
Go to the top menu bar and choose Edit then Presets then click Presets manager
The preset manager window will appear, the first preset type there is Brush. You can choose brush if that is the preset that you want to save or click the drop-down arrow beside brush and choose another preset. From the brush preset or the other chosen preset, you can then choose a set by clicking on any of the squares below the preset name.
Click Save set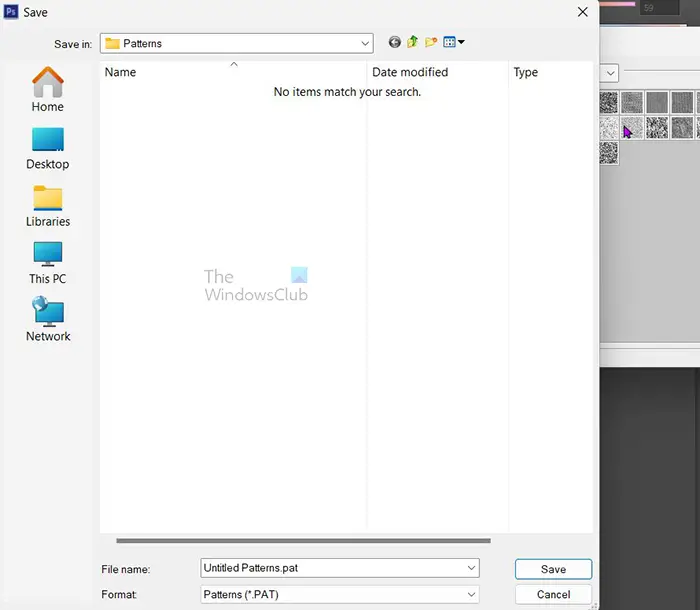
A Save option window will appear for you to choose a name and the destination that you want to save the preset. The default destination would be in the home folder for whatever preset you chose. For example, if you chose Pattern, the preset will be saved in the Patterns folder. When you are finished click Save to confirm or Cancel to stop the process. Photoshop will create a .pat file (.pat if you chose to save patterns presets, different presets have different file extensions).
If you didn’t change the save destination the preset file will be saved at C:\Users\<username>\AppData\Roaming\Adobe\Adobe Photoshop <version>\Presets\Patterns. The destination ends with Pattern because the example chosen for the save was the Patterns preset. You will need to save the preset from the destination to a USB or on the network where it can be accessed by the receiving computer.
On the computer that will be receiving the presets that you want do the following:
Open Photoshop
Go to the top menu bar and choose Edit then Preset Manager.
The preset manager window will appear, the first preset type there is Brush. You can choose brush if that is the preset that you want to load or click the drop-down arrow beside brush and choose another preset. From the brush preset or the other chosen preset, you can then choose a Set by clicking on any of the squares below the preset name. when you have selected chose Load. Selecting the preset name will tell Adobe which preset folder you will be loading from.
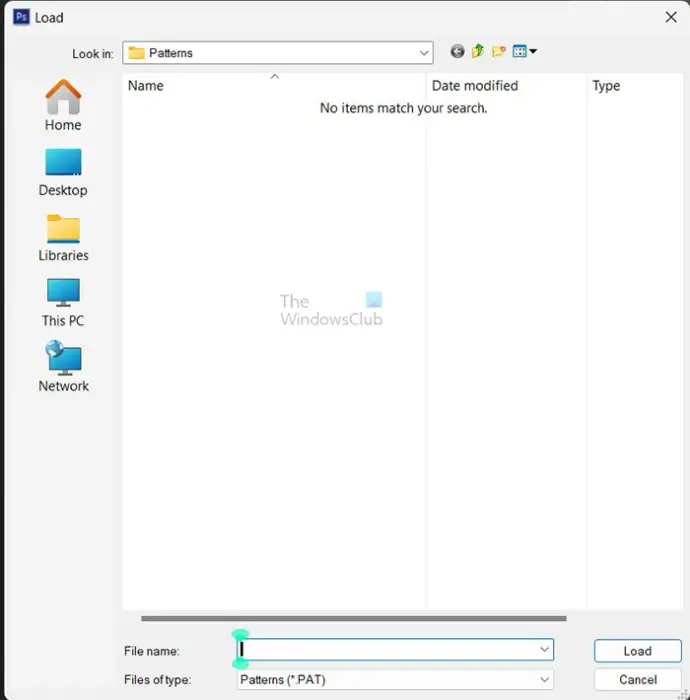
The Load options window will appear, search for the location of the saved preset from the other computer (whether you saved on a USB or over the network, etc). when you have found it click Load.
2] How to move Adobe Actions
Photoshop allows you to migrate actions to the same or different versions of photoshop on the same computer or on different computers. If you want to migrate actions, follow the steps below:
On the computer with the Action that you want, you may have already created a custom action or you want to migrate a default Photoshop action to another version of Photoshop on your computer or another computer. To save the action so that you can access it to put on another computer or other Photoshop file do the following:
Open Photoshop
Go to the top menu bar and click Windows then click Action
The action panel will appear showing the default actions and custom actions if you have any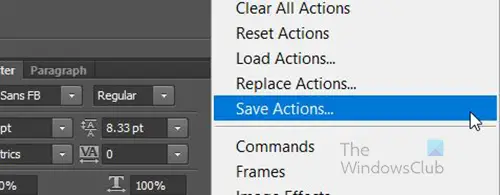
If you have an action that is already in the actions panel and you want to save it for use. Select it then click the hamburger menu button at the top right of the actions panel and choose Save actions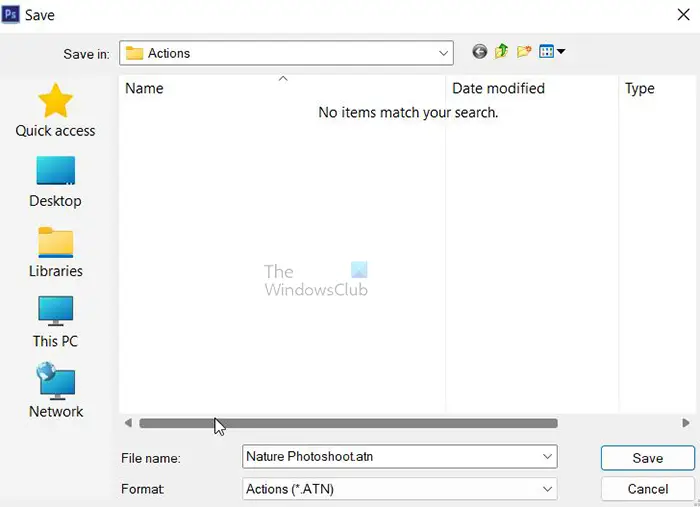
The Save dialogue box will appear and you can choose the name you want and click Save. Photoshop will save the action to the default location C:\Users\<username>\AppData\Roaming\Adobe\Adobe Photoshop <version>\Presets\Actions. You may have to enable viewing hidden folder to see the folder.
To get the actions to the other computer, you can save it to a USB drive or on a network where it can be accessed by the other computer.
There are two ways for you to get the actions file on the other computer.
Open Photoshop
Go to the top menu bar and click Windows then click Action
The action panel will appear showing the default actions and custom actions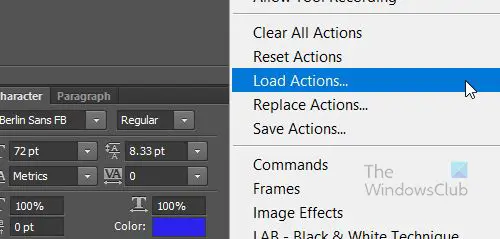
Click the hamburger menu button at the top right of the actions panel and choose Load Actions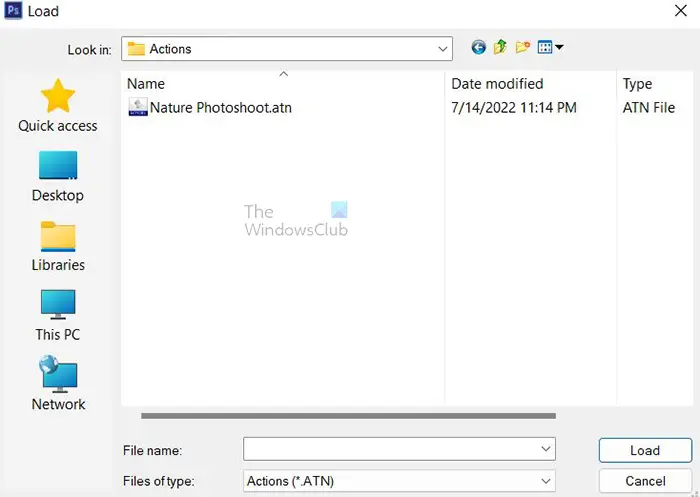
The Load actions dialogue window will appear, you can search for the action that you have saved on the USB or network or whichever location. When you have found it, select it and then click Load.
Here is the other option for loading the actions to the other computer. You would have saved the actions on a USB drive or on a network that is accessible to the other computer.
- Locate the Photoshop Actions folder C:\Users\<username>\AppData\Roaming\Adobe\Adobe Photoshop <version>\Presets. You may have to enable viewing hidden folder to see the folder.
- Paste the action file that you saved from the other computer into the Actions folder
- Restart Photoshop
- When Photoshop is reopened go to the Actions panel and you should see the default actions and the new action you saved in the Actions folder. If you do not see the new action, then just click the hamburger menu button and then click Load Actions. when the Load window appears look for the actions you want, click it, and then click Load.
3] How to transfer Adobe Settings
You can manually copy some Photoshop settings from one installation to another. These settings files include:
- Actions Palette.psp
- Brushes.psp
- Contours.psp
- CustomShapes.psp
- Default Type Styles.psp
- Gradients.psp
- Patterns.psp
- Styles.psp
- Swatches.psp
- ToolPresets.psp
To copy these settings from the source computer to the destination computer, you need to find the folder on the computer where they are stored. Find the files on the source computer and then paste them at the same file location on the target computer. The file location is C:\Users\<username>\AppData\Roaming\Adobe\Adobe Photoshop <version>Settings. You may have to enable viewing hidden folder to see the folder.
Read: How to use Adobe Creative Cloud Cleaner Tool
Where are Photoshop actions stored?
Photoshop actions are stored at C:\Users\<username>\AppData\Roaming\Adobe\Adobe Photoshop <version>\Presets\Actions. You may have to enable viewing hidden folder to see the folder.
Can you export Photoshop actions?
Photoshop actions can be exported for use on a different installation on the same computer or another computer. To export the actions, you will need to save them so that they can be sent to a USB drive or saved to a network location so that they can be accessed on another computer. To save the action for export do the following:
- Open Photoshop
- Go to Windows then click Action
- The action panel will appear showing the default actions and custom actions if you have any
- If you have an action that is already in the actions panel, and you want to save it for use. Select it then click the hamburger menu button at the top right of the actions panel
- Choose Save actions
- The Save dialogue box will appear and you can choose the name you want and click Save. Photoshop will save the action to the default location C:\Users\<username>\AppData\Roaming\Adobe\Adobe Photoshop <version>\Presets\Actions. You may have to enable viewing hidden folder to see the folder.
- To get the actions to the other computer, you can save it to a USB drive or on a network where it can be accessed by the other computer.
To put the action on another computer or installation on same computer do the following:
- Open Photoshop
- Go to Windows then click Action
- The action panel will appear showing the default actions and custom actions
- Click the hamburger menu button at the top right of the actions panel and choose Load Actions
- Choose Load actions
- The Load actions dialogue window will appear, and you can search for the action that you have saved on the USB or network or whichever location. When you have found it, select it and then click Load.
How do I transfer my Photoshop presets to another computer?
To transfer your Photoshop presets to another computer, you need to backup everything on the old computer first. It is possible to use the Creative Cloud app to get the job done. Following that, you can open the new computer, install Photoshop, and use the same app to import everything.
Can you copy Adobe programs from one computer to another?
Yes, you can copy Adobe programs from one computer to another using Creative Cloud app. It helps you backup all the data on your old computer so that you can get the same settings and presets on your new computer. The good news is that you can do this multiple times in case you change your installation frequently.
We hope you find the post useful.