The On-Screen Keyboard is a virtual keyboard app to type text with the help of a mouse, joystick, or a pointing device in Windows 11/10. It is useful in case your physical keyboard is not working properly or certain keys from your physical keyboard are missing. The onscreen keyboard also helps you dodge keyloggers and prevent capturing of keystrokes by spyware. Now, if you want to open the On-Screen Keyboard on your Windows 11 PC, this post will help you and show you multiple methods.
Windows 11/10 PCs come with two keyboard applications, one is the On-Screen Keyboard, and the other is the Touch Keyboard. You basically do not need a touchscreen to use the on-screen keyboard. It displays a virtual keyboard on your screen, and you can use your mouse to select and press the keys.
How to open Onscreen Keyboard in Windows 11?
Here are the different methods you can use to open the On-Screen Keyboard on your Windows 11/10 PC:
- Open the On-Screen Keyboard using the keyboard shortcut keys.
- Use Run to enable the On-Screen Keyboard.
- Open the On-Screen Keyboard using Windows Search.
- Open the Onscreen Keyboard from the taskbar.
- Use Windows Settings to open the On-Screen Keyboard.
- Open the On-Screen Keyboard from the Control Panel.
- Enable the On-Screen Keyboard using the Command Prompt.
- Open the On-Screen Keyboard using the executable file.
- Create a desktop shortcut to quickly open the On-Screen Keyboard.
- Pin the On-Screen Keyboard to the Start menu.
1] Open the On-Screen Keyboard using the keyboard shortcut keys
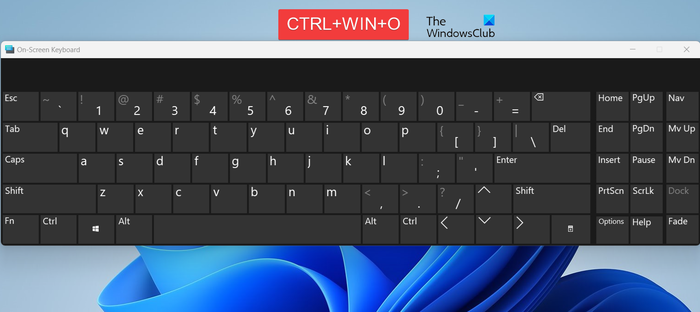
The easiest method to enable and open the On-screen Keyboard is to use keyboard shortcut keys. You can quickly press the combination of CTRL + WINDOWS + O keys and it will open the On-Screen Keyboard. In case you want to close the virtual keyboard, you can again press the same hotkey.
In case your physical keyboard is stuck or is not working correctly, you can use some other methods to enable the On-Screen Keyboard.
Read: On-Screen Keyboard Settings, Tips and Tricks
2] Use Run to enable the On-Screen Keyboard
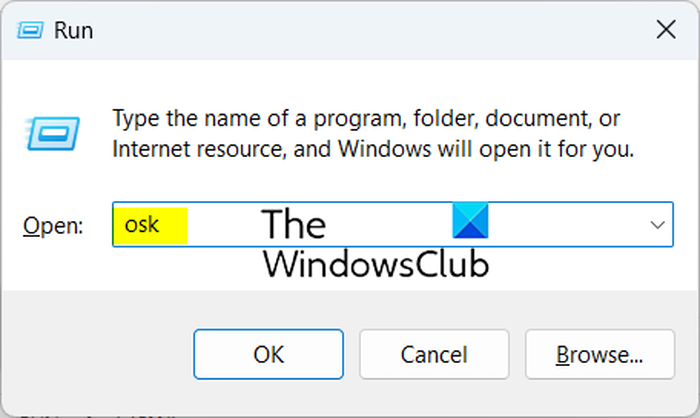
The Run command box is another method to launch the On-Screen Keyboard. Here’s how:
- First, open the Run command box using Win+R.
- Now, in the Open box, type the below command:
osk
- Next, press the Enter button and the On-Screen Keyboard will be on your screen.
Read: Windows On-Screen Keyboard Options and Settings in Windows.
3] Open the On-Screen Keyboard using Windows Search
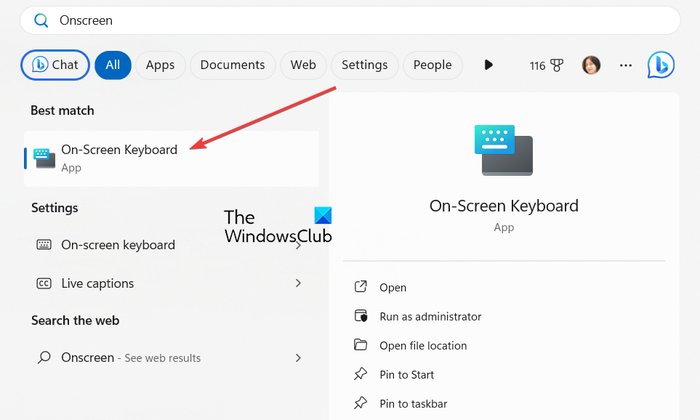
You can also use the Windows Search function to enable the virtual keyboard in Windows 11/10. For that, click on the taskbar search icon or press the Win+S hotkey. Now, type onscreen in the search box and you will see the On-Screen Keyboard app in the results. Just click on it to launch the virtual keyboard and start using it.
4] Open the Onscreen Keyboard from the taskbar
If you want to quickly open the On-Screen Keyboard right from the taskbar in one click, you can do that too. Here are the steps for that:
First, right-click on your taskbar and choose the Taskbar settings option from the context menu.
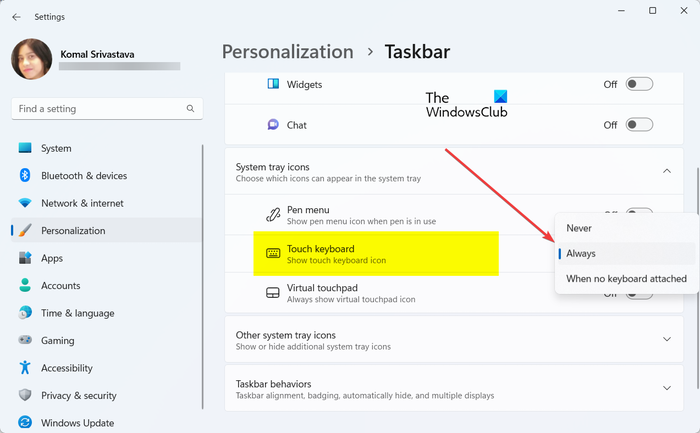
Now, find the Touch keyboard option under the System tray icons section and set it to Always or When no keyboard attached as per your preference.
![]()
Next, you will see a Touch keyboard icon in the system tray section on your taskbar. You can simply click on it to open the Onscreen Keyboard.
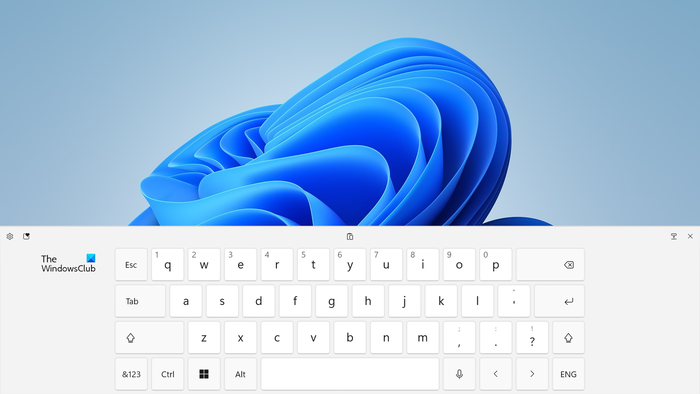
This method is useful when you don’t have a physical keyboard or you are unable to use the physical keyboard.
Read: Can’t Type Password at the Login Screen in Windows.
5] Use Windows Settings to open the On-Screen Keyboard
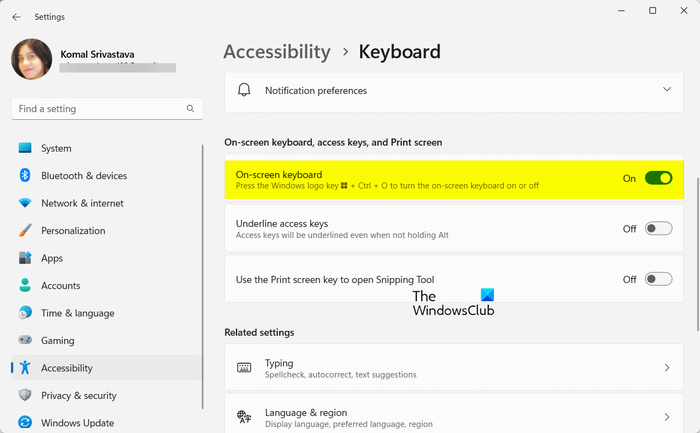
The next method to open the On-Screen Keyboard is to use the Windows Settings app. Here’s how:
- First, press the Win+I hotkey to open the Settings app.
- Now, go to the Accessibility tab from the left-side pane.
- Next, click on the Keyboard option and switch on the toggle associated with the On-screen keyboard option.
6] Open the On-Screen Keyboard from the Control Panel
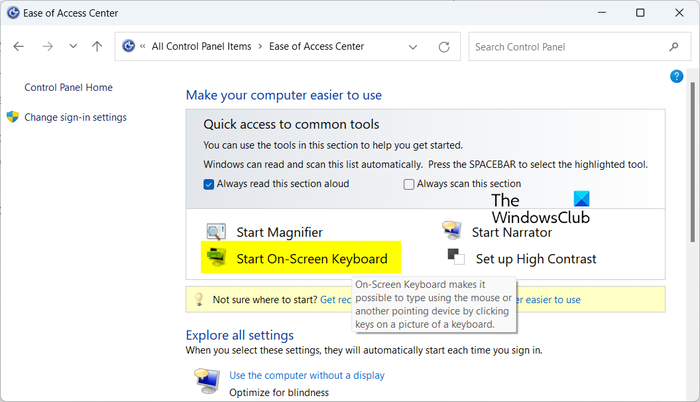
The Control Panel is still preferred by many Windows users to tweak system settings and perform other tasks. If you are one of them, you can use the Control Panel to open the On-Screen Keyboard. Here are the steps to do that:
- First, open the Control Panel; press Win+R to open Run and enter control in it.
- Next, click on the Ease of Access Center category.
- After that, under the Quick access to common tools section, tap on the Start On-Screen Keyboard option.
TIP: Activate On-screen keyboard for filling Password fields in browsers.
7] Enable the On-Screen Keyboard using the Command Prompt

You can also run a specific command to open the On-Screen Keyboard. For that, you will be required to open Command Prompt or PowerShell and enter a command. Here’s how:
First, open the Command Prompt app using Windows Search and type the below command:
osk
After that, press the Enter button and the On-Screen Keyboard will open.
You can run the same command in Windows PowerShell as well to launch the virtual keyboard.
8] Open the On-Screen Keyboard using the executable file
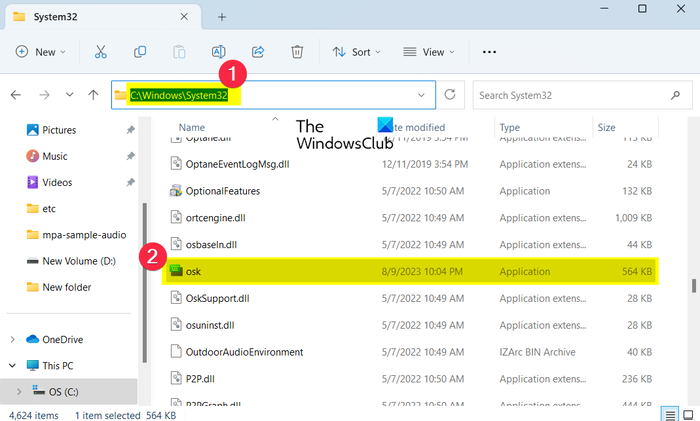
One more method to launch the On-Screen Keyboard is to use its main executable file. You can directly run the executable file of the On-Screen Keyboard from File Explorer and open the keyboard. Here’s how:
First, press Win+E to open the File Explorer and navigate to the following address:
C:\WINDOWS\System32\
Next, locate the osk.exe file and double-click on it to open the On-Screen Keyboard.
Read: How to Turn Off Keyboard Sound in Windows for On-Screen Keyboard?
9] Create a desktop shortcut to quickly open the On-Screen Keyboard
If frequently use the virtual keyboard or your physical keyboard is faulty, you can keep a shortcut of the On-Screen Keyboard on your desktop and run it whenever required. You can follow the below steps to do that:
First, go to your desktop and right-click on the empty section. From the context menu, click on the New > Shortcut option.
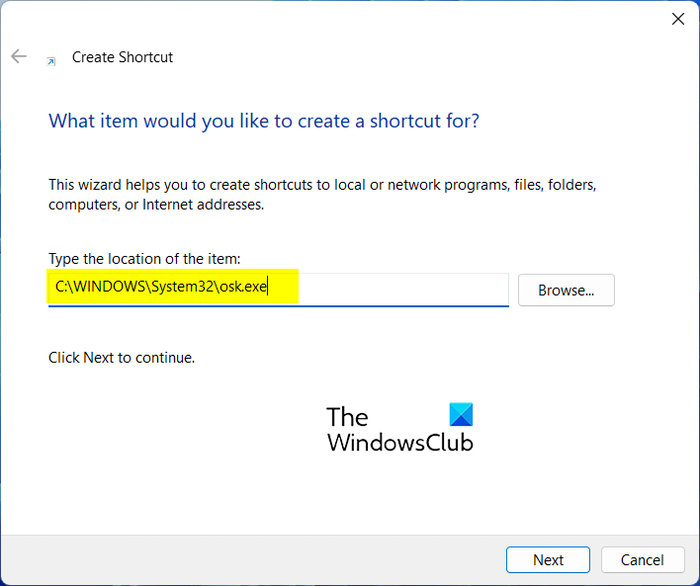
Now, in the Type the location of the item box, enter the below location and click on the Next button:
C:\WINDOWS\System32\osk.exe
After that, name the shortcut On-Screen Keyboard or whatever you prefer, and press the Finish button.
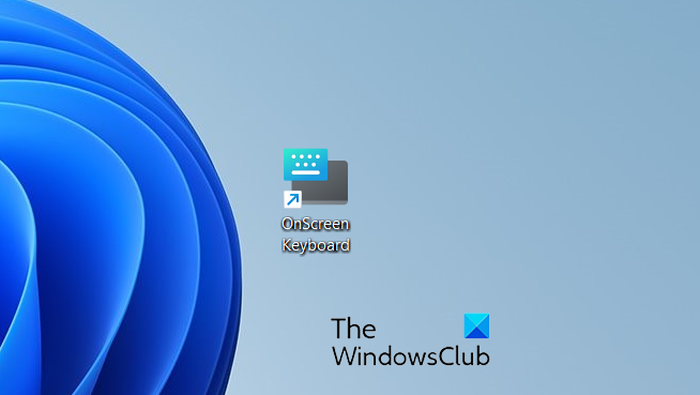
A desktop shortcut for the On-Screen Keyboard will now be created. You can double-click on it whenever you need to use the virtual keyboard.
Read: How to customize Touch keyboard on Windows?
10] Pin the On-Screen Keyboard to the Start menu
You can also pin the On-Screen Keyboard to the Start menu and open the keyboard from there. For that, follow the below steps:
First, click on the Start menu button from the taskbar.
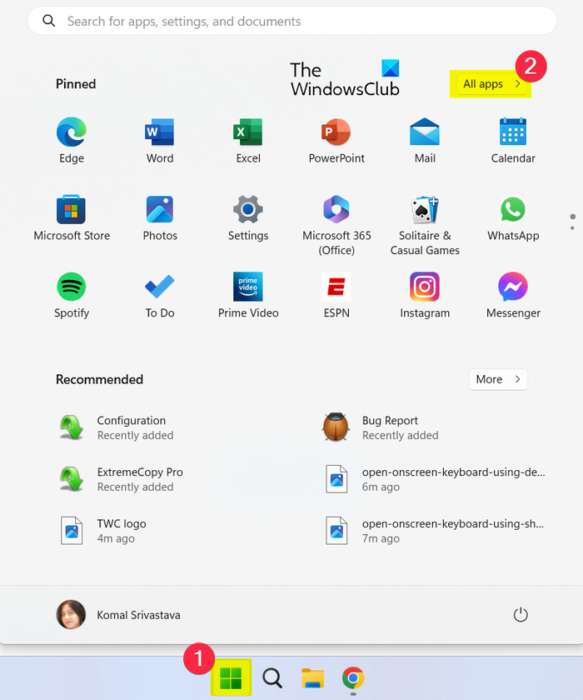
Now, tap on the All apps button from the right side.
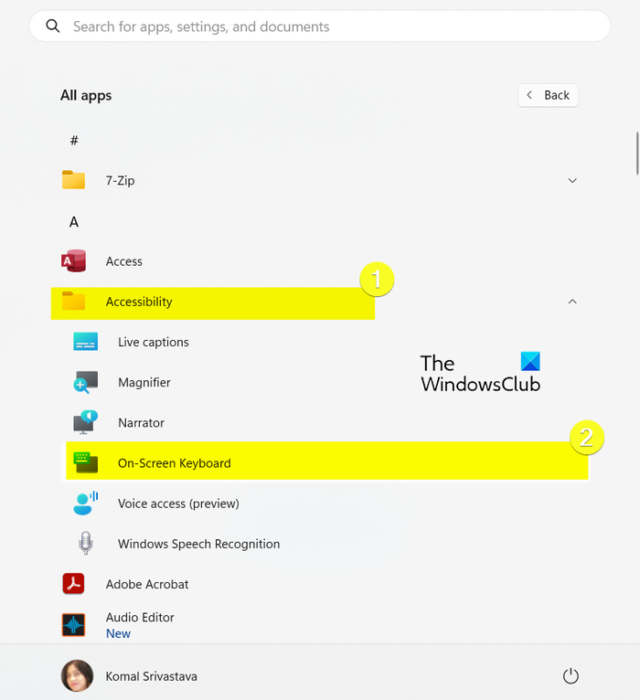
After that, expand the Accessibility category and you will see an On-Screen Keyboard option. Simply tap on it to open the keyboard.
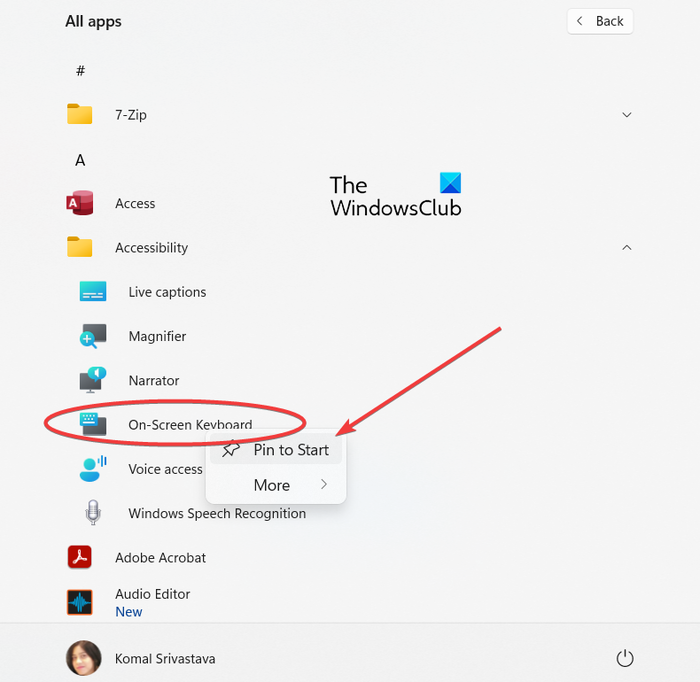
In case you want to pin the On-Screen Keyboard app to the Start menu, right-click on it and choose the Pin to Start option from the context menu.
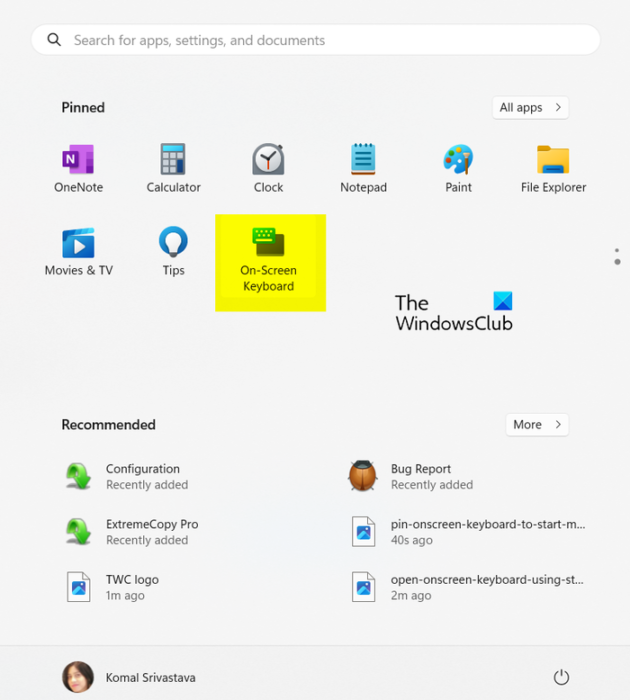
You can now quickly open the onscreen keyboard from the Start menu’s pinned items.
TIP: Fix On-Screen Keyboard not working in Windows.
How do I open the virtual keyboard on Windows 11 lock screen?

If you are unable to use your physical keyboard on your login screen in Windows 11 and can’t enter your password, you can use the virtual keyboard. To open the On-Screen Keyboard on the login screen, click on the Accessibility icon present at the bottom right. After that, you will see an On-Screen Keyboard option in the list; switch on the toggle associated with this option. This will open the virtual keyboard using which you can type your password and sign in to Windows.
How do I use the physical keyboard in Windows 11?
The physical keyboard can be simply plugged into the USB port of your PC. As soon as you do that, Windows detects the keyboard, installs the necessary drivers, and lets you use the keyboard to input text and commands. In case your physical keyboard it faulty, you can use the On-Screen Keyboard using the above-discussed methods.
Related read: How to enable On-screen Keyboard in Kiosk mode in Windows?
Leave a Reply