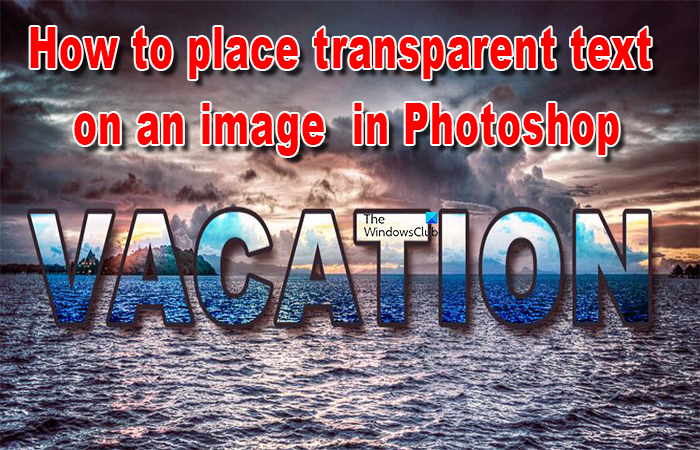
Today I will be showing you how to place transparent text on an image in Photoshop. Transparent text on an image can add interest. It is also a way to add text to an image without taking away from the image.

How to place Transparent Text on Image in Photoshop
Placing transparent text on an image is a great way to enhance photos for magazines, calendars, postcards, and much more. It allows the text to be seen on the image without the text blocking any of the beauty of the image.
- Open the image in Photoshop
- Convert the image to a Smart object
- Add the text to the image
- Lower the text Fill to 0
- Add a drop shadow to the text
- Add a stroke to the text
- Add a gradient overlay
- Enhance the effects
- Bonus
1] Open the image in Photoshop
The first step is to get the image in Photoshop so that the text can be added to it. To get the image in Photoshop, locate the image on your device. When the image is located, right click on it and select Open with then Adobe Photoshop (version). The image will be opened in Photoshop, it will be in the main window and also in the layers panel. The image will be a background and it will be locked.
2] Convert the image to a Smart object
This step is optional but I would recommend it. converting the image to a smart object will make the image retain its quality even when it is resized. Smart objects also allow you to edit the overall artwork easily. For example, you can exchange the image without having to do over the whole project. The smart objects can be edited or changed within a few seconds. Another point for Smart objects is the fact that they will be edited non-destructively. When you convert the image to a smart object the background image will be renamed Layer 0.
3] Add the text to the image
This step requires that the text be added to the image. go to the left tools panel and click the Horizontal type tool or press T. go to the top menu bar and you will see the font settings, Font type, Font color, Font style, and Font type. Choose a good font that will show the effect very well. You could use Arial Black font. The text color I am using is black, but you can use any color you want that will make the text more visible as you type. When the other effects are added the color will go, but for now, choose a color that will be visible as you type on the image.

With the Type tool selected click on the image and type. Set the font size to 72, that is the biggest size. If the text is too small after typing, press Ctrl + T and hold any of the controls to stretch the text. you can hold Shift + Alt while you stretch so that the text will be stretched from multiple angles.
4] Lower the text Fill to 0
This step will require that you lower the text’s fill to 0. To lower the text’s fill to 0, go to the layers panel, click on the text layer and look for Fill at the top of the layer panel and change it to 0
The text will become invisible and the image will look empty.
5] Add a drop shadow to the text
The next step is to add a drop shadow to the text. to add the drop shadow to the text go to the layers panel and click on the text layer, right-click on the text layer and click Blending options.
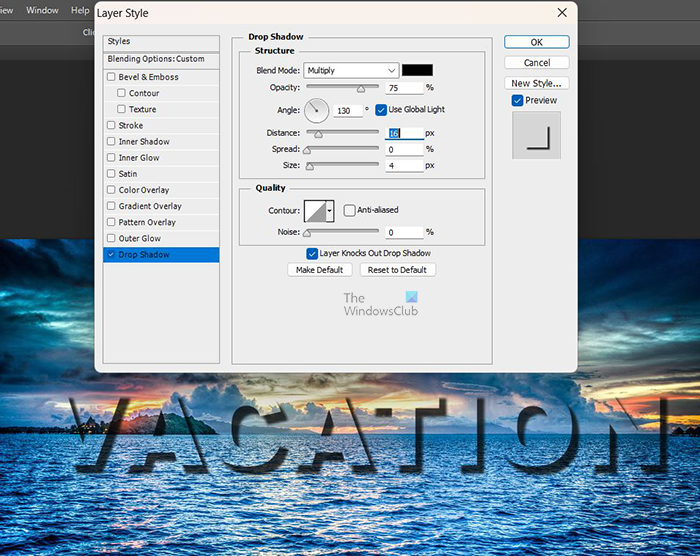
When the blending options window appears, click on the word Drop shadow. With the word Drop shadow selected change the angle and the Distance. You can change the angle and the distance easily by clicking on the document, holding the left mouse button, and dragging, you will see the shadow move, and the text will be outlined. You will also notice that as you drag the values for distance and angle will change. The angle and distance you use will be dependent on how the shadow looks on your image. you may need more or less distance and angle values on your image.

The Layer style and the image is showing how the shadow looks on the image with the values for distance and angle.
Adjust the opacity of the shadow
You may adjust the Opacity of the shadow, you can choose if you want it darker or lighter. The opacity I use is 75 %, you can always adjust it later when everything is finished.
Adjust the size of the drop shadow
You can adjust the size of the shadow and that will soften the edges, the higher the value, the softer the edges. The value you use will depend on what is satisfactory to you and your image. experiment with different values until you find a satisfactory value. The value that I use for the shadow size is 10.
Change the color of the drop shadow
You can change the color of the drop shadow by clicking on the color swatch. Choose a color from the color picker, or sample a color from the image. The right color for your shadow will depend on the image that the text is on. Chose a color that will make the text show but not too obvious, remember the text is to be transparent. When all is done, you can still adjust the shadow’s color if it needs to be darker or lighter. Click ok to close the Layers style window so that you can view the text.
This is the image with the text. The text is more visible with the drop shadow added.
6] Add a stroke to the text
In this step, a stroke will be added to the text. To add the stroke go to the layers panel and right-click on the text layer. From the menu choose Blending options. The layers style window will appear, click on the word Stroke. When you click the word Stroke you will see a stroke around the text.
Choose a stroke color
You will then choose a stroke color by clicking on the color swatch. When the color picker appears choose a color or sample a color from the image. I sampled color from a dark blue part of the cloud in the image. when that is finished click Ok to close the color picker.
Change stroke position
This is where you will change the position of the stroke. The positions can be Inside, Outside, or center. For this image, Outside will be the choice. You can experiment and see which you prefer.
Change the stroke size
You will now choose a size for the stroke, you can enter a value in the stroke size value box, use the slider or click in the value box and use the direction keys. With the stroke now bigger, you will see the text much clearer, you can decide if you want to make the stroke lighter.
7] Add a gradient overlay

Here you will add a gradient overlay to the text. The layers style window is still open so click on the word Stroke overlay. The default black-to-white gradient is automatically added to the text.
Change the gradient overlay blend mode
Change the gradient overlay blend mode from the default which is Normal to Overlay. If the Overlay blend mode is too bright you can try Soft light. Keep the one that is best for your image and your preference. You can click Ok to close the layers style box or you can try adding more effects.
8] Enhance the effect
The effect will be further enhanced and the following is what will be done to make it even more beautiful.
Select the text

To select the text hold Ctrl and press the text layer’s thumbnail in the layers panel. You will see the selection outline inside the text.
Invert the selection
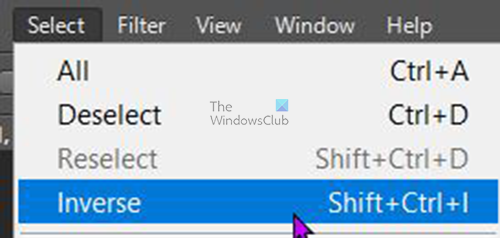
Now you will invert the selection, this will select everything except the text. To invert the selection go to the top menu bar and press Select then Inverse or Press Shift + Ctrl + I.
Add fill and adjustment layer
With the image now selected, go to the layers panel and click on the image layer then go to the bottom of the layers panel and click the Create the new fill or adjustment layer icon. When the menu pops up click Solid color. A color picker will appear, choose any color you want. Depending on the color you choose the outcome will be different in the next step. The color you choose will cover everything except the text. Click Ok to close the color picker.
Lower the opacity of the fill layer
This is where you will lower the opacity of the fill layer. This will allow the image to show through. To lower the opacity, go to the layers panel and click on the fill layer and lower the opacity to about 55%. The goal is to have the image a bit darker than the text.
Change the color of the fill layer
This step is where the color of the fill layer is changed. To change the color of the fill layer, double-click on the thumbnail of the fill layer. A color picker will appear, you can choose a color from the color picker or sample one from the image. I sampled the orange-red from the clouds showing through the text.
Change the Blend mode of the fill layer
You will now change the blend mode of the fill layer. To change the blend mode, click on the fill layer then click on the word Color at the top left of the layers panel. A drop-down menu with other options will appear, click Color.
The fill layer’s color mode will change, it will look different depending on your color choices and image. You can also experiment with different blend modes too, you may like another one.
Lower the opacity of the fill layer again
This is where you will once again lower the opacity of the fill layer. Click on the fill layer and slowly change the slider and watch the effect on the image. stop when you are at a level that you are comfortable with. I chose to lower the opacity to 40%. You can turn the visibility of the fill layer on and off to see the difference.
This is the final image with all the effects.
9] Bonus
The bonus is to show you how to change the artwork in a few seconds and change the image if you want to. Since the image is a Smart object, you can easily change the image. You will also need to change the Color fill to a smart object, just right-click on it and choose Convert to Smart object. If this is not done, when you go to edit the image layer, it will remove the Color fill layer.
To change the image you have to double-click on the image’s thumbnail
An information window will pop up telling you to save after editing to see the changes. When you click ok you will be taken to another document that shows the original image. You can then change the image and then save it. Go back to the original document and you will see the changes.
Back in the original document with the new image, you can use the type tool to change the text.
You can also change the Blend mode on the Color fill layer. Depending on the image you are using, the previous Color blend mode will not work.
Results of changing the images that were changed to Smart objects.

This image was inserted into the document by editing the smart object.

This is another image that was inserted into the document by editing the smart object.
Read: How to make a Silhouette in Photoshop
What is the difference between lowering the Fill and lowering the Opacity of a layer?
When you lower the opacity of a layer it will affect the layer and any effect that was done on the layer. On the other hand, when you lower the fill it will only affect the layer. All the effects will still be the same.
How do I add a gradient to an image in Photoshop?
Select the image then go to the layers panel and right-click on the image layer. Select the Blending mode from the menu. When the layer styles window appears, click the word Gradient overlay. The black-to-white gradient will be applied to the image. You can choose the gradient that you want to add to the image.
Leave a Reply