Port forwarding or Port mapping is the process through which external traffic from the Internet can connect to a computer within a private network. In this post, we will learn how to port forward a hotspot to a PC in Windows 11/10.
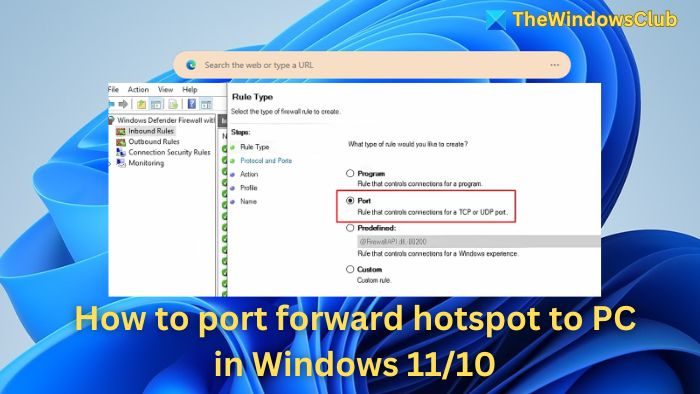
Forwarding creates a dedicated tunnel between the device and the Internet, enabling specific applications to bypass the network rules to access the device or service. This can be achieved by configuring the PC’s network settings to forward incoming data to the corresponding application on the device, but only through ports designated for this purpose.
For example, if we are hosting a Minecraft game Server for my friends, we would need the router to direct their connection to the actual server PC on the network. Port forwarding, in this case, helps us specify which incoming traffic should be directed to the server, as mentioned above.
How to port forward hotspot to PC in Windows 11/10
Port forwarding in Windows, both in real and virtual machines, can be set through the following method:
- Windows Defender Firewall
- Windows Terminal
- NAT rules in Virtual Machines
You will need admin permission to execute these methods. Also, ensure that the Mobile hotspot is turned on before you execute these steps.
Find the IP Address range used by Windows hotspot
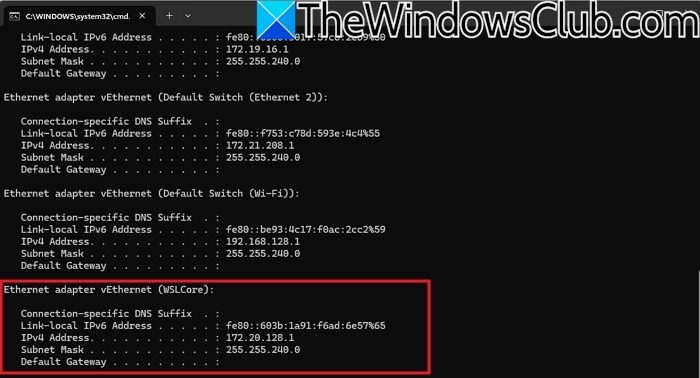
To find the IP address range used by your Windows mobile hotspot, you can use the Command Prompt, PowerShell, or the Network and Sharing Center.
- Press Win + R, type terminal, and press Enter.
- Type
ipconfigand press Enter. - Scroll through the results and look for the Local Area Connection adapter, vEthernet (Internal Network), or something similar (this represents the mobile hotspot adapter).
Under this adapter, you should see a section labeled IPv4 Address. This is the IP address used by your PC’s mobile hotspot. The mobile hotspot’s IP address range typically uses x.y.z.1/24, meaning all devices connected to the hotspot will have IP addresses between x.y.z.1 and x.y.z.24.
Port forward a hotspot using Windows Firewall, Terminal, or NAT Rules
We will use 192.168.1.10 as an example. You should use it based on what you see on the terminal when you run the config part.
1] Windows Firewall
Configuring the Windows Defender Firewall for port forwarding would involve the below-mentioned steps:
- Type firewall on the Desktop Search Bar and select Windows Defender Firewall from the search results.
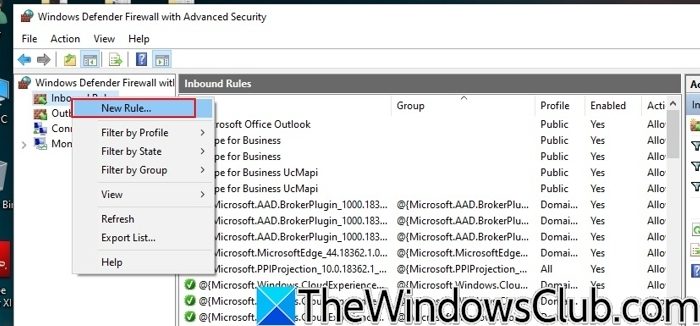
- On the very next window that appears, right-click on Inbound Rules and then click on New Rules
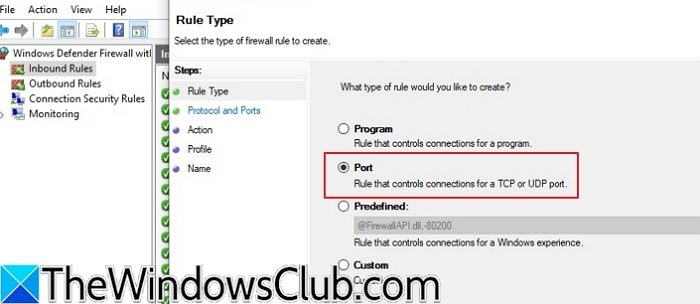
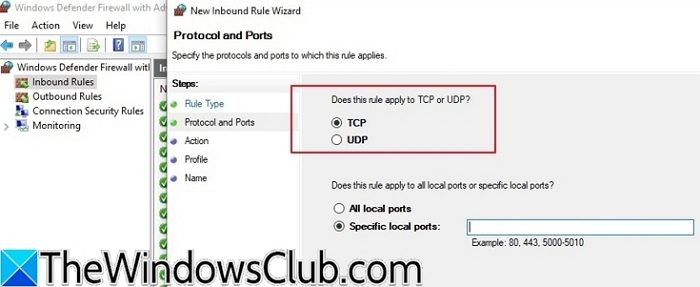
- Select the port option, click Next, and select the type of port to be configured. We can choose between TCP and UDP.
- Enter the port numbers to be forwarded under Specific Local Ports.
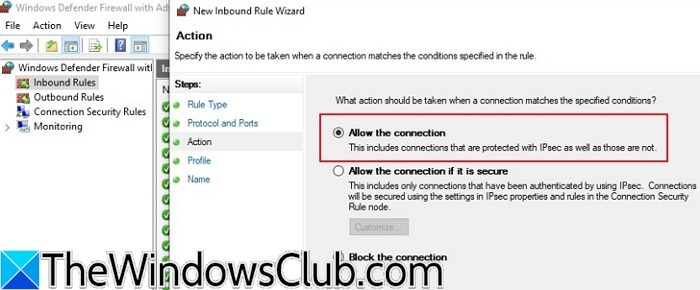
- Select the option Allow the connection and then click on Next.
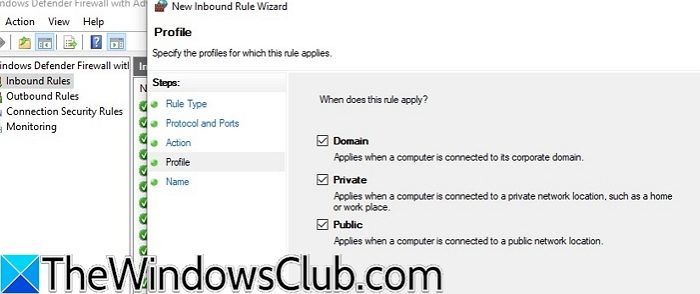
- Select the profile for which the rule would apply among the Domain, Private, or Public options and then proceed further by clicking Next.
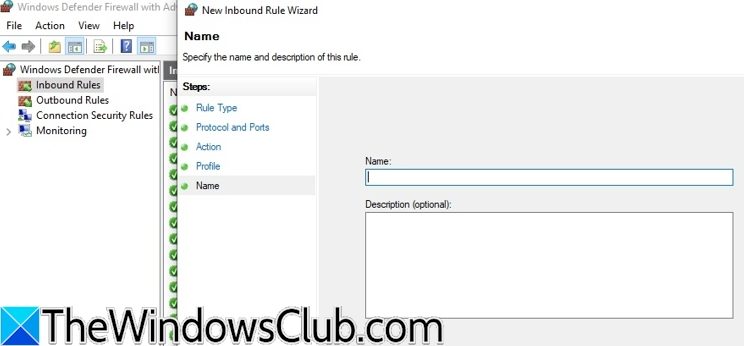
- Enter a name for the rule and click on Finish to complete the process.
2] Terminal
Port forwarding can also be configured in a PC through the Windows Terminal by following the below-mentioned steps:
- Type cmd on the Desktop Search Bar and click the Command Prompt option from the search results.
- On the Terminal Prompt, type ipconfig and press Enter to open the network configuration details.
- Make a note of the IP address that appears for the IPv4 address under the Network Adapter
- Type the below command on the prompt to create the port forwarding rule:
netsh interface portproxy add v4tov4 listenport=8080

listenaddress=192.168.1.10 connectport=8080 connectaddress =192.168.1.10

Here,
- netsh interface portproxy add v4tov4: It indicates the addition of a new port forwarding rule for IPv4 traffic.
- listenport=8080: This assigns the local port, numbered 8080, on which the proxy server would listen to all the incoming connections.
- listenaddress=192.168.1.10: Sets a static local IP address through which incoming traffic would be listened.
- connectport=8080:Sets the port number of the remote system to which all the incoming connections would be forwarded.
- connectaddress=192.168.1.10: It sets the IP of the remote machine to which the proxy server would direct the incoming traffic.
Overall, the above set of commands creates a port forwarding rule that forwards all the incoming traffic to port 8080 of the local machine with IP 192.168.1.10 to a remote system on port no. 8080, having the IP 192.168.1.10.
However, both systems are configured with the same port number and IP address since forwarding is a loopback. Loopback port forwards redirect the incoming traffic to the same system rather than forwarding to a different network. This configuration is commonly used in port forwarding to expose a service on a specific port within the same system without exposing it to any external network.
3] NAT rules in a Virtual Machine
Port forwarding also allows us to access a Virtual Machine’s services. To configure a VM for port forwarding, we can follow the below-mentioned steps:
- Open Hyper-V Manager by typing and clicking on the same on the Desktop Search Bar
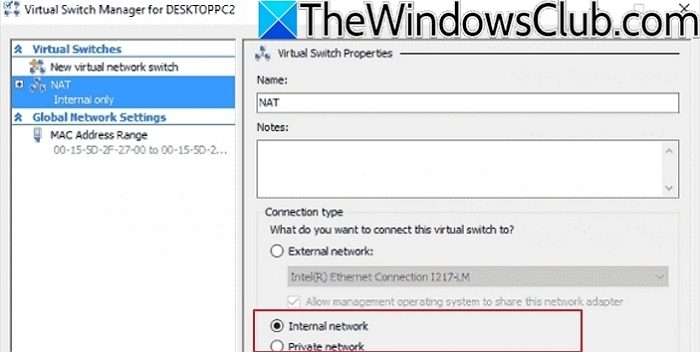
- In the Hyper-V Manager window, click on Virtual Switch Manager and click on New Virtual Network Switch.
- Choose Internal or Private as the virtual switch and enter a name for the newly created switch.
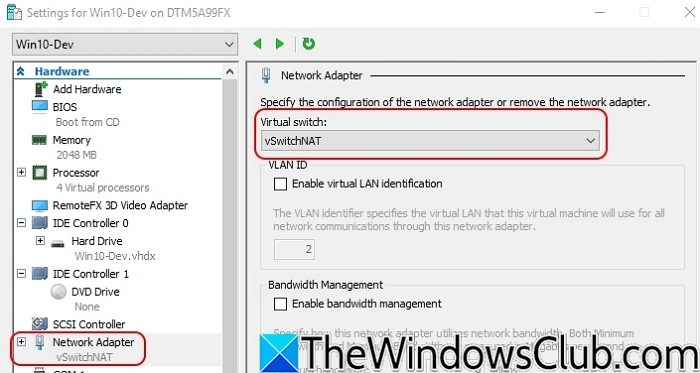
- Click on Add Hardware > Network Adapter to add a network adapter and select the virtual switch which is already created in the network adapter settings
- We can now create the NAT rule by opening the Windows Terminal on the VM and entering the command in the Terminal Prompt :
netsh interface portproxy add v4tov4 listenport=80 listenaddress=0.0.0.0
connectport=8080 connectaddress=192.168.1.10
I hope this helps.
How to add, delete, and modify port forwarding rules in Windows?
As mentioned above, we can add a port forwarding rule by typing :
netsh interface port proxy add v4tov4 listenport= listenaddress= connectport= connectaddress=”
An existing rule can also be deleted by typing the following at the command prompt.
netsh interface portproxy delete v4tov4 listenport= listenaddress=”
However, modifying a rule would involve deleting an existing one and creating a fresh one, as rules cannot be edited once created. Similarly, disabling a rule would also involve deleting an existing one, and enabling a rule would mean creating a new one.
How do I port forward to two devices?
You can set up port forwarding for multiple devices or computers needing the same ports. You can create Port Forward Rules using Windows Firewall, ensure CP & UDP” as the Protocol, and enter the computer’s IP addresses.