If you use the traditional method to add a background image to your spreadsheet; Excel won’t print the image. If you need to print an Excel spreadsheet with a background image. then this tutorial will show you how to do it. You need to add the picture separately in your spreadsheet so that it detects the picture while printing. This tutorial is for Microsoft 365, Office 2019, and 2016 users only.
By default, you can go to the Page Layout tab and click the Background option to add a picture to the background. However, it works as long as you keep the spreadsheet on your computer only. Whenever you try to print the file, it deletes the background image immediately. Sometimes, you may need to paste an image in the background of the spreadsheet to customize it better or as a watermark.
How to print the Background Image in Excel
To print an Excel spreadsheet with a background image, follow these steps-
- Finish editing your spreadsheet in Excel.
- Insert a shape covering your data.
- Add an image from Picture or texture fill section.
- Adjust the transparency.
- Print the spreadsheet.
To learn more about these steps, continue reading.
Once you have finished editing your spreadsheet you can insert the background picture; because once the background image is inserted, it might be awkward to edit the spreadsheet. If you are done with the editing, go to the Insert tab and click on the Shapes option.
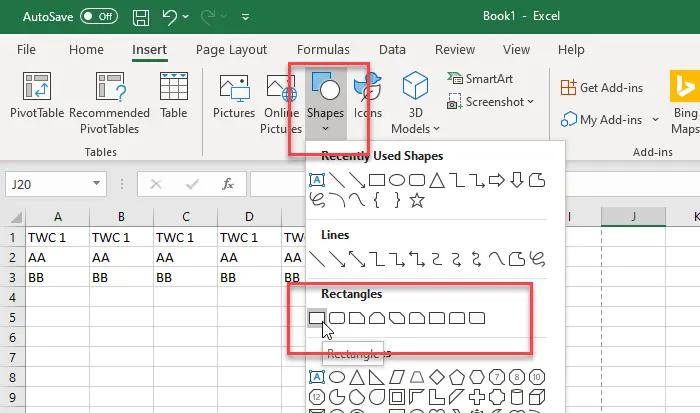
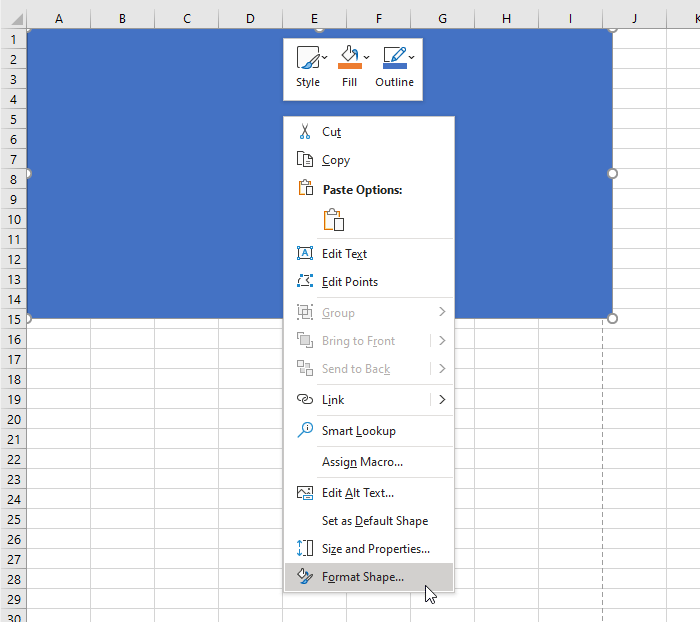
From here, choose a rectangle shape and use your mouse to cover the whole area that includes your data. If you have data from A1 to Z100, you must cover the entire area with that shape. In other words, the background image will be inserted according to this selected area. After that, right-click on the shape, and select the Format Shape option.
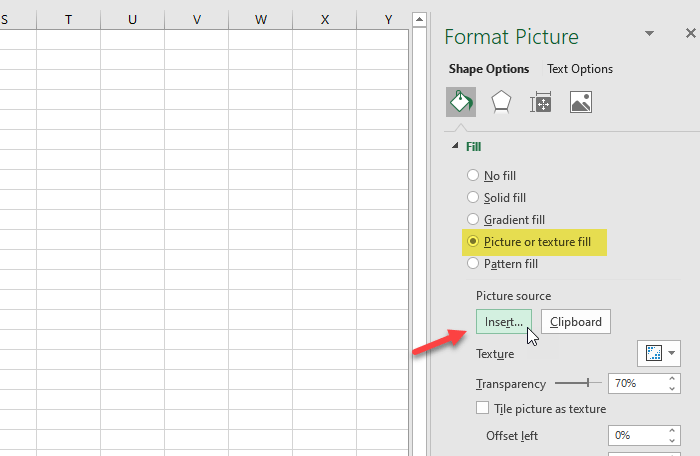
It will open a pane on your right side. Expand the Fill menu and select Picture or texture fill option from the list. As the name defines, it helps you add a picture or a texture as the background. To replace the default texture, click the Insert button under the Picture source option.
Now you need to choose an image. If you already have the picture on your PC, click on the From a File option. If you want to fetch the image from a website, you should click the Online Picture button, and follow the screen instructions.

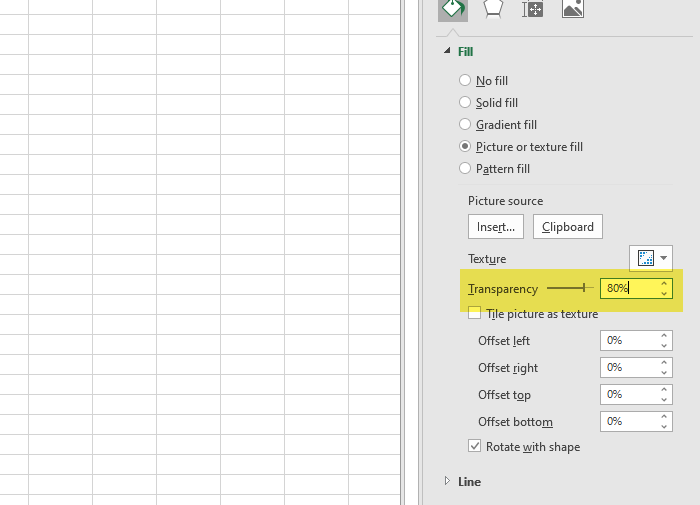
After inserting the image, change the transparency level so that it acts as a watermark. For that, use the Transparency menu to adjust it according to your requirements.
Now, you can print the spreadsheet, and it won’t remove the image from the background.
Hope this tutorial helps.
Read: How to print selected cells in Microsoft Excel or Google Sheets
How do I print a background image in Excel?
To print a background image in Excel, you need to insert a shape first. Then, right-click on that shape and select the Format Shape option. Next, expand the Fill pane and choose the Picture or texture fill option. Click on the Insert tab and choose an image. Then, change the opacity level to 70-80%. Now, you can print the spreadsheet as usual.
How do I print a background grid in Excel?
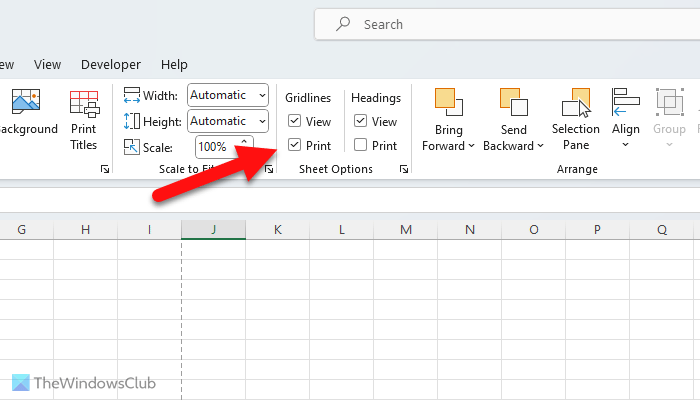
To print a background grid in Excel, you need to open the spreadsheet and go to the Page Layout tab. Then, head to the Sheet Options panel. Next, find the Print menu and tick the corresponding checkbox. Following that, you can press Ctrl+P to go to File > Print to start the printing process. If no data is available, it will print only cells.
Leave a Reply