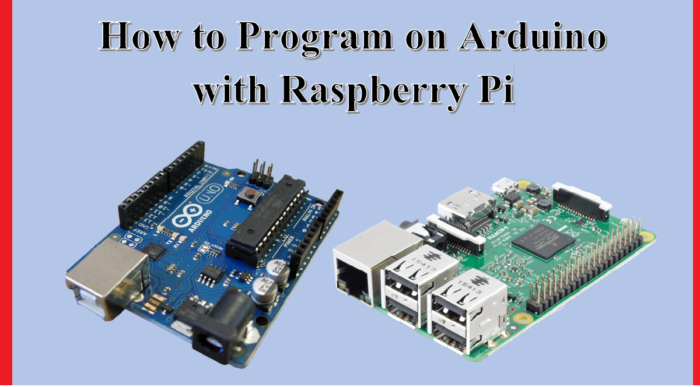
You must have heard about Arduino UNO and some of you also have developed programs in Arduino UNO by using Arduino IDE. Arduino is an open-source microcontroller based on easy-to-use hardware and software, whereas Arduino IDE (or Arduino Software) is an Integrated Development Environment. We know that the program in Arduino UNO is easy, but have you ever tried to do the program with a Raspberry Pi? Raspberry Pi is a series of small single-board computers that can be plugged into a computer monitor, keyboard, and mouse. In this post, we will show you how to program on Arduino with Raspberry Pi.

Components we need
- An Arduino UNO with IDE
- A Raspberry Pi with Raspberry Pi OS
- One USB Type-A to USB Type-B connector
- PC or Laptop
How to Program on Arduino with a Raspberry Pi
Download the Arduino File

First of all, you need to download the Arduino IDE on your computer from its official site so that you can write the code and upload it to the Arduino UNO board. Now follow the below steps to do the complete downloading process.
- Navigate to your browser
- Just type Arduino IDE in the search box and press Enter
- Click on the first result and you will see the Download page of Arduino IDE
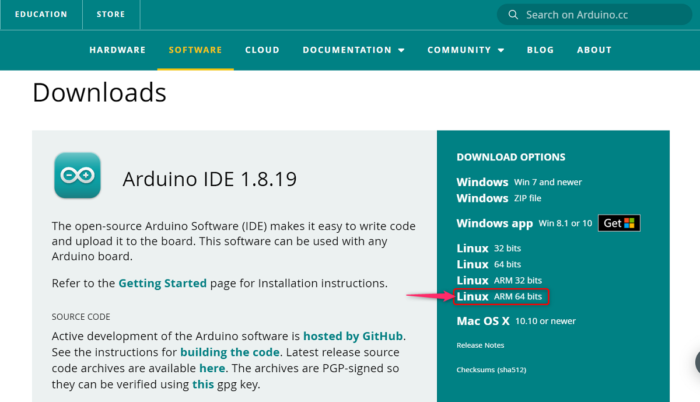
- Click on the Linux ARM 64 bits as shown in the above image or you can also choose this according to your OS.
- Now it will through you to pages where you will be asked to download or donate.
- Simply click on the Just Download button if you don’t want to donate.
- Arduino IDE will begin to download to your computer, just wait till the file has downloaded.
Hopefully, the Arduino IDE has been successfully installed on your computer. Now go to the installation process.
Extract and Install the File

Arduino IDE software has been successfully installed on your PC. Now you have to extract and install this file. Follow the below steps to do this process.
- You will find the download file in the Download folder (or whichever folder you choose) after downloading. Double click on it to open the Archiver app.
- The Archiver will open the file, there will be a circle toward the left that blinks red and green. Wait for it to finish before doing anything else.
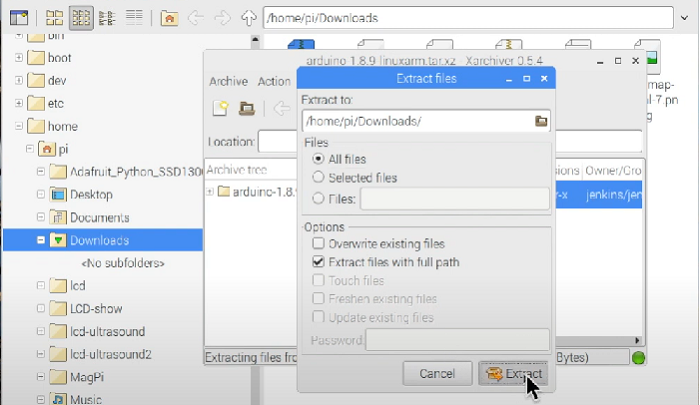
- Click on Extract files that are shown with the opened-up brown box.
- Now a new Windows will open, you can change the download location by editing in the top box. Click on the Extract button in the bottom right corner.
- Close Archiver, then go to the new folder and double click on the install.sh file
- Click on Execute in the new window
- The Arduino IDE should be available at Pi logo > Electronics > Arduino IDE
After downloading and successfully installing Arduino IDE on your PC, you have to write a program on IDE. Now, go to the below steps to do that.
Program on Arduino IDE

We have completed the Installation process, now it is time to do a program on Arduino IDE software. Follow the below steps to do this.
- Navigate to the Pi logo > Electronics > Arduino UNO
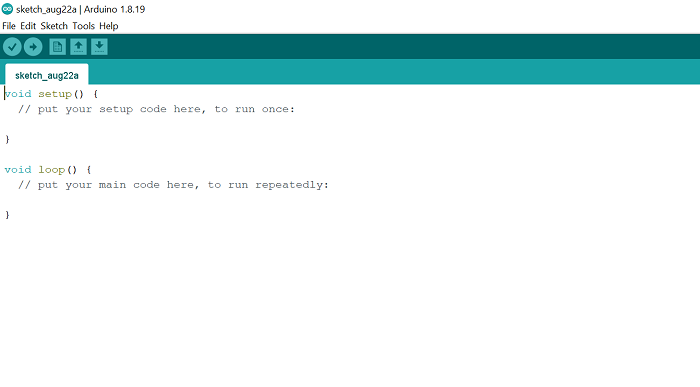
- Now you will find the green page as shown in the above image. Here you have to write the program.
- Copy the below code and paste it onto the green page
// the setup function runs once when you press reset or power the board
void setup() {
  // initialize digital pin LED_BUILTIN as an output.
  pinMode(LED_BUILTIN, OUTPUT);
}

// the loop function runs over and over again forever
void loop() {
  digitalWrite(LED_BUILTIN, HIGH);//turn the LED on (HIGH is the voltage level)
  delay(1000);                       // wait for a second
  digitalWrite(LED_BUILTIN, LOW);//turn the LED off by making the voltage LOW
  delay(1000);                       // wait for a second
}
- The above code will make the LED turn on for 1 second and vice versa.
- To save this code, press File > Save or you can directly save it by pressing Ctrl + S keys on the keyboard.
- Now connect the USB cable, the square side of the cable goes to the Arduino UNO while the rectangle side goes to the Raspberry Pi.
- To upload the code on Arduino UNO, click on Sketch > Upload or you can press Ctrl + U on the keyboard. It may take some time for the code to be uploaded.
- After uploading the code, the 13-number LED in the Arduino UNO will continue to turn on and off for 1-second.
What is Arduino UNO?
Arduino is an open-source microcontroller based on easy-to-use hardware and software. We can program on Arduino UNO by using Arduino IDE (Integrated Development Environment) software. You can use the USB cable to connect Arduino UNO to your computer. The Arduino programming language is simplified from the C/C++ programming language which is also called sketches. The Arduino UNO is designed for hobbyists, newbies, and anyone interested in creating interactive objects.
Also read: How to install Windows on Raspberry Pi?
What is Raspberry Pi?
A Raspberry Pi is a small, fully functional computer that can be plugged into a computer monitor, keyboard, and mouse. It is based on a microprocessor. Raspberry Pi supports its Linux-based operating system Raspberry Pi OS. It contains everything – CPU(Central Processing Unit), GPU(Graphics Processing Unit), GPIO(General Purpose Input/Output) pins, and power source connector.
Also read: Single Board Computer: Raspberry Pi vs Beagalebone vs Arduino.
Leave a Reply