Live Tiles as a prominent feature of Windows OS never really took off. So, when Microsoft did not implement it in Windows 11, the move didn’t come across as a big surprise. But users, who are still inclined on using the feature can check out the Live Tiles Anywhere app. It will let them put Live Tiles directly on their Windows Desktop.
How to put Live Tiles in Windows 11 Desktop
Live Tiles Anywhere is available as an app from the Microsoft Store and has one dedicated function – add the square-shaped tiles that contain a picture or a number to the start menu. Besides, it can also show notifications previews from apps. Let’s try and put the ‘Live Tiles Anywhere’ app in action and see how to create custom tiles on Windows 11 or Windows 10.
- Launch the app.
- Switch to the Custom Tiles tab.
- Enter the Tile Editor View to choose a tile size.
- Add visual branding, background, color, text color, etc.
- Save your changes.
- Preview your work.
- Pin the tiles to Start Menu or create widgets for the same.
An important feature of Live Tiles Anywhere app ships without ads and other paid additions. It’s completely free for use.
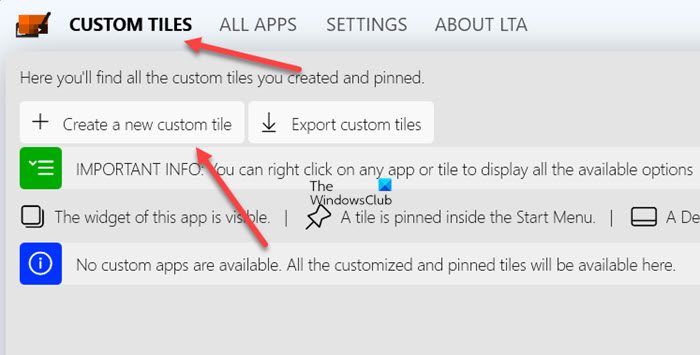
To create a custom tile, switch to the CUSTOM TILES tab in the upper-left corner of the app screen. Hit the Create a new custom tile button.
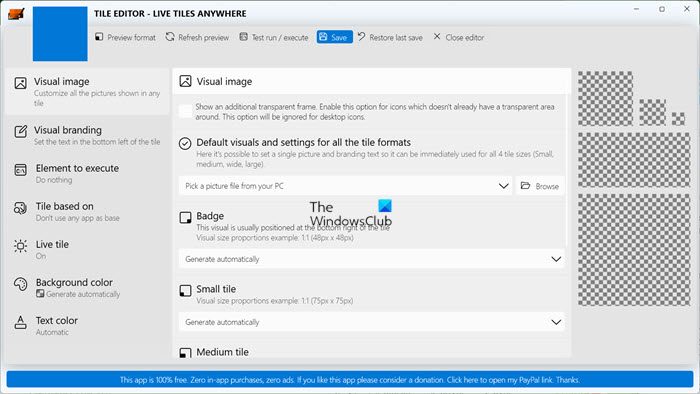
Instantly, you’ll be directed to TILE EDITOR screen. Here, under the Visual image heading, you can set a single picture and branding text so it can be utilized readily for all tile sizes. Choose the Generate automatically option or select Pick a picture from your PC.
For Badge, you can set the option to one of the following.
- Generate automatically.
- Generate from the default visual.
- Pick a picture from your PC.
Likewise, you can configure options for Small Tile, Wide Tile, Large Tile, Medium Tile and Large Tile as desired.
For any Custom Tile created, you can add text in the bottom left of the tile by moving to the Visual Branding tab. Its located just below the Visual Image heading. Set the desired option for all tile sizes.
The Element to execute function adds a handy option to open an installed app or a program/file/URL/protocol when a command is executed.
Once you have created a tile, you can modify its appearance by changing the color. Simply select the Customize option by hitting the drop-down menu next to it, select a color from the color Picker and generate a color from the Visual. Click Save, when done!
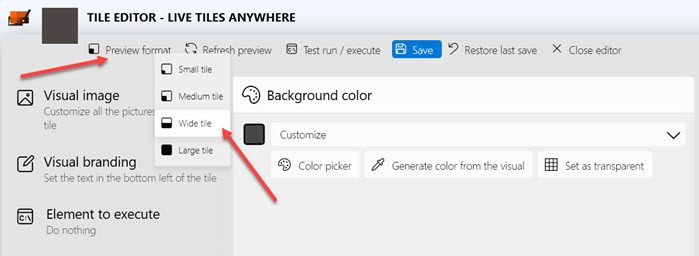
Now, click Preview format option to preview the appearance.
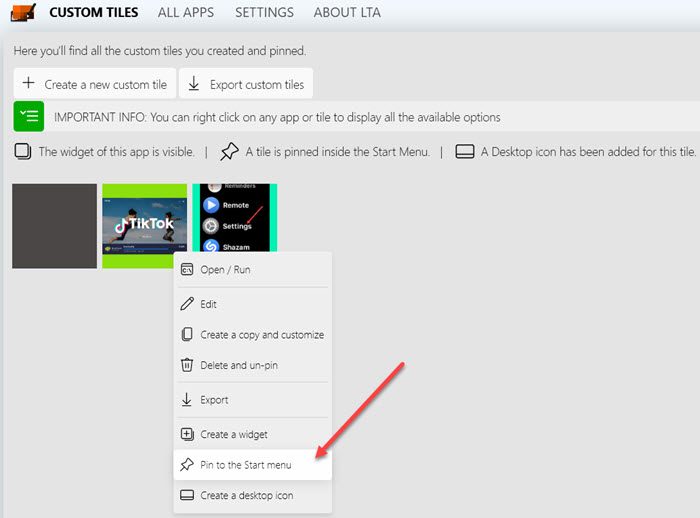
Go back to the CUSTOM TILES tab, right-click the tiles you would like to pin to the Start menu and choose the Pint to Start Menu option.
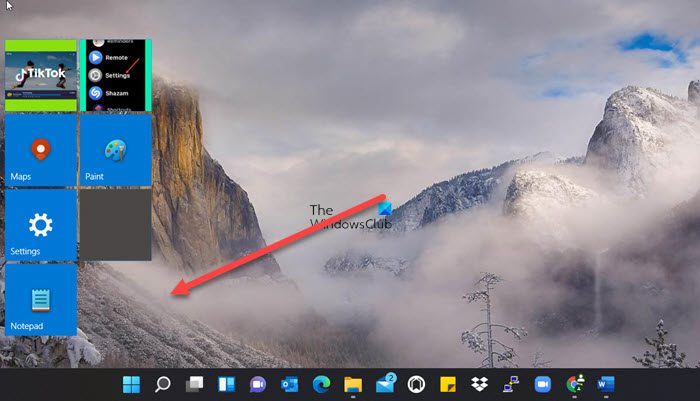
Honestly, for me, Live Tiles Anywhere did now work well with Windows 11. As you can see in the image above, it merely adds the app icons as tiles on your Desktop screen. So, when you click them, it opens the corresponding app. However, it’s quite compatible with Windows 10. We hope the developer adds support for Windows 11 soon. You can get it from Microsoft Store here.
How do I get to my widgets in Windows 11?
The most simple way to open widgets is by clicking on the Widget icon on the taskbar (it looks like a rectangular box with a white and blue split-screen). Another way is by pressing Win + W keys. On touchscreen laptops, widgets can be accessed by swiping from the left.
What happened to Windows Tiles?
Sadly, the Live Tiles feature has been stripped from Windows with the rollout of Windows 11. Also, its maker – Microsoft, stopped updating them on Windows 10 shortly after the phasing out of the Windows Mobile ecosystem. If you still want the Tile feature, you will need to find software that can emulate that.