Sharing your PC with other members in the house makes it obvious to have separate user accounts. The good thing is you don’t need a Microsoft account to add a new user profile in Windows. Now if you ever feel the need to move a user profile to another drive, then this post will guide you.
Move User Profile Data Folders to another drive in Windows 11/10
Each user profile has a set of documents, pictures, downloads, and other data saved on the device. Over time, these items can grow significantly, and you may need to move them to a separate drive. Also, by moving your user profile data to another drive you will create a sort of emergency backup, preventing any permanent loss, in case you decide to reinstall your operating system at a later point.
- Select a drive.
- Create a new folder under it.
- Go to This PC > Local Disk (C:) > Users > User Name.
- Right-click the folder and select Properties.
- Switch to the Location tab.
- Hit the Move button.
- Select the newly created folder under the target drive.
- Hit Yes and wait for the files to be moved.
Let’s cover the above steps in some detail now!
Select a new drive where you would like to place the contents of a user profile.

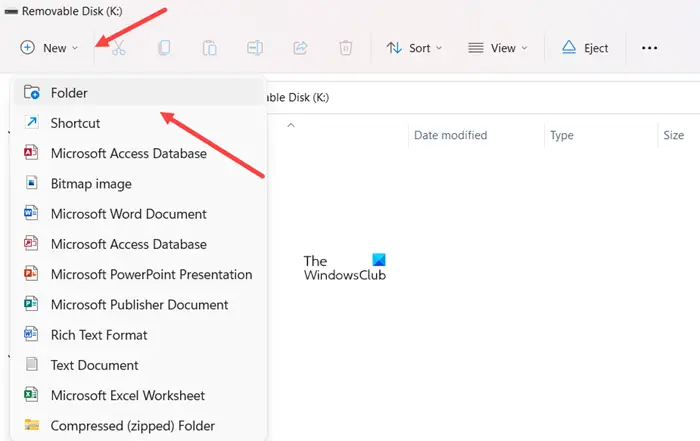
Create a new folder there and name it as New User or anything of your choice.
Now, click This PC heading in the left navigation pane of your File Explorer and go to the location of your user profile as follows – This PC > Local Disk (C:) > Users > User Name.
Now, right-click the folder you would like to move to a different drive and choose the Properties option.
Read: How to migrate a User Profile to another new Windows PC.
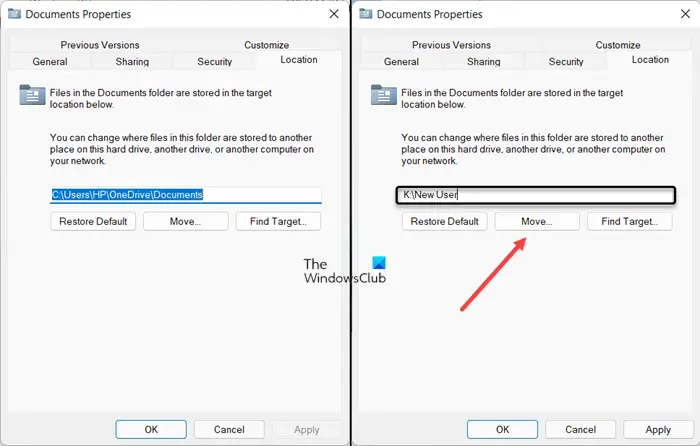
When the Properties dialog box opens, switch to the Location tab. Hit the Move button and select the newly created folder under the target drive.

Click the Select Folder button at the bottom. When prompted with a message, click the Yes button.
Allow the process to finish!
Similar read: Change default Save location for Documents, Music, Pictures, Videos.
Re-locate User profile directory in Windows 10 using Profile Relocator
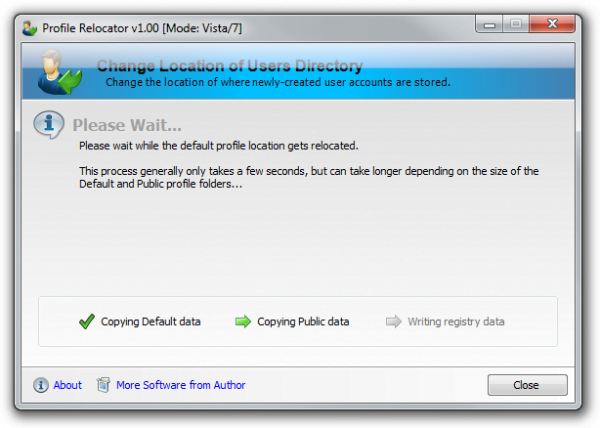
Profile Relocator is a step-based application that allows re-locating the Windows User profile directory. If your User Profile is corrupted, you may want to consider this tool.

Once re-located, any created profiles will appear in the new location in their entirety.
The advantage to doing this is that it allows profiles to be stored in a location that doesn’t reside on the system drive, ensuring that profile data isn’t compromised as a result of re-installation or system failure.
Please note that this application should ideally be used on new installations of Windows; Profile Relocator should be used, and then the final profile should be created. Do read the included documentation for step-by-step information.
Profile Relocator will not move existing profiles, as this can be dangerous.
Profile Relocator has been designed to work with Windows 10/8/7/Vista. You can visit its home page to download it.
TIP: How to transfer user profiles manually may also interest you.
What is a Computer User Profile?
A user profile in Windows refers to a collection of settings and information associated with a user. It contains vital information that is necessary to identify a user associated with it. This includes name, age, profile picture, and other individual characteristics.
Read: User Accounts Settings in Windows 11.
What are two types of Windows User Profiles?
Windows clients support two kinds of User Profiles namely, Local User Profiles and Roaming User Profiles. As the name suggests, Local user profiles are stored on the client computer whereas Roaming user profiles are stored in a central location on the network, generally a shared folder on a file server.
Leave a Reply