The way in which videos are made and shared these days have come a long way. Unless you are a professional YouTuber, high video qualities like 2K or 4K can seem wasteful and a bit of an overkill since most videos are used for casual recreational and sharing purposes. If you do come across a video that is too big to be shared or uploaded, you may want to reduce its size. So today, I’ll be suggesting some hassle-free ways in which you can do so. I will be discussing freeware as well as a free online tool.
What impacts a video’s size?
The two most common ways in which you can reduce a video’s size without impacting its quality is by either trimming the footage down or removing audio from the video. You can bring your video’s resolutions down, but that will take a toll on its quality, although tools and software try their best to make the impact as minimal as possible. The resolutions that you choose to go with largely depend on the device that your video will be broadcast on. The bigger the screen of your device, say television or a home projector, the higher the resolutions you would need. So, one should modify their videos accordingly.
Several other factors can play a role in the varied video sizes like video codec and the bitrate. Video bitrate is the amount of data that is used by a video per second. Different videos require different bitrate to stream without losing their quality, depending on their resolution and frame rates. The video codec is used to encode a video and compress its data. Different codecs provide different compression ratios, depending on the contents of the video. For example, the H.265 codec offers a 50% better compression ratio than the H.264 codec.
How to reduce Video file size in Windows 11/10
You can reduce video size without losing quality by using free video compressor software or an online tool.
ShotCut free video compressor software

ShotCut is a full-fledged video editing tool used by people far and wide to efficiently cut down on the size of their videos. In order to edit a video on ShotCut, you have to follow the steps mentioned below:
- Download & install ShotCut, open it and import a video file using the ‘Open File’ option.
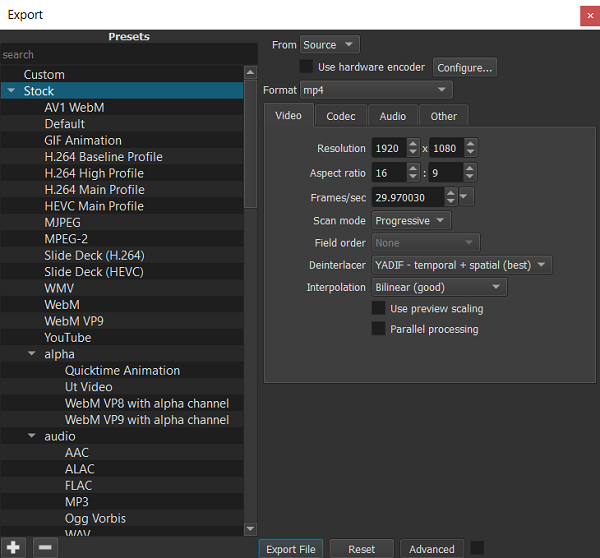
- On the top-right corner, you’ll find an option by the name of ‘Export,’ clicking on which will open a plethora of options.

Using an H.264 profile is good enough to cut down on the video size without giving up too much on its quality, and it is what ShotCut itself claims to have done the job for most of its users.
- You will find options to compress your videos in the export settings. You can also play around with the resolutions and aspect ratios. However, you should make proportionate changes to your configurations unless you want a distorted video.
- Changing the output automatically modifies the attributes of the video, suppose you shift from HDV (1080p HD film at 25 fps) to HDV (720p HD film at 29 fps). Your FPS and resolution will change automatically, as will your corresponding size. However, going smaller than the preset resolution will require you to manually calculate the appropriate dimensions.
VideoSmaller free video compressor online tool
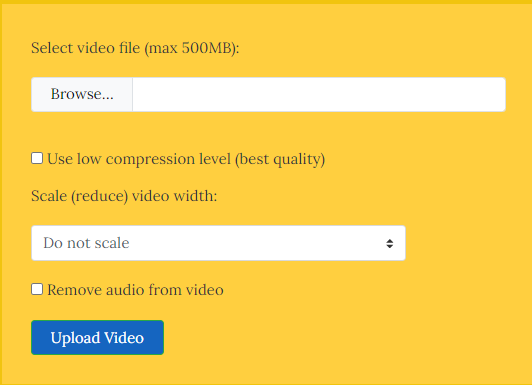
Compatible with both Mac and Windows, VideoSmaller is a clean, easy-to-use video compressing tool. The first thing you’ll notice is that it first offers you to use a lower compression level on the video you upload. This would maintain the best quality but won’t reduce the size as much.

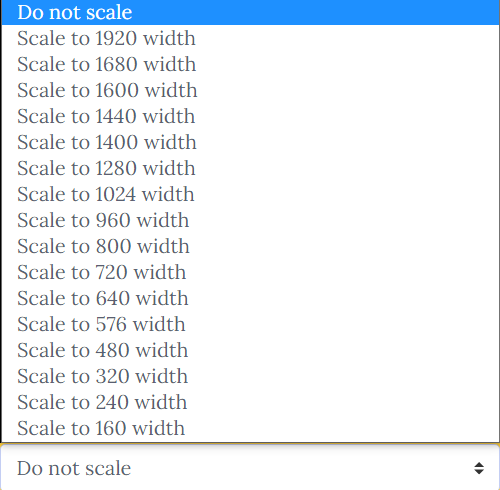
Alternatively, you can choose to scale your video. The option to do so is right below the low compression setting, in the form of a dropdown with all possible dimensions. This would impact your video quality, the significance of the impact would depend on how much you choose to scale it back, but it would reduce the file size considerably.

On the bottom is an option for you to rid the video of any sound. This, as mentioned above, has bearings on the file size. So, if your video is something that isn’t in any need of audio, you can check this setting too. On the window where you can upload your video is a warning that VideoSmaller can only take videos up to 500MB, but this isn’t something to be worried about, because it takes hours and hours of footage off of, say, a smartphone, to rag up 500 megabytes. VideoSmaller also claims to keep your uploaded videos off of its cloud, i.e., any video you upload will be removed from its servers a few hours after your work with it is done. Go here to use this tool.
You may experience some issues, like the website being too stuffed with ads, or that it can only work on one video at a time, in which case you have several alternatives like VideoSolo, YouCompress, etc.
In a scenario where you want to convert a DVD into an MP4 or an MKV video, HandBrake is the tool that would come in handy.
How do I reduce the MB size of a video?
To reduce a video’s MB size, you can use video compression software like HandBrake or online tools such as Clideo. Options include lowering the video resolution, reducing the bitrate, or converting it to a more efficient format like MP4.
How do I decrease the size of a video on Windows?
To decrease the size of a video on Windows, use a video compression tool like HandBrake. Install the software, open your video file, and adjust settings such as resolution, bitrate, or format to reduce size. Finally Export the compressed file.
Leave a Reply