If you want to set portable apps as default apps on Windows 11/10, you need to register them first. PORTABLE Registrator is one of the best apps that helps you register portable apps on Windows 11 and Windows 10. Here is how you can use it to register any portable app on your PC.

Let’s assume that you do not want to install an app but want to set it as the default app to open a specific type of file or link. It could be email, URL, or anything else. However, the problem is you cannot set a portable app as the default app until you register it first. It is possible to do that with the help of the Registry Editor. However, that method might not work all the time for all portable apps. That is why you can use the PORTABLE Registrator app to get it done.
PORTABLE Registrator has two options – you can register and unregister any portable app. However, that app must be present on your computer, and you cannot change the location of the app once it is registered via this app. As of now, it allows users to register web browsers and email clients. Therefore, if you have such an app and want to register it with PORTABLE Registrator, you can do the following.
How to register a Portable app as Default program in Windows 11/10
PORTABLE Registrator is a free tool that helps you register a portable app as a Default program & add an entry to the Open With item in Windows 11/10. To register portable apps on Windows 11/10 using PORTABLE Registrator, follow these steps:
- Download the app from GitHub.
- Double-click on it to open the window.
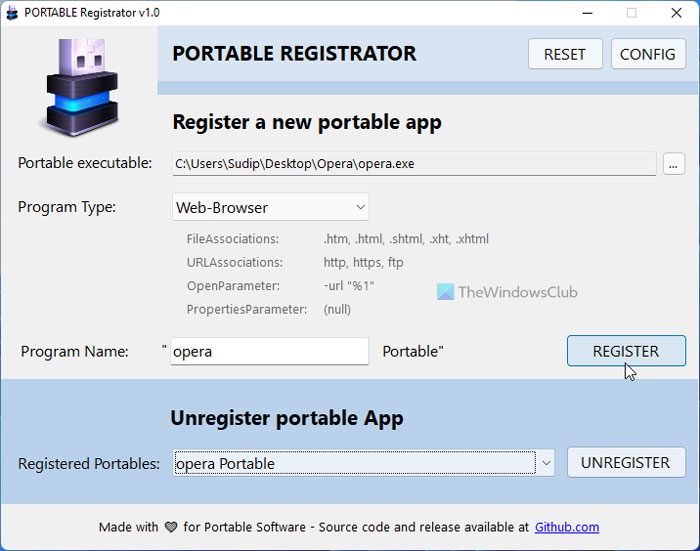
- Click the Browse button to select the portable app’s path.
- Choose the Program Type.
- Name the program.
- Click the REGISTER button.
Using PORTABLE Registrator for Windows
First, you need to download the app from GitHub. The best thing is that you do not need to install this app since it is also a portable app. Therefore, double-click on the executable file to open the window.
At this moment, you must have the portable app you want to register and set as the default app on your PC. However, if you do not have it on your computer, you can download the app.
Once done, place the portable app somewhere permanently. Then, click on the Browse button and choose the .exe file or the executable file of the portable app.
Then, expand the Program Type drop-down list and choose either Web-Browser or Mail-Program option as per the app.

After that, you need to name the app. By default, it fetches the name from the executable file. However, if you like, you can enter a different name as per your requirements.
Finally, click on the REGISTER button to register the app on your Windows 11/10 PC.
If you want to set it as the default app, you need to open Windows Settings > Apps > Default apps > Choose defaults by link type. Here you can find the portable app on the list.
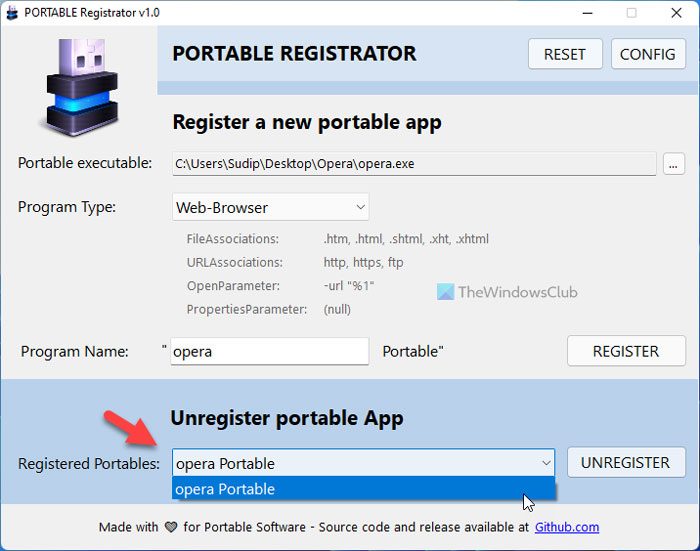
However, if you do not want to use the portable app and want to unregister it, you need to select it from the Registered Portables drop-down list and click the UNREGISTER button.

That’s all! If you like, you can download PORTABLE Registrator from github.com.
How do I run a portable program on Windows 11/10?
To run a potable program on Windows 11/10, you need to double-click on the file since it doesn’t require any installation. However, if you want to set it as the default app, you need to register it first. For that, you can use the PORTABLE Registrator app. A detailed guide is mentioned above, and it is recommended to follow it.
How do I add a portable app to my Start menu?
To add a portable app to the Start Menu in Windows 11/10, you can right-click on the executable file and select the Pin to Start option. You can find it in the context menu on your Windows 11 PC. However, the shortcut will be removed or will not be working once you remove it from your PC.
Read:
Leave a Reply