This post will show you how to remove or blur Background with the Photos App in Windows 11. Microsoft Photos is the default photo viewer and editor application included with Windows 11. It offers many features for organizing, viewing, editing, and sharing photos. Recently, some new features have been added that allow users to remove and blur the background of photos.

How to remove or blur Background with Photos App in Windows 11
To remove or blur the background with the Photos App, follow these steps:
Right-click on the photo you want to edit, and select Open with > Photos.
Once the photo opens, click the Edit image option at the top or press Ctrl + E.
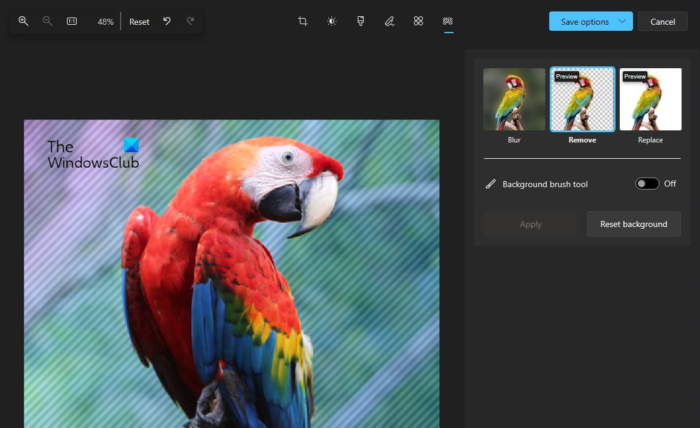
Here, click on the Background tab on the toolbar and select what you want to do, i.e, Blur, Remove or Replace the background.

- Clicking on the Remove option will remove the background.
- Clicking on the Replace option will allow you to enter a new background to the image.
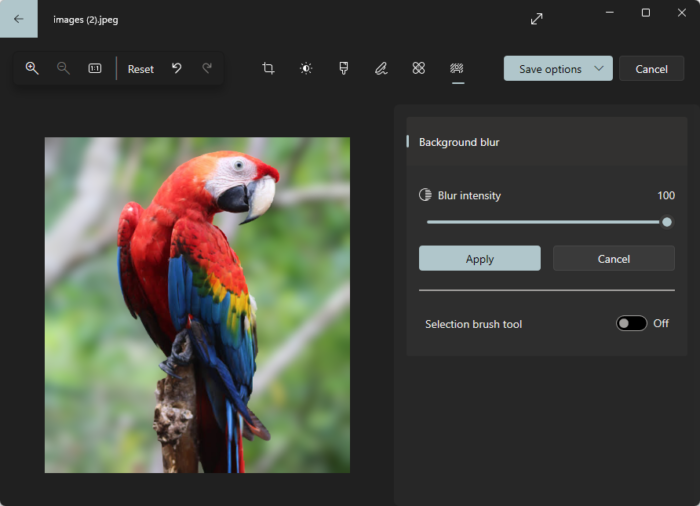
- Clicking on the Blur option will open the blur options; here, you can increase or decrease blur intensity, brish size and softness.

Once done, click on Save options > Save to save the image.
Read: How to Blur Image Background in Photoshop
I hope this post helps you.
How do I remove the background from a picture in Windows 11?
To blur a picture’s background in Windows 11, open the Photos app and select your image. Here, click on the Edit image option, select blur and use the slider to adjust the blur intensity.
Read: How to remove the Background from a Photo using GIMP
Does Windows 11 have a photo editor?
Yes, Windows 11 does have a built-in photo editor. The Photos app’s feature allows users to refine images with different tools. Users can also use AI-driven functions like automatic background blur and photo search capabilities.
Read: Best free Background Removal software | Blur Image Background software.
Leave a Reply