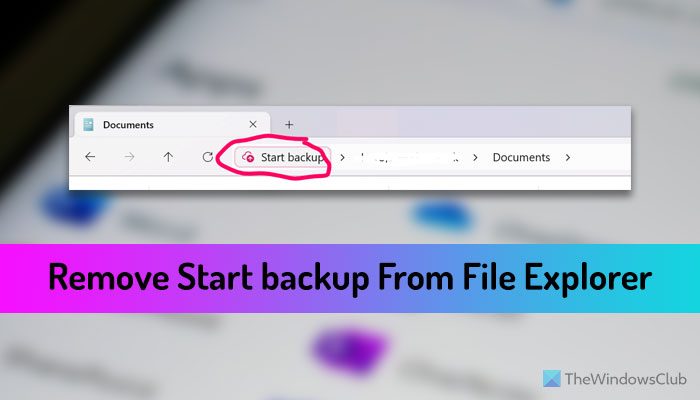
If you want to remove the Start backup option in the File Explorer of Windows 11, here is how you can do it. There are multiple ways to disable or hide the Start backup option from the File Explorer, and here we have enlisted some of the working methods so that you can get it done quickly.

Before starting, you must know that this option is directly related to the OneDrive. It appears in the File Explorer’s path when you open a certain Library folder such as Document, Pictures, Music, etc.
How to remove Start backup in File Explorer of Windows 11
To remove Start backup in File Explorer of Windows 11, follow these methods:
- Close OneDrive app
- Using OneDrive Settings
- Using Registry Editor
To learn more about these methods, continue reading.
1] Close OneDrive app
As said earlier, this option is a part of OneDrive. It helps you backup your important files to the OneDrive so that you can access them from anywhere. In other words, the Start backup option appears only when OneDrive is running on your computer. That being said, if you close the app, it will hide the option as well.
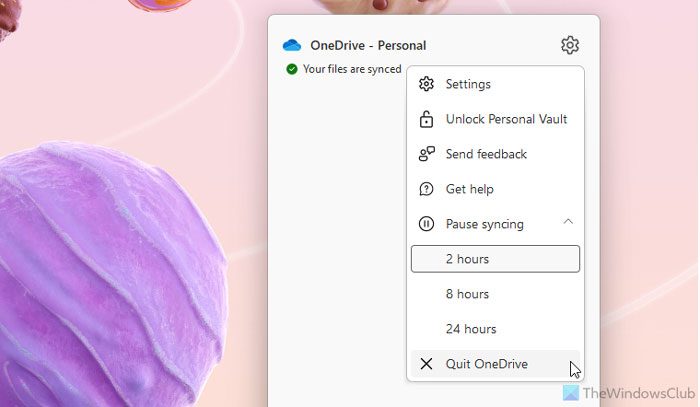
Although you can use Task Manager to close the app, you can also use the native option of OneDrive. For that, click on the OneDrive app in the system tray first. Then, click the settings gear icon and select the Pause syncing option.

Finally, click on the Quit OneDrive option.
Although it helps you hide the option, this is a temporary solution. Whenever you open the OneDrive app, the same option will appear again.
2] Using OneDrive Settings

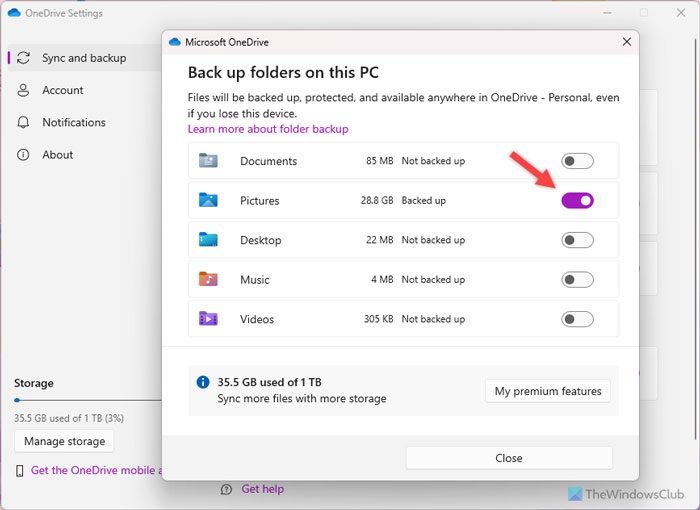
It is possible to select folders you want to back up to OneDrive. If you deselect the folder, the option will not appear again. Therefore, to remove the Start backup option in File Explorer using the OneDrive Settings panel, follow these steps:
- Click on the OneDrive icon in the system tray.
- Click the settings gear icon and choose the Settings option.
- Switch to the Syns and backup tab.
- Click on the Manage backup button.
- Click the toggle button of the respective folder.
- Click the Close button.
3] Using Registry Editor

You can disable OneDrive’s backup functionality using Registry Editor as well. Indirectly, it will remove the Start backup option too. For that, do the following:
- Open the Registry Editor on your computer.
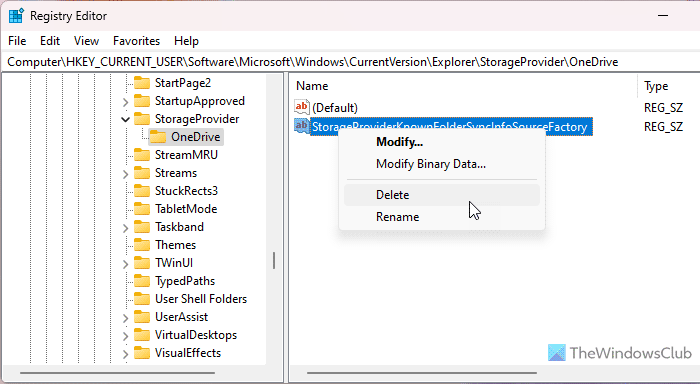
- Navigate to this path:
HKEY_CURRENT_USER\Software\Microsoft\Windows\CurrentVersion\Explorer\StorageProvider\OneDrive - Right-click on the StorageProviderKnownFolderSyncInfoSourceFactory String Value.
- Select the Delete option.
- Click the Yes button.
- Restart your computer.
I hope these methods have helped you.
Read: Completely Uninstall OneDrive using Command Prompt in Windows
How do I turn off Windows backup in Windows 11?
To turn off OneDrive’s Windows backup in Windows 11, you need to open the OneDrive Settings wizard first. You can right-click on the OneDrive icon in the system tray and select the Settings option. Then, go to the Syns and backup option and click on the Manage backup button. Following that, deselect all the folders and click on the Close button.
How do I get rid of Start backup?
To get rid of Start backup, you have three options: close the OneDrive app, deselect the folders you selected for backup, or delete a certain String Value from the Registry Editor. If you do not use this option or are not going to use it in the near future, you can uninstall the OneDrive app. However, using the second method seems to be wiser.