When you plug in your USB drive, do you see a UEFI NTFS partition? Do you know why Windows Explorer is displaying such a partition? If not, then you are at the right place! That partition usually occurs when you use Rufus to make a bootable USB drive. This post will discuss this topic and guide you on deleting the UEFI NTFS partition from the USB drive.
What is UEFI NTFS?
UEFI NTFS is a generic bootloader made to boot from NTFS or exFAT partitions in pure UEFI mode, even if your system doesn’t support it by default. This is mainly meant to be used with Rufus, although it can also be used independently.
How to remove UEFS NTFS Partition from the USB drive?
This part will provide the proper steps to remove the UEFS NTFS partition from the USB drive. We will be using the Diskpart tool, which is a command line tool.

- Connect the USB drive to your PC.
- Open Windows Terminal with admin permission
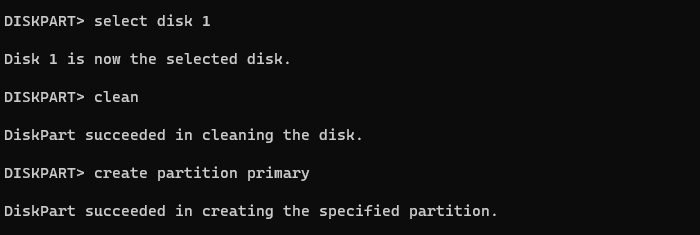
- On the terminal, type diskpart and press the Enter key to open the DiskPart tool.
- Type listdisk and press the Enter key to get the list of disks again.
- Make a note of the USB disk number, and then Type select disk <disk number>
- Type clean and press the Enter key, and wait for it complete
- Post that, type create partition primary and press the Enter key
When the process is complete, you should receive a message as—DiskPart succeeded in creating the specified partition.
Note: Choose the correct partition; otherwise, you may lose all your valuable data.
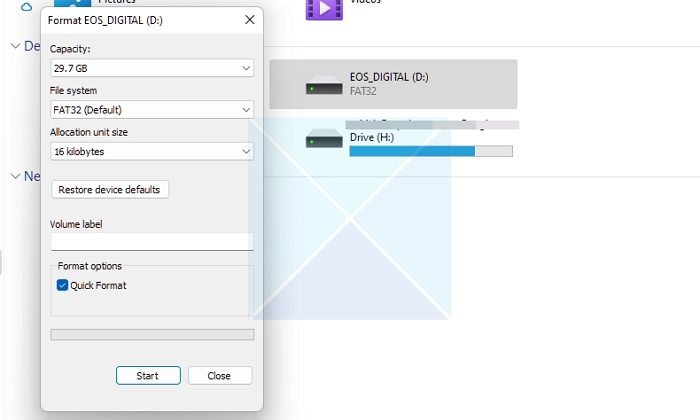
At this stage, the USB drive will not be accessible. It would be best if you formatted it. Since we have created the primary partition, any error, such as the drive showing Unknown Capacity, will not appear.
Open File Explorer
Right-click on USB, and click Format disk.

Select the File System as either FAT32 or NTFS and click Start.
Once the formatting is completed, check whether the UEFI NTFS partition is still showing.
Important:
If you try to access the USB driver after running the CLEAN command either through the Disk Management tool or File Explorer, it will not work. Since the disk space is unallocated, there will be no operation that can work on it.
Conclusion
If you are still following this post, you must have learned how to remove the UEFI NTFS partition from the USB. Follow the steps above and choose the right drive for deletion; otherwise, you may lose important data.
What’s the Need for Deleting the UEFI: NTFS Partition?
There may be several reasons for deleting the UEFI: NTFS partition like
- Suppose you want to make a bootable USB drive for a different operating system. In that case, you may need to delete the UEFI partition and replace it with a new partition scheme that works with the other operating system.
- The UEFI partition might take up a lot of space on the USB drive, which can be problematic if the disk is small. If you delete the partition, this space can be used for other data or apps.
- In some situations, the UEFI partition on a bootable USB drive can make it incompatible with certain PCs, creating boot errors and other problems. These problems can be resolved by removing the partition.
Read: Cannot delete Disk Partition as Delete Volume option is greyed out.