If you want to remove a virtual camera from Windows 11/10, here is how to do it using the Windows Settings and Device Manager. Whether you want to remove a mobile camera or any other third-party camera, this step-by-step guide will help you do that.
What is a virtual camera in Windows?
A virtual camera is software that emulates a physical webcam. It allows you to create or use custom video or audio by combining various sources like your screen, webcam, images, videos, etc.
If your computer doesn’t have an in-built camera or you just want to use a mobile phone or any other third-party better camera as a webcam, you need to add it as a camera. Using such a method with or without a USB cable adds it as a virtual camera. Similarly, using the Phone Link app, you can find it at a specific location in the Windows Settings. If you cannot access that third-party camera, you can simply remove it from your Windows PC.
How to remove virtual camera from Windows 11/10
To remove virtual camera from Windows 11/10, follow these steps:
- Press Win+X and select Device Manager.
- Click on View > Show hidden devices.
- Expand the Cameras section.
- Right-click on the camera and select the Uninstall device option.
- Click the Uninstall button.
To get started, you need to open the Device Manager first. Although you can use the Start Menu or the Taskbar search box to open it, you can use the Win+X menu as well. In that case, press Win+X and select the Device Manager from the menu.
Next, you need to show the hidden devices as these inactive virtual cameras may not be visible all the time. For that, go to View and select the Show hidden devices option.
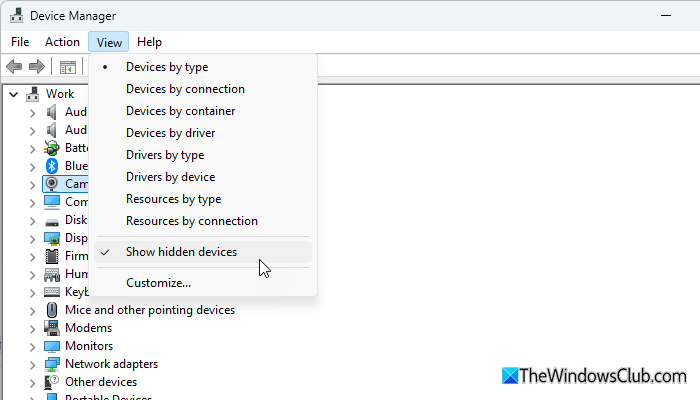
Then, expand the Cameras section. Here, you can find all the cameras, including virtual cameras. Right-click on the camera you want to delete and select the Uninstall device option.
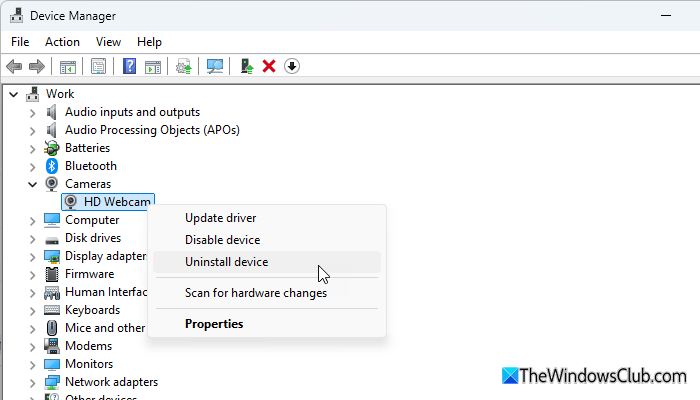
Finally, click on the Uninstall button to confirm.
Once done, it will be removed immediately. However, if you use the Phone Link app to turn your mobile camera into a webcam, but do not want to use it anymore, you have a different option to disable it.
Uninstall or disable Virtual Camera from Windows Settings
To uninstall or disable virtual camera from Windows 11/10 using Windows Settings, follow these steps:
- Press Win+I to open Windows Settings.
- Go to Bluetooth & devices > Mobile devices.
- Click on the Manage devices button.
- Expand the mobile phone’s settings.
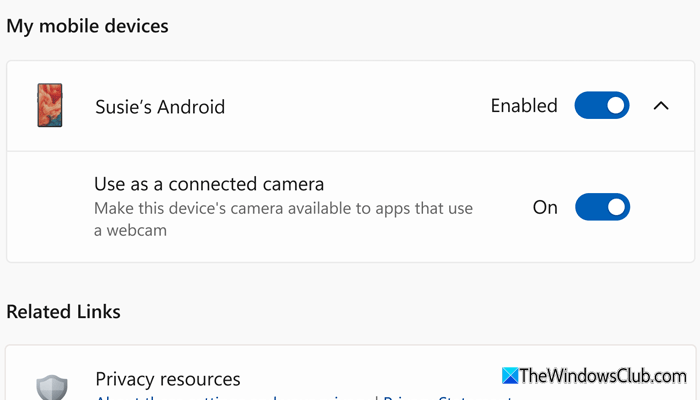
- Toggle the button to turn off the Use as a connected camera setting.
First, open Windows Settings by pressing Win+I. Then, go to Bluetooth & devices > Mobile devices and click on the Manage devices button.
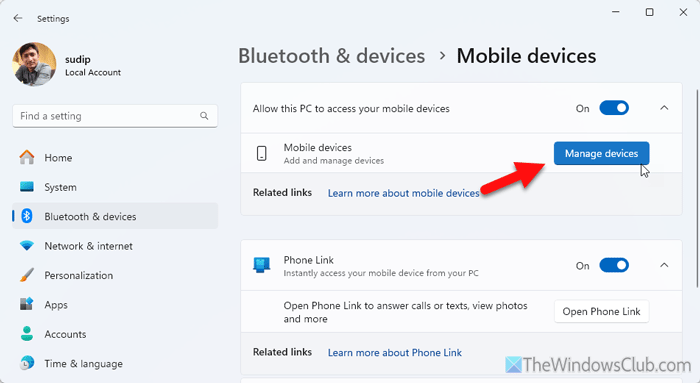
Here you can find all the mobiles you have connected so far. Click on the phone and toggle the Use as a connected camera button to turn it OFF.
That’s all!
Read: How to disable Camera using Group Policy or Registry Editor
How do I delete virtual camera?
To delete the virtual camera, open the Device Manager and expand the Camera menu. Then, right-click on the camera you want to remove, and select the Uninstall device option. Next, click the Uninstall button to confirm.
How do I disable the Windows Virtual Camera Phone Link?
To disable the virtual camera in the Phone Link, open the Windows Settings, go to Bluetooth & devices > Mobile devices, and click on the Manage devices option. Expand the mobile device and toggle the Use as a connected camera button.
Read: How to Move or Remove Camera Roll and Saved Pictures folders.