This article will show some easy ways to rename an external hard drive in Windows. Some users get confused, especially with generic labels like “HDD” or “Drive E, D, etc.” You can rename them on your Windows PC easily.
How to rename External Hard Drive in Windows 11/10
You can rename the External Hard Drive on your Windows 11/10 PC, by following any one of these five methods:
- By using Disk Management
- By using File Explorer
- By using the Properties window
- By using the Command Prompt
- By using Windows Settings
Let’s start.
1] By using Disk Management
The first method to rename an External Hard Drive in your Windows PC is by using Disk Management. Use the following instructions:
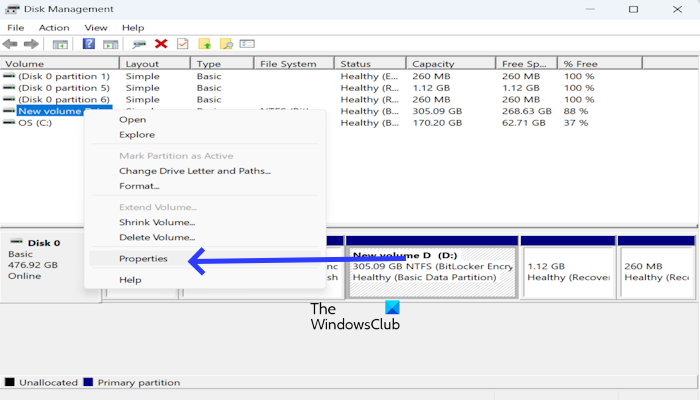
- Press the Win + R key to open the Run dialog box.
- Type diskmgmt.msc and click OK to open Disk Management.
- Right-click your external drive and select Properties.
- Under the General tab, type a new name for your external hard drive and click Apply.
- Now, click OK.
Read: How to rename Hardware in Device Manager
2] By using the File Explorer
You can rename an External Hard Drive in your Windows PC by using the File Explorer method. To do so, use the below steps:
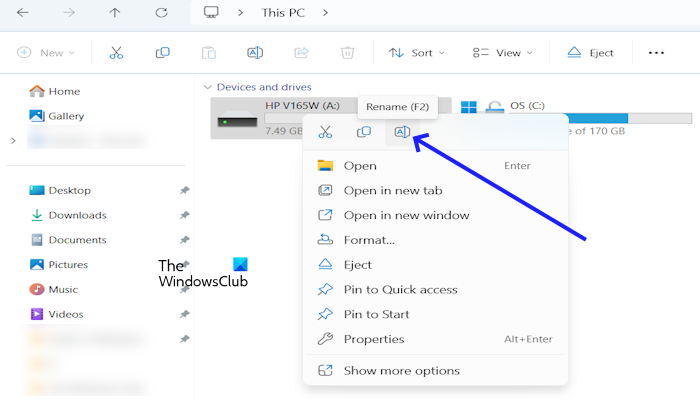
- Open File Explorer Windows key + E and navigate to This PC.
- Expand Devices and drives and right-click your external drive which you want to rename.
- Select “Rename.” Alternatively, you can also press the F2 key. The F2 key is used to rename files and folders on Windows 11/10.
- Type a name, and press Enter.
Read: How to rename a Bluetooth device in Windows
3] By using the Properties window
You can also rename your external hard drive by using the Properties window. Check the below steps:
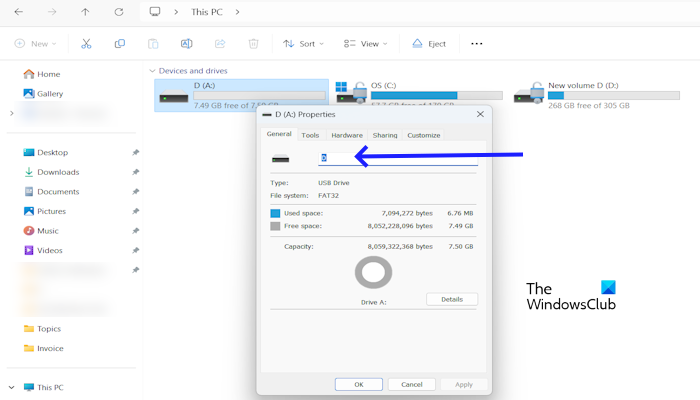
- Press Windows + E to open File Explorer.
- Click on This PC, right-click on the drive you want to change the name, and select Properties from the menu.
- Select and delete the current name and type a new name for your external hard drive.
- Now, click on OK and then Apply.
4] By using the Command Prompt
Rename an External Hard Drive in your Windows PC by using the Command Prompt method. Use the below steps:
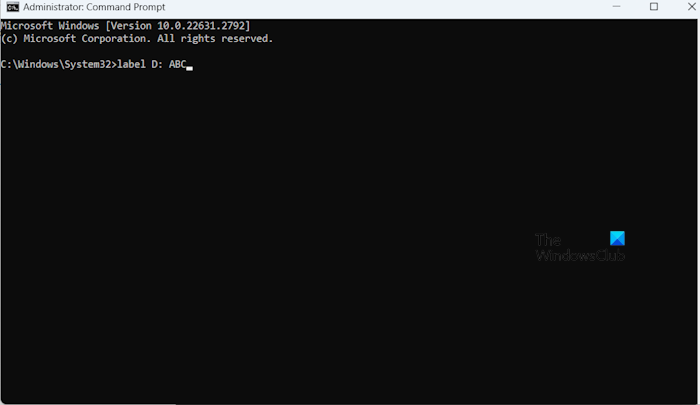
- Press the Windows key and type cmd.
- Right-click on CMD and Click on Run as administrator.
- Type the following command after replacing the <DriveLetter> with the external hard drive name or type the name you want to choose and then press Enter.
label <DriveLetter>: New name
5] By using Windows Settings
Windows settings also let you rename your external hard disk. To do so, use the following steps:
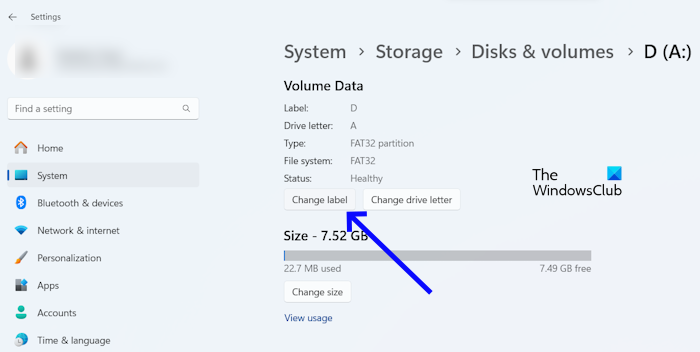
- Go to the Windows Settings.
- Click on System > Storage> Advanced storage settings.
- Click on Disks & volumes.
- Locate your external drive and select Properties.
- Now, type a new volume label on the Change Volume label window and click Apply.
That’s it. I hope this helps.
Read: How to rename an Audio device in Windows.
Why can’t I see my external hard drive?
There can be several reasons why you cannot see your external hard drive on your Windows 11/10 computer. Some of the most common reasons are faulty USB port, corrupted USB controller driver, etc.
How do I rename a drive letter in Windows 11?
You can rename a drive letter in Windows by using Command Prompt, Disk Management, PowerShell, Registry Editor, and Drive Letter Changer software.
Read next: How to create multiple System Images on a single external USB drive.
Leave a Reply