In this post, we will show you different methods to repair your Windows 11 or Windows 10 PC without data loss if you see any errors during its usage. Windows 11 is an upgrade from Windows 10. Though many worldwide still use Windows 10, Windows 11 is slowly making its way into those Windows 10 PCs. Like in Windows 10, we face many issues or errors if we are not careful on Windows 11. We can use different methods to fix them. In this guide, we show you different ways to repair Windows 11 if you face any errors on it.
How to repair Windows 11

There are many different ways you can use to repair or fix issues on Windows 11/10. We have listed a few methods that can be helpful when you face any issues with Windows 11/10.
- Run Troubleshooters on Windows
- Repair with Windows Updates
- Using System Restore
- Using Advanced Startup Repair options
- Using SFC scan to check System files
- Using DISM to repair Windows System Image
- Repair with Windows 11 Installation media
- Using Bootrec.exe to fix booting issues
- Using Reset this PC setting
- Using FixWin 11
Let’s get into the details of each method and know more about them.
1] Run Troubleshooters on Windows
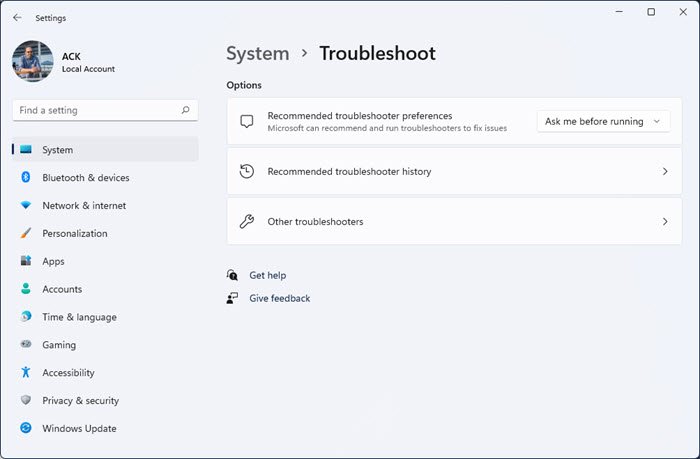
Troubleshooters available in the Settings app of Windows are the best way to fix basic errors or issues that we come across on Windows 11/10. There are different troubleshooters like Bluetooth troubleshooter that fixes issues with Bluetooth connections, hardware troubleshooter that fixes issues with your system’s hardware, Printer troubleshooter that fixes issues with your printer, etc. You can run troubleshooters on Windows according to your issues and fix the issues on your PC.
To run troubleshooters on Windows 11,
- Press Win+I on your keyboard to open the Settings app
- On the System page, scroll down to find Troubleshoot tab and click on it
- Then, click on the Other troubleshooters tab on the Troubleshoot page. You will see many troubleshooters. Just click Run beside the particular troubleshooter you need to run according to the issues you are facing on your PC. It will then run, find issues, and fixes them automatically.
Read: How to run Troubleshooter from the command line
2] Repair with Windows Updates
Windows updates fix the bugs that came with the previous updates and implement improvements in many aspects. We need to check and install all the pending updates if we see any errors on our Windows PC.
To update Windows 11,
- Press Win+I on your keyboard to open the Settings app
- Click on Windows Update in the left sidebar
- You will see the Windows update page. Click on Check for updates button to check and install if there are any pending updates.
Sometimes, we may find issues or errors after updating Windows to the latest version. We may have to roll back or uninstall the previous Windows updates to fix the errors and use our PC normally.
To Uninstall Windows Updates in Windows 11,
- Open the Settings app from the Start menu or use the Win+I keyboard shortcut
- Click on Windows Update on the left sidebar
- Then, click on Update History
- Scroll down to find Uninstall updates under Related settings. Click on it. A new Windows will open with all the updates in it.
- Right-click on the particular update you need to uninstall and select Uninstall
You can now also reinstall Windows 11 using Windows Update.
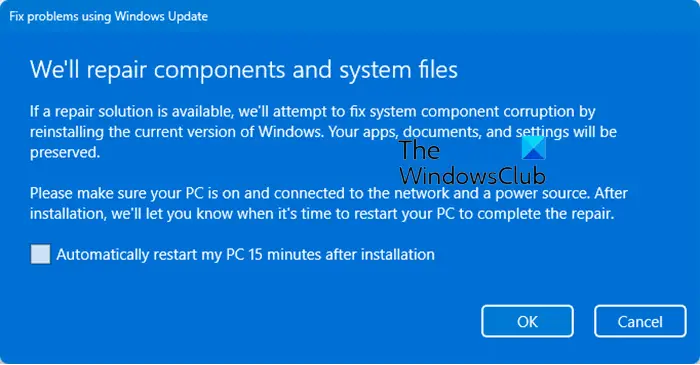
- Press Win+I to open Windows Settings
- Click on System settings on the left side
- On the right side, scroll down a bit and select Recovery.
- Locate the Fix problems using Windows Update section
- Click on the Reinstall now button.
Read: How to fix or repair corrupted or damaged Registry
3] Using System Restore
When you see any error on Windows, you can fix it easily using the System Restore point. With System Restore, you can take back your PC to the point where it was functioning properly without any issue.
To perform System Restore, do the following:
- Press Win + R. to open the Run command box.
- In the Run dialog box, type rstrui and hit Enter to launch the System Restore Wizard.
- On the System Restore window, click Next.
- At the next screen, check the box associated with Show more restore points.
- Now, select a restore point prior to when you noticed the issue on your device.
- Click Next to advance to the next menu.
- Click Finish and confirm at the final prompt.
Read: Basic Troubleshooting Tips for Beginners for Windows 11
4] Using Automatic Startup Repair options
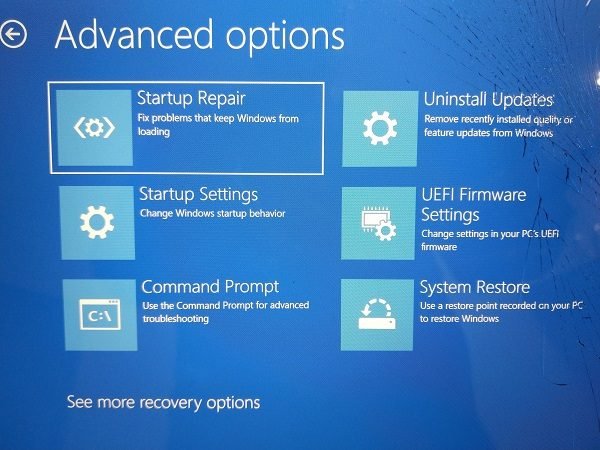
Windows 11 has a built-in Startup Repair Tool that you can use to fix any startup issues that you face on Windows 11. The Startup Repair will scan various aspects of Windows like system files, Registry, configuration settings, and others to find the issues and fix them automatically without our intervention.
To get into Startup repair options on Windows 11,
- Press Win+I on your keyboard to open the Settings app
- In the System settings, scroll down to find the Recovery tab and click on it
- On the Recovery page, you will find the Advanced startup tab under Recovery options. Click on Restart now button beside it
Related: Automatic Startup Repair is not working
5] Using SFC scan to check System files
System File Checker or SFC is a utility that comes by default on Windows located in the System32 folder. This utility allows users to scan for and restore corrupt Windows system files. If the issue you are facing on Windows 11 is related to missing files or something, you can run an SFC scan to fix them.
To run the System File Checker in Windows 11, type cmd in the Start menu. Click on Run as an administrator under the Command Prompt in the results. In the command prompt windows, enter the following command and press Enter.
sfc /scannow
Read: Run System File Checker in Safe Mode, Boot Time, or Offline
6] Using DISM to repair Windows image
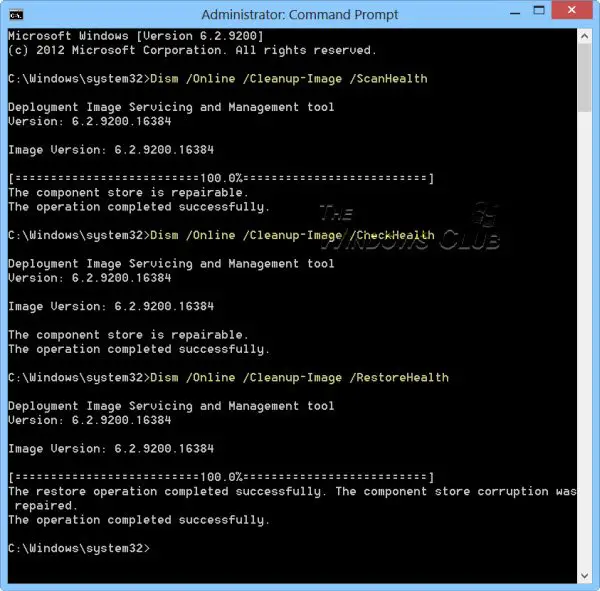
DISM or Deployment Imaging and Servicing Management is another command-line tool that is designed by Microsoft to service Windows images. You can run a DISM scan when you face any issues with Windows image or any other major issues.
To run a DISM scan, you need to open Command Prompt as an administrator and use the following commands.
To check if there are any corruptions in the Windows image file:
Dism /Online /Cleanup-Image /ScanHealth
This checks to see if a component corruption marker is already present in the registry:
Dism /Online /Cleanup-Image /CheckHealth
To fix the corruptions in the Windows image file:
Dism /Online /Cleanup-Image /RestoreHealth
Read: DISM vs SFC first? What should I run first on Windows?
7] Repair with Windows 11 Installation Media
This process involves Windows ISO, a bootable USB or DVD to repair your Windows. This method also helps you fix issues where Windows Advanced Options troubleshooting options are not accessible from within the Windows, you need to use a USB or DVD media.
To repair Windows 11 using installation media, first, you need to download the Windows ISO file from the official source, and then create a bootable USB or DVD and boot from the drive during the startup and select Repair your computer.
Read: Media Creation Tool: Create Installation Media or Upgrade PC
8] Using Bootrec.exe to fix booting issues
If your Windows 11 PC has any booting issues, you can use the bootrec.exe tool to fix them. To run bootrec.exe, you need to boot into Windows Recovery and then use Command Prompt to execute the bootrec commands.
To use Bootrec.exe,
- Boot your computer into Advanced Recovery Mode
- Launch Command Prompt available under Advanced Options
- Type
bootrec.exeand press Enter - Then, type
Bootrec /fixmbrand press Enter - To fix boot, type
Bootrec /fixbootand press Enter, to rebuild BCD, typeBootrec /rebuildbcdand press Enter
Then, restart your PC to use it normally without any issues.
Read: How to repair the EFI bootloader in Windows
9] Using Reset this PC setting
The easiest method to fix your Windows 11 PC when it is not working as it should be is to reset the PC. In most cases, the process runs after you click on Reset PC and finishes on its own. So, if you’re having trouble starting your machine, try resetting it first. You can choose to delete files or keep files in this process.
To reset your Windows 11 PC,
- Open the Settings app from the Start menu or use the Win+I keyboard shortcut
- Choose Windows Update from the left sidebar
- Go to Advanced Options.
- Then, choose the Recovery tab.
- Click on the Reset PC button.
- Follow the on-screen instructions and reset your PC. This process takes nearly an hour to complete and your PC will restart multiple times during the process. You need not panic because of it.
Read: How to reset Windows 11/10 without using the Settings app
10] Using FixWin 11
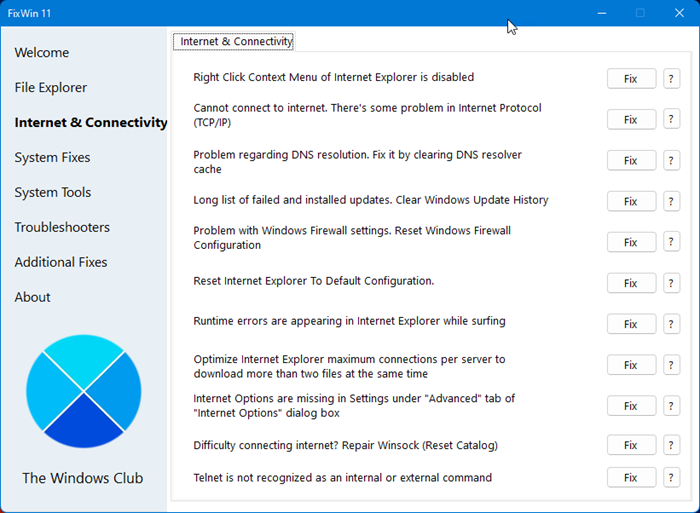
FixWin 11 Windows Repair Tool is the best free Windows repair software using which you can repair Windows 11 issues. It is a free tool that lets you fix issues on your Windows 11 PC without much of a process.
The fixes have been categorized under 6 tabs:
- File Explorer: Offers fixes to resolve problems relating to Windows File Explorer.
- Internet & Connectivity: Lets you fix Internet problems that you be facing after upgrading Windows OS
- System fixes: Offers fixes to several common Windows problems and includes an option to reset thumbnail cache, re-register all system DLL files and fixes for Windows Activation issues
- System Tools: Offers to fix built-in tools that may not be working properly. A new Advanced System Information tab displays some specific advanced information about your system, like the number of threads in the processor, number of logical processors, maximum display resolution, maximum refresh rate, etc.
- Troubleshooters: This section provides direct links to bring up the built-in Windows Troubleshooters and download links to other Troubleshooters released by Microsoft.
- Additional Fixes: Offers several other fixes for Windows 11 and Windows 10.
These are the different methods you can use to repair Windows 11.
Read: Windows Startup & Boot problems – Advanced Troubleshooting
Is there a way to repair Windows 11?
There are many ways using which you can use to repair Windows 11 without losing programs or data. You can use the Windows Installation Media, freeware FixWin, run SFC or DISM scans, perform System restore, run built-in troubleshooters, update windows or uninstall updates, etc.
Read: How to fix corrupted system files in Windows
How do I repair Windows 11 with Command Prompt?
You can use SFC and DISM commands on Command Prompt to repair Windows 11. SFC scan fixes if there are any issues with the system files and DISM Scan fixes if there are any issues with the Windows image file. You can also run Bootrec commands if you are facing issues during boot.
Read next: How to repair Broken Apps and Programs in Windows.