This is a guide on how to reset or clear CMOS in a Windows 11/10 computer. Sometimes, when your computer fails to boot or you face some other error, you may want to reset or clear CMOS in order to fix it. So, let us see how to do the same.

How to Clear or Reset CMOS in Windows 11/10
These are the ways by which you can reset or clear the CMOS of your Windows computer.
- Reset CMOS from BIOS
- Clear CMOS
Let us talk about them in detail.
1] Reset CMOS From BIOS

You can easily reset CMOS using the BIOS Menu. We are going to change all the BIOS settings to default in order to reset CMOS. Restart your computer and boot into BIOS.
When your computer starts, a screen will ask you to press a key in order to Boot into BIOS. The right key for your system could be F1, F2, F10, etc. – and it depends on your manufacturer. You may be able to see which key, in the bottom left or right side of your boot screen, when your computer is booting. So, make sure to pay close attention to the first screen that appears once you switch on your computer.
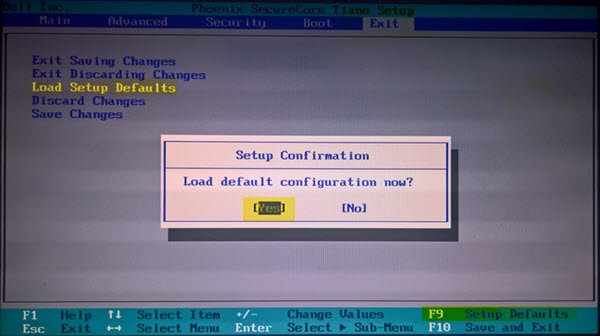
Once on the main screen, under the Exit tab (In the case of my HP PC) I could see a Load Setup Defaults option. You could select such a similar option on your system using the arrow keys and hit Enter. Or you could simply hit the F9 key to display a white screen that says Load default configuration now? Click on Yes.
Now, look for the option that has the word “default” in it. Usually, it is the button to reset your BIOS. Select it, save the changes (check your screen, you will see a key that you can press to save the settings), and exit BIOS.
Read: How to get BIOS key for Windows PC
2] Clear BIOS with Screwdriver or Jumper
If you cannot enter the BIOS setup during boot, follow the steps below to clear the CMOS. You may require the services of a hardware technician.
- Turn off all peripheral devices connected to the computer.
- Disconnect the power cord from the AC power source.
- Remove the computer cover.
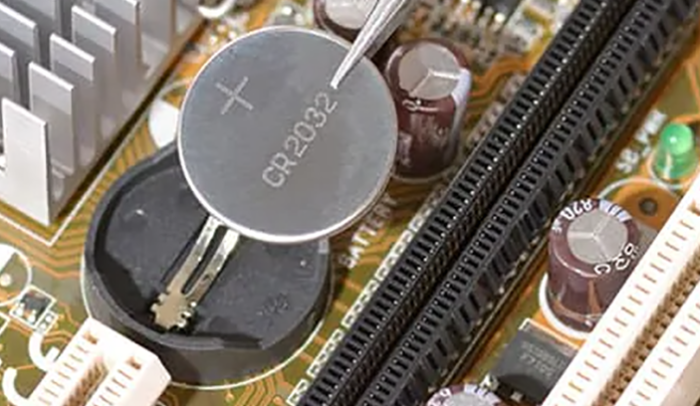
- Find the battery on the board. The battery may be in a horizontal or vertical battery holder or connected to an onboard header with a wire.
If the battery is in a holder, note the orientation of the + and – on the battery. With a medium flat-blade Screwdriver, gently pry the battery-free from its connector.
If the battery is connected to an onboard header with a wire, disconnect the wire from the onboard header.
- Wait one hour, then reconnect the battery.
- Put the computer cover back on.
- Plug the computer and all devices back in.
You can now try booting into BIOS – it should complete successfully.
Make sure you are grounded, otherwise, static electricity can damage parts of your computer
Alternatively, if you can use a Jumper there, set it to Clear or CLR position and restart your computer.
Make sure that you put the Jumper back after your computer has booted.
Hopefully, this post will help you reset or clear CMOS.
How to Factory reset Windows 11 from BIOS?
To factory reset Windows 11 from BIOS, you have to restart your computer and enter BIOS by pressing the BIOS key (F2, F10, or DEL) during boot. Once inside BIOS, locate Restore Factory Settings option. Click on it and ollow the on-screen instructions to reset Windows 11 to its factory settings.
Does resetting BIOS clear CMOS?
Yes, resetting the BIOS usually clears the CMOS. You can do this by entering the BIOS setup and selecting options Reset to Default or Load Setup Defaults. This will restore the BIOS settings to factory defaults, also clear the CMOS.
Leave a Reply