If you want to reset the Windows Subsystem for Android (WSA) on Windows 11, here is how you can do that. It is possible to reset WSA to the factory defaults with the help of an in-built or given option. However, you can do the same using Windows Settings as well.
Windows Subsystem for Android is the proprietary Windows platform that helps you run Android apps through Amazon Appstore. Although the WSA app comes with minimal or essential options, you can customize them as per your requirements. Let’s assume that you changed quite a few settings, and a particular feature is not working in Windows Subsystem for Android. At such a moment, it is better to reset it to get started with the predefined settings.
As mentioned earlier, there are two ways to set Windows Subsystem for Android on Windows 11 – using the in-built option and using Windows Settings. Depending upon the situation you are in, you can follow the method accordingly.
How to reset the Windows Subsystem for Android on Windows 11
To reset the Windows Subsystem for Android on Windows 11, follow these steps:
- Open Windows Subsystem for Android app on your computer.
- Find the Reset to defaults option.
- Click the Reset button.
To learn more about these steps, continue reading.
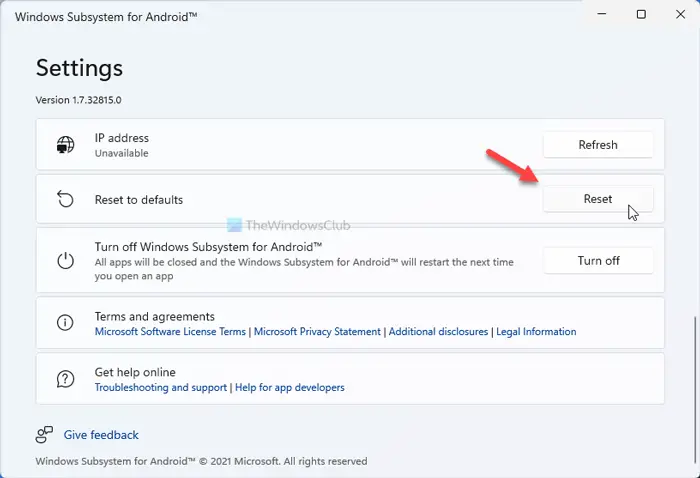
You need to open the Windows Subsystem for Android app first on your computer to get started with the process. After opening, you can find some options on your screen. You need to find out the Reset to defaults option.

Then, click the Reset button associated with it.
It will reset all the settings to the factory defaults instantly. As mentioned, there is another way to reset the same.
Reset the WSA on Windows 11 using Windows Settings
To reset the Windows Subsystem for Android on Windows 11 using Windows Settings, follow these steps:
- Press Win+I to open Windows Settings.
- Go to Apps > Apps & features.
- Find out Windows Subsystem for Android app.
- Click the three-dotted icon and select the Advanced options.
- Click the Reset button twice for confirmation.
Let’s delve into these steps in detail.
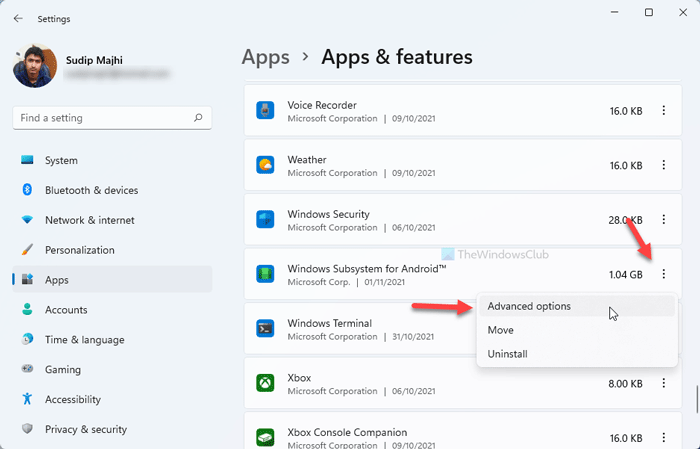
At first, you need to open Windows Settings on your computer. Although there are so many ways, you can use the keyboard shortcut, Win+I. After that, switch to the Apps section on the left side and click the Apps & features option on the right side.
Here you can find all the apps installed on your computer. You need to find out the Windows Subsystem for Android, click the three-dotted button, and select the Advanced options.

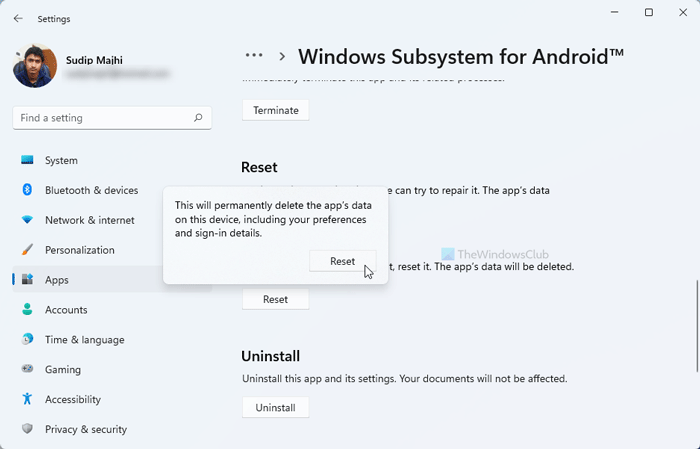
Following that, click the Reset button and the same option twice for confirmation.

After that, Windows Subsystem for Android app will be reset on your computer.
How do I get Windows Subsystem on Android on Windows 11?
To get Windows Subsystem for Android, you have mainly two options. If you live in the USA, you can Microsoft Store and download the Amazon Appstore app on your PC. However, if you live outside of the USA, you need to go through the manual method. For that, you must have the bundle downloaded from a third-party website. Then, you can install the bundle via an elevated instance of Windows PowerShell on your computer and get Windows Subsystem for Android.
How to repair Windows Subsystem for Android on Windows 11?
To repair Windows Subsystem for Android on Windows 11, you need to use the Windows Settings. To get started, press Win+I to open Windows Settings and go to Apps > Apps & features. Then, click the three-dotted icon of Windows Subsystem for Android and select the Advanced options. Following that, click the Repair button. It is handy when the Windows Subsystem for Android has some issues causing various problems while running it on your PC.
How to restart Windows Subsystem for Android?
In order to restart Windows Subsystem for Android, you need to open the app and go to the Settings panel. Here you can find an option called Turn off. Click on this button to stop Windows Subsystem for Android. Following that, you need to click the Turn on button to restart it.
That’s all! Hope this guide helped.
Leave a Reply