Knowing how to resize or scale an image is a basic action that everyone will do while using image manipulation software. Resizing or scaling an image means making it larger or smaller than its present size. In this post, we will show you how to resize an Image in GIMP by dragging without losing quality or stretching and keep it sharp.
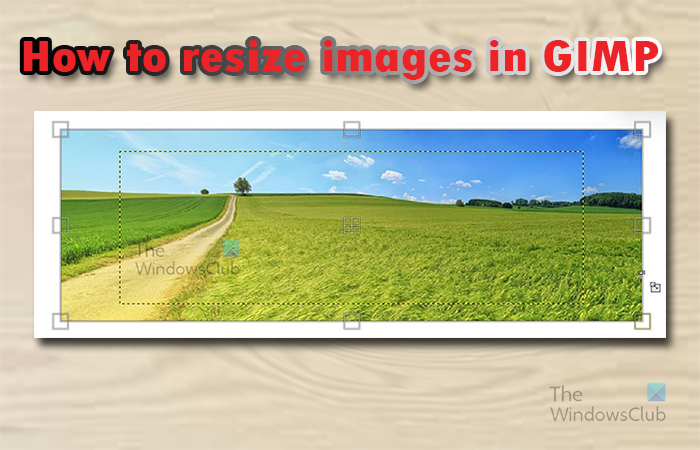
How to resize Image in GIMP without losing quality
When you place an image in GIMP it may be bigger or smaller than you want so you will have to resize it to make it the size that you want. There are two ways to resize an image in GIMP and they are both easy to do and to remember. The two ways that images can be resized are by Entering a numerical value or by Resizing manually. Let’s explore both ways that you can resize an image in GIMP.
As a bonus, you will be shown how to resize the canvas to fit the image if the canvas is larger than the image. you can also use the method to make the canvas become a little border around the image.
Resize images in GIMP by entering a numerical value
This method of resizing an image using the numeric value is very useful when you have a specific size that you want the image to fit. You would know the size that you want in Width and Height so you would enter these values. Below are the steps that you will follow to resize the image by entering a numeric value.
- Create a new document canvas
- Add image to canvas
- Select the Scale image option
- Enter the width and height values
1] Create a New document canvas
To place the image in GIMP, open GIMP then go to File then New to open a new canvas. The Create a new image options window will open. Choose your image properties and press Ok to create the document with your options.
2] Add image to canvas
To add the image to the newly created canvas locate the image on your computer and drag it onto the canvas. If you use the method which uses File then Open to load the image, the image will go to a new document. you will then have to click it and drag it onto the previously created canvas.

The image that will be used for the article
3] Select the Scale Image option
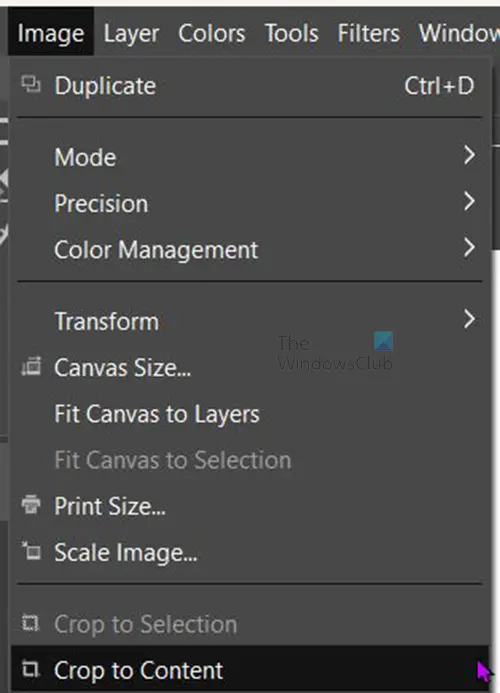
To use this method click the image then go to the top menu bar and press Image then Scale Image.
4] Enter the width and height values
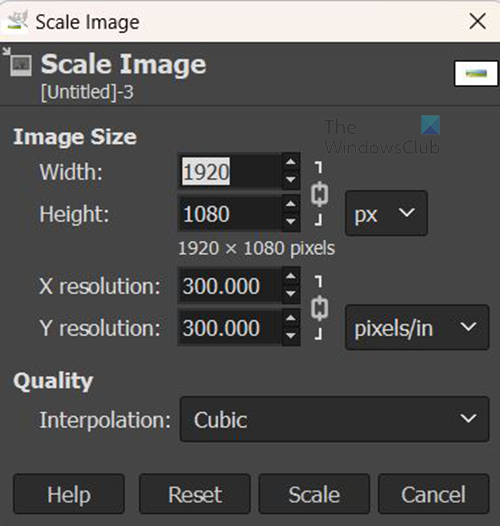
The Scale image options box will appear and you will see the value boxes that you can fill out to scale the image. You can change the physical size of the image using the Width and the Height value. You can change the Resolution of the image (amount of pixels per inch) which will affect the overall clarity. The chain icon tells that the resolution for the width and height will be changed together. In this case, you will just change the width and height of the image so just enter the values in those boxes then press Scale to confirm and scale the image.
Resizing images in GIMP manually
You can resize an image manually by dragging with the mouse. You will not see the handles so you will have to follow some steps to make them visible.
- Select the Scale tool
- Click on the image to bring up resizing handles
- Press enter to confirm resize
1] Select the scale tool
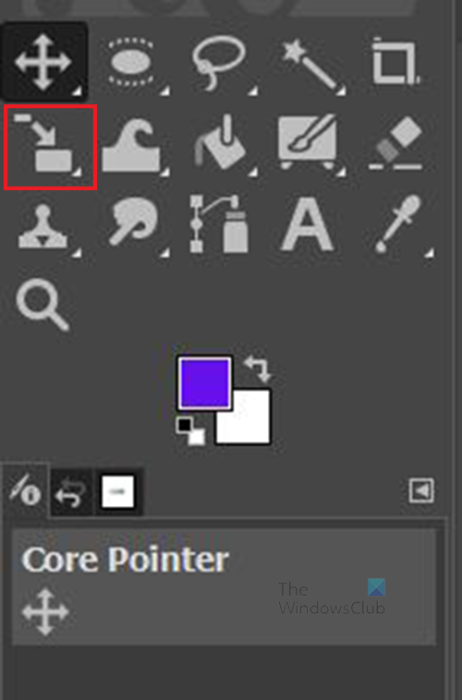
Click the Scale tool on the left tools panel or press Shift + S.
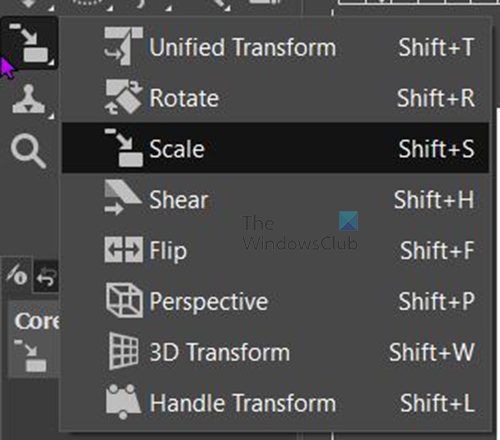
If the scale tool is not the first tool at the top, press and hold that tool that is there until you see the list of tools in the group. Click on the Scale tool to activate it.
2] Click on the image to bring up resizing handles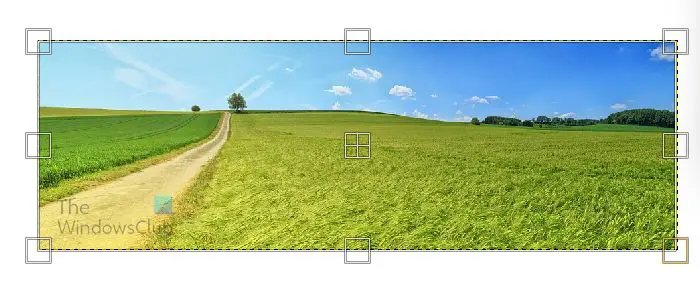
With the scale tool selected, click on the image that you want to resize. When you click on the image, you will the handles appear around the image. you can click any of the handles to resize the image.
You can click the handle and drag it to resize. You can also hold Shift while you drag to make the image resize only in the direction that you drag. When you view the image you will see four squares in the form of a grid in the middle of the image. you can use these to resize the image from the center out.
3] Press enter to confirm resize
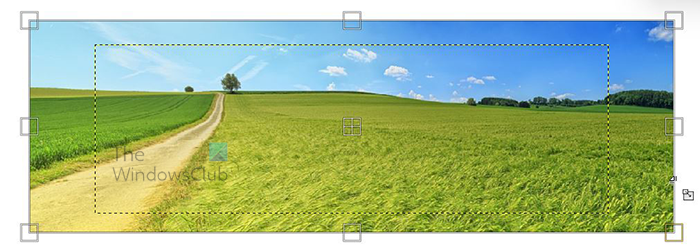
When you resize you will see the yellow dotted line showing the original image dimensions. When you stretch it to the size that you want. You will see the new and the old dimensions, you can stop and resize different sides. You then press Enter to accept the new dimensions and the image will resize. If you do not want to keep the new dimension, click Esc to cancel the resize.
Read: How to make Stencil in GIMP?
Resize the canvas in GIMP to the size of the image
After resizing the image, it may be smaller than the canvas, in this case, you need to resize the canvas to fit the image. You could have resized the image to fit the canvas, but in the case where you need to maintain a certain image size, you would want to resize the canvas to fit the image.
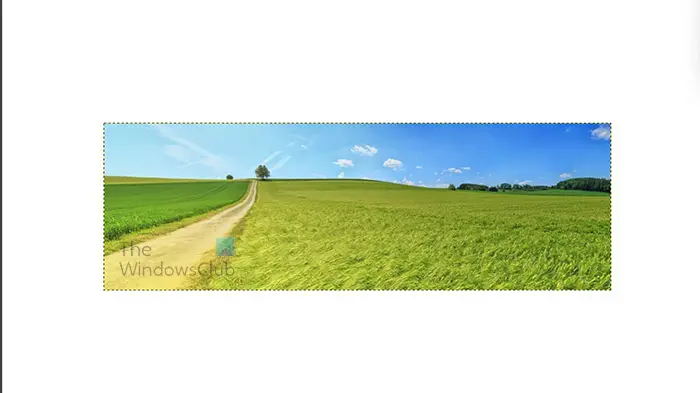
The image is smaller than the canvas.
1] Select crop to content

To resize the canvas to fit the size of the image go to the top menu bar and press Image then Crop to content. The canvas will automatically fit the image.

The canvas is cropped to the size of the image.
Manually adjust the canvas size
- Bring up canvas size options
- Link Width and Height (optional)
There is another way to resize the canvas but this method is somewhat manual. You would go to the top menu bar and press Image then Canvas size.
1] Bring up canvas size options
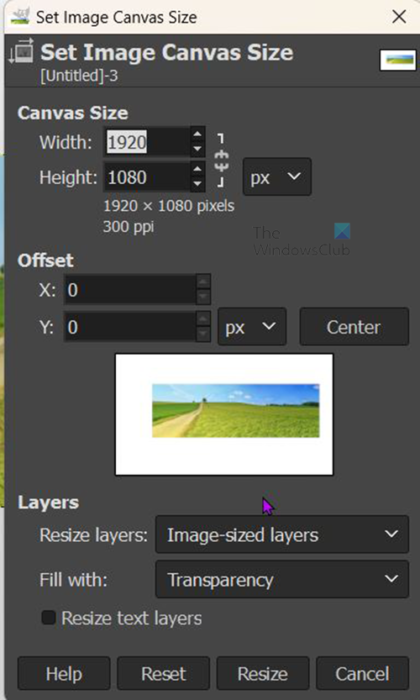
The Set image canvas size options window will appear.
2] Link Width and Height (optional)
You can look under the Canvas size you can click the chain link to make the Width and Height change at the same time proportionate to each other.
This would work if it is a square, however, for a rectangle, you want to be able to adjust the size independently. As you adjust you will see changes in the view window, you will see a border appear around the image in the view window showing you how the canvas is scaling up or down. When you have reached a satisfactory size press Resize to keep the changes and close. You can press Reset to remove the changes that you made or Cancel to close without keeping the changes.

This is the image with the canvas resized to fit the image.
Read: How to Fade out Images and make them washed out in GIMP
How to resize an image freehand in GIMP?
To resize an image in GIMP freehand, you can just go to the layers panel on the left and select the Scale tool or press Ctrl + S. you then click on the image, and you see the handles appear around the image. You can then click and drag any of the handles to resize the image.
How do I move a layer in GIMP?
To move the layer, click the Move tool, which is the cross icon with four arrowheads in the left tools penal. When you click the Move tool you will see its properties appear at the top right of the screen. There will be three icons to choose from, move selection, Move layer, and Move path. Click move layer, then click the layer and move it anywhere on the canvas.
Leave a Reply