Windows 11/10 offers many customization options, including display settings. Sometimes, changing display settings can lead to unexpected results. In this case, you need to reset them. In this article, I will show you how to restore the default Graphics or Display settings in Windows 11.

How to restore default Display settings in Windows 11
To restore Graphics or Display settings to default in Windows 11, you have to reset the following display settings to their default values.
- Display resolution and scale
- Display calibration for HDR video
- Night light preferences
- Color settings
- Contrast theme and color filters
- Mouse pointer settings
Let’s start.
1] Display resolution and scale
To restore the default display resolution and scale, follow these steps:
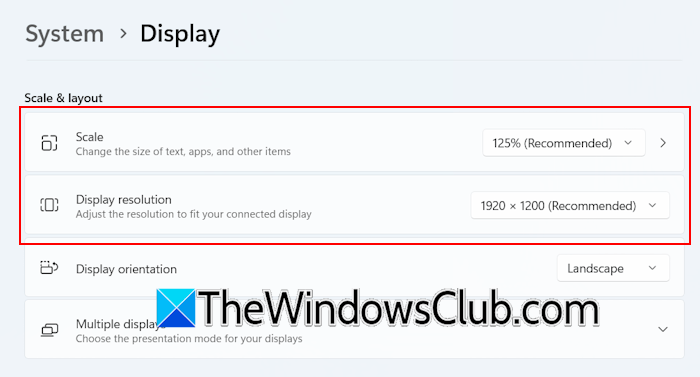
- Open Windows 11 Settings.
- Go to System > Display.
- Select the Recommended display resolution and scale settings under the Scale & layout section.
2] Display calibration for HDR video
If you have messed up the display calibration for HDR video, you can reset it to the default values by following these steps:
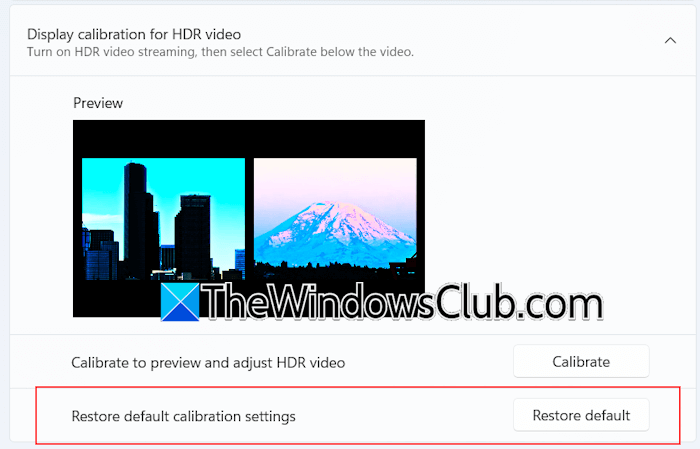
- Open Windows 11 Settings.
- Go to System > Display > HDR.
- Expand the Display calibration for HDR video tab.
- Click Restore default.
Read: How to clear the Display cache in Windows
3] Night light preferences
In Windows 11, Night Light remains off by default. Since you are restoring all the display settings to their default values, you have to turn off Night Light and set its strength to the default.
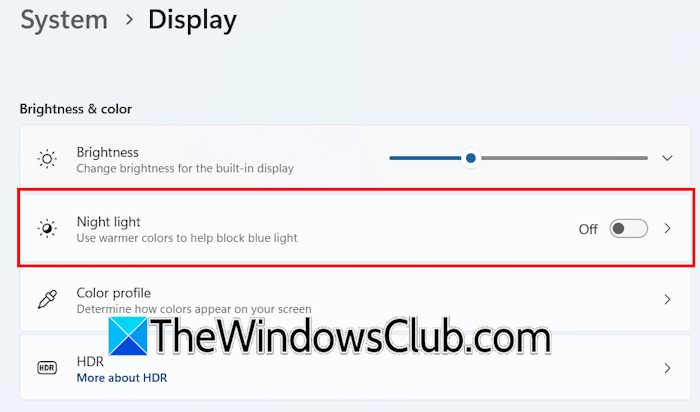
Here is how to do that:
- In Windows 11 Settings, go to System > Display.
- Turn off the Night Light if it is turned on.

Now, click on the Night light tab to open its settings. If you have set any schedule for the Night light, turn it off. Move the Strength slider to 48, as 48 is the default value of Night Light’s strength.
4] Color settings
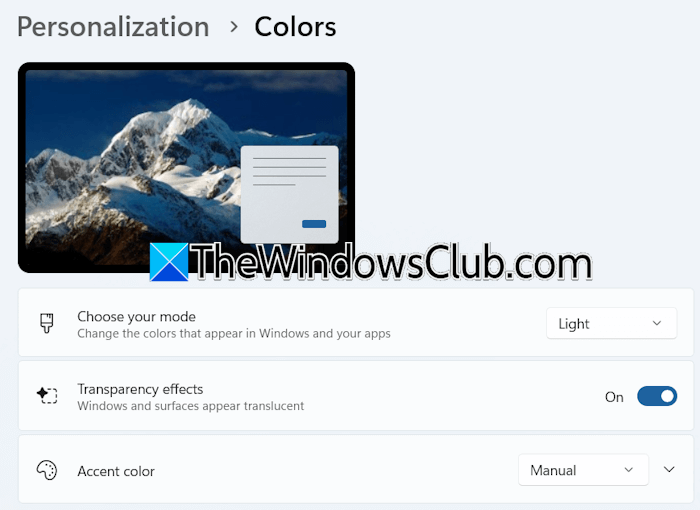
Now, restore the color settings to default. In Windows 11 Settings, go to Personalization > Colors. Select Light in the “Choose your mode” option and turn on the Transparency effects.
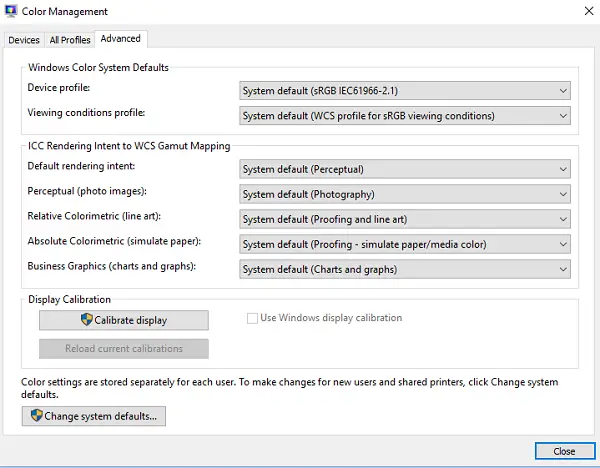
If you have also changed the color management settings, use the Color Management app to restore the default display color settings.
5] Contrast theme and color filters
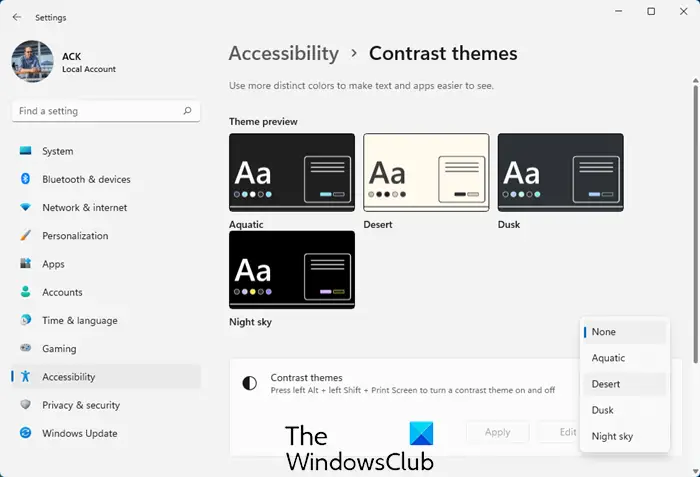
Check if you have activated the Contrast theme. If so, disable it.
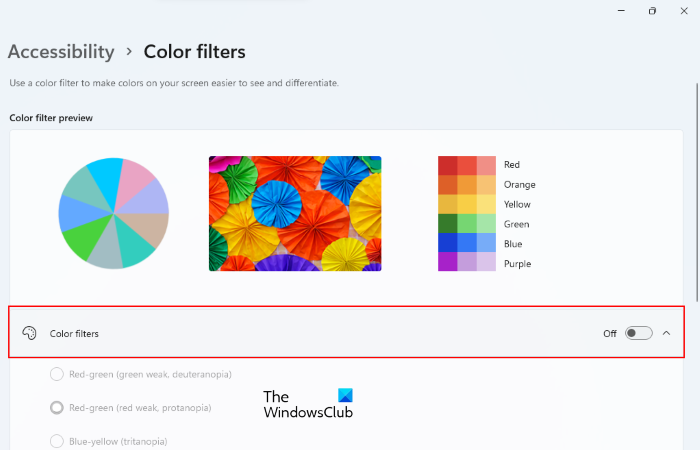
To disable Color Filters, go to Accessibility > Color filters. If the Color filters switch is on, click Reset to reset the intensity, then turn off the switch.
It is best to go to Personalization > Themes and select the default Windows theme to reset colors and backgrounds.
6] Mouse pointer settings
The last step is to reset your mouse pointer style. Follow these steps:

- Open Windows 11 Settings.
- Select Accessibility > Mouse pointer and touch.
- Expand the Mouse pointer style tab and select the white mouse cursor.
- Now, move the mouse pointer size slider to the left.
This is all about what you can do to restore default display settings in Windows 11. However, if you experience any display or screen issues, you can either roll back the display driver or perform its clean installation by completely removing and reinstalling it.
How do I go back to normal mode in Windows 11?
If you are in a Clean Boot state, use MSConfig to enable all the disabled services and restart your computer. After restarting your device, you will be in normal mode. To get out of Safe Mode, open MSConfig and uncheck the Safe Boot checkbox under the Boot tab. Click OK and restart your computer.
How do I change my Windows 11 theme back to normal?
To change your Windows 11 theme back to normal, apply the default theme to your system. Open Windows 11 Settings and go to Personalization > Themes. Now, select the Windows 11 default light theme. If it is already active, switch to another theme, then switch back to the light theme.
Read next: Accidentally deleted Graphics card driver in Windows.