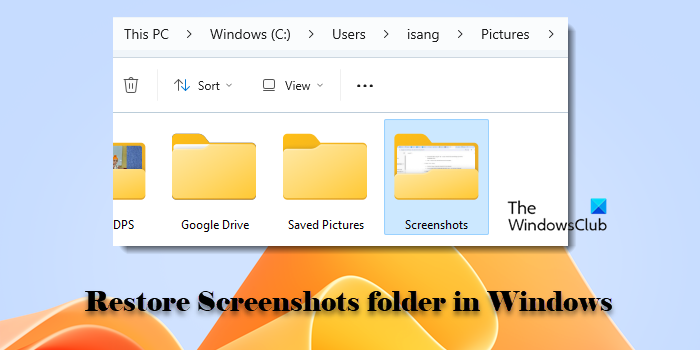
In this post, we will show you how to restore the Screenshots folder in Windows 11. If the Screenshots folder is missing or screenshots are not being saved on your computer where they should be, it indicates that the folder has been deleted, moved, or is otherwise inaccessible. This could happen due to various reasons, such as accidental deletion of the folder, changes in system settings, user profile corruption or misconfiguration, or issues with OneDrive integration.

By restoring the folder, you can make sure that your screenshots are saved correctly and you can easily find them in the future. This post will help you restore the Screenshots folder in Windows 11 to its default location or configure a new save path for your screenshots.
Where are my screenshots saved in Windows 11?
Screenshots in Windows can be saved in several locations depending on the method or tool used to take them. Screenshots taken using the Win+PrtScn keys are automatically saved to the Screenshots folder (C:\Users\<Username>\Pictures\Screenshots). PrtScn alone copies the screenshot to the clipboard. You can paste it into an image editor and save it manually. If OneDrive is configured to save screenshots, they might be automatically saved to a folder in your OneDrive.
Restore Screenshots folder in Windows 11/10
To restore the Screenshots folder on your Windows 11/10 PC, use these methods:
- Recreate the Screenshots folder
- Set the default save location for Screenshots
- Use System Restore
- Verify OneDrive settings (if applicable)
Let us see this in detail.
1] Recreate the Screenshots folder
You can manually recreate the Screenshots folder in its default location if the folder was deleted or lost.
Press Win+E to open File Explorer. Navigate to C:\Users\<Username>\Pictures. Right-click anywhere in the empty area of the Pictures folder and select New > Folder.
Rename the new folder as ‘Screenshots‘.
2] Set the default save location for Screenshots
Once you’ve created the Screenshots folder, you must ensure Windows knows where to save the screenshots by default. You can do that either using File Explorer or using Registry Editor.
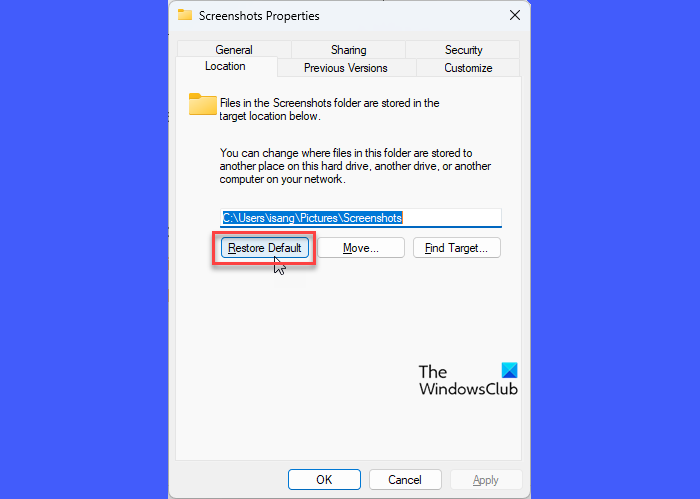
Open File Explorer and navigate to the Pictures folder as explained above. Right-click on the newly created Screenshots folder and select Properties. Switch to the Location tab in the Screenshot Properties window. Click the Restore Default button. Click Apply and then OK.

Alternatively, press Win+R, type ‘regedit‘ in the Run dialogue and press Enter. Click Yes when prompted by User Account Control.
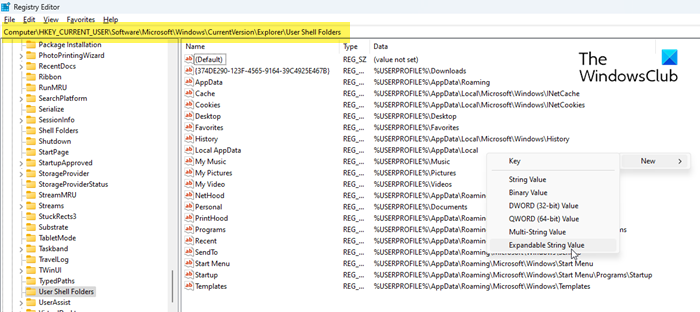
In the Registry Editor window, navigate to the following path:
HKEY_CURRENT_USER\SOFTWARE\Microsoft\Windows\CurrentVersion\Explorer\User Shell Folders
Look for the Screenshots key in the right pane. If the key is missing, you can create it by right-clicking in the right pane, selecting New > Expandable String Value, and naming it ‘Screenshots’. The GUID {B7BEDE81-DF94-4682-A7D8-57A52620B86F} also maps to the default Screenshots folder.

Double-click on the Screenshots key and set its value to the path of the newly created folder. Close the Registry Editor and restart your computer to apply the changes.
3] Use System Restore
System Restore allows you to revert your computer’s system files, settings, and installed applications to a previous state, without affecting your personal data. If the Screenshots folder was previously included in a restore point, you might be able to recover it using System Restore.
Press Win+R to open the Run dialog. Type ‘rstrui‘ and press Enter.
This opens the System Restore wizard. Click the Next button. You will see a list of available restore points.
Select a restore point from a date before the Screenshots folder went missing and click the ‘Scan for affected programs‘ button. This will show which applications and drivers will be affected by the restore.
Click Next to continue. Click Finish to start the restore process.
After your computer restarts, open File Explorer and navigate to the Pictures folder to see if the Screenshots folder is restored.
4] Verify OneDrive settings

If OneDrive or another backup service is set to redirect screenshots to their folders automatically, your Screenshots folder can appear to be missing or empty.
Click the OneDrive icon in the system tray. Click the Help & Settings icon in the top-right corner of the OneDrive window and select Settings from the menu.
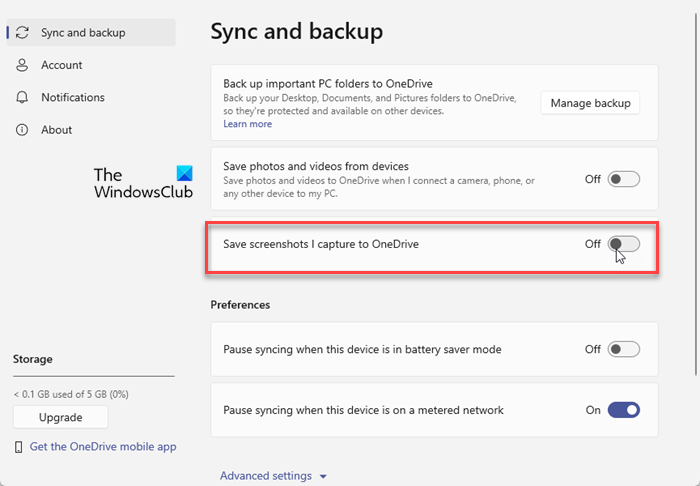
In the OneDrive settings window, look for the Save screenshots I capture to OneDrive option under Sync and backup. If the option is enabled, your screenshots will be redirected to OneDrive\Pictures\Screenshots.
Disable the option using the toggle button to save screenshots locally.
If you use other cloud or backup services, check their settings to see if they are configured to handle screenshots. If so, adjust the settings to ensure screenshots are saved locally on your Windows 11 PC.
I hope this helps.
Read: How to reset Screenshot Counter in Windows.
How to recover deleted screenshots on Windows 11?
Start by checking the Recycle Bin. Files are first moved to the Recycle Bin instead of being immediately removed from your system, allowing you to recover or restore files, including screenshots, if you accidentally delete them. If they’re not in the Bin, use Windows File Recovery or a third-party file recovery software like Recoverit to scan and restore deleted files from your drive.
Read Next: Screenshots not saving in Pictures folder in Windows.