The Brushes in Photoshop add even more tools to make any design stand out. The many default brushes in Photoshop plus the ability to download and also create custom brushes make it easy to have outstanding designs. Learning to use brushes is an essential skill in Photoshop.
How to rotate Brushes in Photoshop
Photoshop brushes offer the ability to make great effects without creating them from scratch. However, some persons would like to change the direction and angle of brush strokes. They would like to know how to rotate brushes in Photoshop. This article will show you how to rotate any brush in Photoshop.
- Access brushes
- Change the brush color
- Choose the correct brush
- Rotate brushes
1] Access brushes
Before you can rotate the brushes you will need to be able to find them. The first thing to do is to open Photoshop then open a new document by going to File then New or Press Ctrl + N.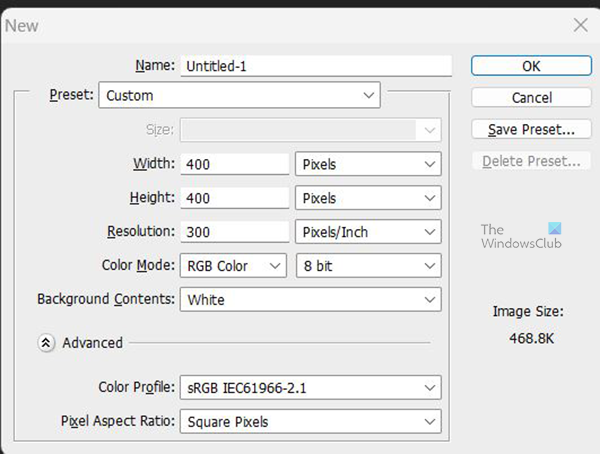
A new document options window will open, make whatever changes you want then press Ok. The canvas will open with the options you had chosen.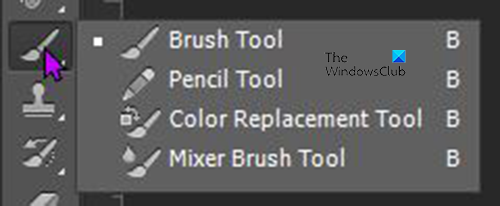
You can access the Brush tool by going to the left Tools panel and clicking on the Brush tool. You can also access the brush by clicking B on the keyboard. When you click on the Brush tool set you will see four tools available. There is the Brush tool at the top, then the Pencil tool, then the Color replacement tool, and finally the Mixer brush tool. If you look where the Brush tool is supposed to be and you see any of the other tools there, just long press that other tool, and the panel will slide out showing the other available tools. You can then choose the Brush tool. Note that pressing B will open the tool that was last used which may be any of the other tools in that toolset.
2] Change Brush color
To give the brush color, select the Brush tool then go to the left Tools panel and look for the Foreground background color tool. You then click on the part for the Foreground color.
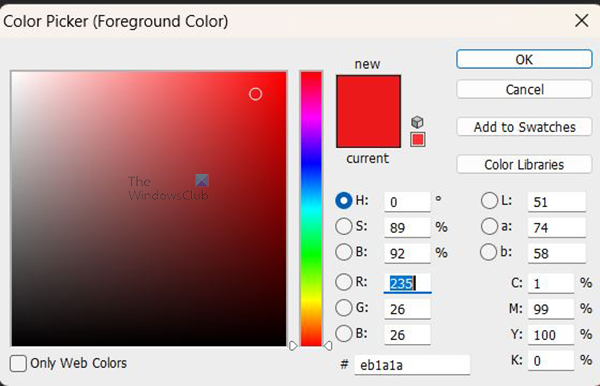
The Foreground color picker will pop up. You can then choose a color for your brush tool. If you move the cursor from the Color picker you will notice that the cursor will change to the Eyedropper tool. This allows you to sample colors from anywhere. And I mean anywhere, if you hold the left mouse button while the cursor is the Eyedropper tool, you can sample color even outside of Photoshop. You can also find color values and type them into the value boxes. You can search for color values online and type them in the color value boxes of the color picker.
3] Choose the correct brush
Now that you have accessed the brush and you change the color, you will need to find the correct brush. There are brushes for every effect that you want, if they are not in Photoshop by default, you can download them from a trusted source and install them in Photoshop.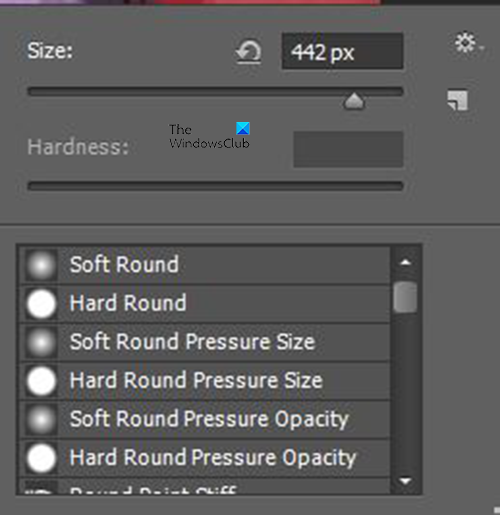
To choose the brush you want, click on the Brush tool then right-click on the canvas. A window will come up where you can change the size of the brush and the hardness. You can scroll down and pick the brush you want as well. If the brush is not there you can choose to load more brushes.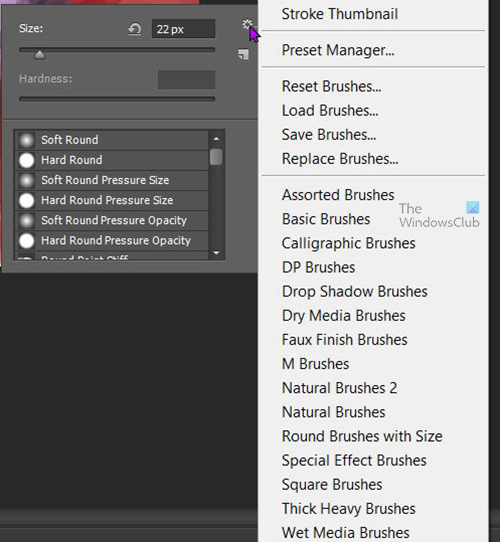
Click on the menu button which is the gear icon on the top right edge of the brush options menu. A list menu will appear and you can choose brush categories, load new brushes, reset brushes, save brushes, reset brushes, and other options.

If you choose another brush category, you will be asked to confirm if you want to replace the current brushes with the brushes from the category you chose, you can click Ok to replace, Append to add the new brushes to the list of Cancel to make no changes.
4] Rotate brushes
Now that you have opened the brush, changed the color of the brush, and chosen the brush you want, it is now time to rotate the brush. Rotating the brush can help in your design as it can make the brush fit into the design in the way that you want.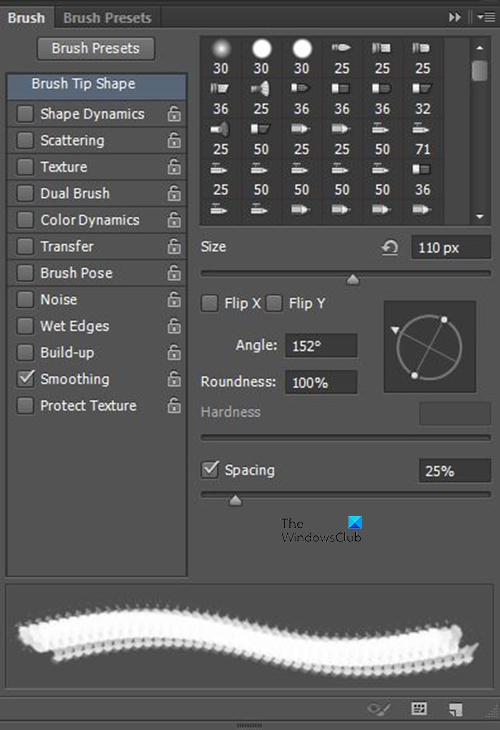
To rotate the brush go to the top menu and press Window then Brush and a Brush menu window will appear. here you can make a lot of changes to the brush, you can change the size of the brush, the Angle, the Hardness, and the Spacing of the strokes when you click and drag the brush. Here is where you also rotate the brush.
At the bottom of the Brush menu, you will see the preview window. this will give a live preview of the brush as it is changed. You can see how it is changed as you make the adjustments. You can click on the canvas and see the changes without closing the Brushes menu window.
Rotate on Axis
You can rotate the brush on the X or Y axis or both, you will see the check boxes at X and Y. you can check X so that it is rotated on the X axis only or Y so that it rotates on the Y axis only or you can check both so that it rotates on both the X and Y axis.
Rotate with Angle value
If you know at what angle you want to rotate the brush, you can type it in the Angle value box. If you are not sure and you want to see as it changes, you can click in the angle value box and use the Up or Down arrows on the keyboard to change.
Rotate with the Compass icon
You can also rotate the brush by holding and rotating the compass icon. If you click and hold the pointy end you will change the angle when you rotate it in a circular motion. If you hold the round dots on the sides you will change the roundness of the brush. This is a way to rotate the brush to give it a different look on the canvas.
You can use both the angle and roundness together to make your own custom brush stroke.
Whenever you choose a new brush, all the settings will go back to the default.
Bonus Tip: If you want to paint in a straight line or if you want to paint from one spot to another in a straight line without dragging the brush, click on the starting point, hold Shift and click the ending point. This will paint a straight continuous line between the start and the end spot.
Read: How to make a Color Photo look like a Sketch in Photoshop CS6
How do I rotate a custom brush in Photoshop?
In order to rotate a custom brush in Photoshop, you have two options. First, you can change the X and Y axis of the brush as per your requirements so that it fits your needs. Secondly, you can use the Shift+Right/Left arrow key to rotate it as per your requirements. No matter which brush you choose, the process is the same for all of them.
How do I flip a brush in Photoshop?
To flip the brush, select the brush tool by pressing B, choose your brush, and then open the Brush Settings panel. If the panel is not visible navigate to Window then Brush (Brush Settings for newer versions of Photoshop). Look for the Flip X or Flip Y check box. You can choose one of the axes to flip it on or choose both.
Leave a Reply