Microsoft Word is capable of rotating images without much effort—no need for users to switch over to Photoshop or GIMP to accomplish basic image editing. Now, we know that Word does not have all the features, but when it comes down to some of the minor things, it is quite good.

You’ll be happy to know that rotating photos in Microsoft Word is more or less the same across devices and on the web.
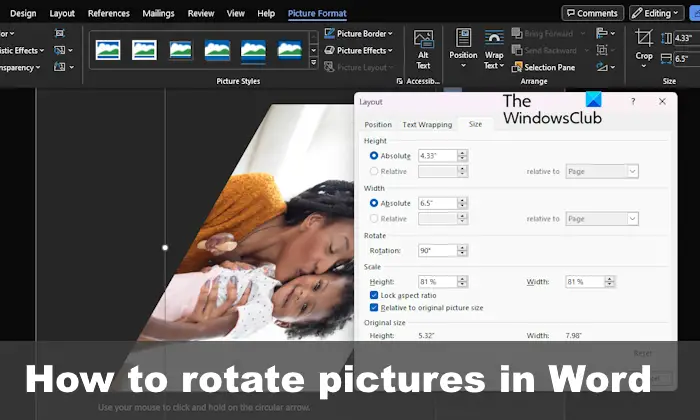
How to rotate Picture in Word
Rotating a picture in Word is easy and you can use any one of these three methods. They work for Word on desktop and the web.
- Rotate pictures using the mouse
- Rotate images by degrees
- Use the 3D rotation feature
1] Rotate pictures using the mouse in Word

- Open the Microsoft Word document with the added picture.
- Click on the image.
- If done correctly, you will see an outline appear around the edges of the image.
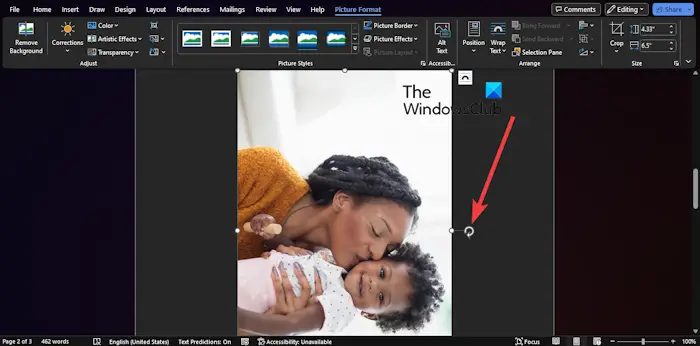
- A circular arrow will also appear at the top of the photo.
- Use your mouse to click and hold on the circular arrow.
- Drag the mouse to the direction that you’d like the image to be rotated.
- Release the mouse to have the photo stay in place.
- You can now save your work.
READ: Microsoft Word Table not going to next page
2] Rotate images by degrees in Word

From within the Word document, you must again click on the photo.
- When the outline appears, look for the Picture Format tab and select it.
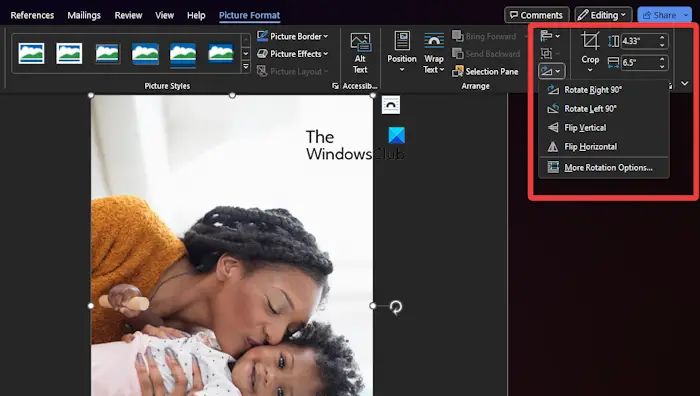
- Go to the Ribbon and look for Arrange.
- Click on the icon that looks like a triangle.
- Right away a dropdown menu will make an appearance.
- You will see four present angles, so select the one that works best for your needs.
If you want more customization freedom, we suggest clicking on More Rotation Options instead.
3] Use the 3D rotation feature in Word

- Right-click on the image in your document.
- Select the Format Picture option from the context menu.
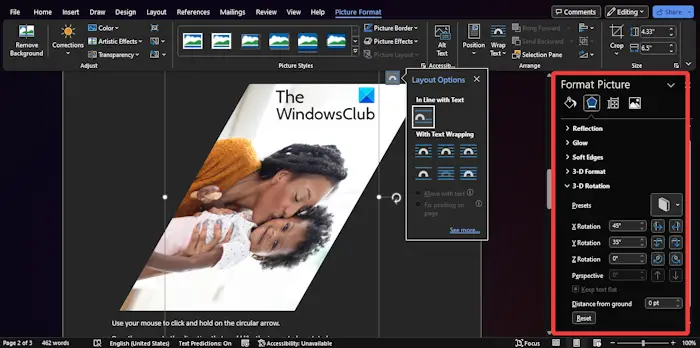
- From the newly opened window, please choose 3D Rotation via the left panel.
- Select a preset by clicking the Presets box.
You also have the option to manually enter your own degree numbers for a more unique 3D rotation.
How do I rotate a picture 90 degrees in Word?
Click on the picture, then select Format Picture. Go to Arrange on the Ribbon, then click the triangle button. When the dropdown menu appears, select Rotate by 90, and that’s it, you’ve effectively rotated your photo at 90 degrees in Microsoft Word.
How do you insert a picture with text in Word?
Click on the Insert tab, then select the Pictures command. Right away the Insert Picture dialog box will pop up. Navigate to the location where the picture is located, then select and insert it into the document.
Leave a Reply