As the MSDT-based troubleshooters are being deprecated in the near future, Microsoft has decided to introduce a new set of Troubleshooters via the Get Help app. Here is how to use or run the Network and Internet Get Help Troubleshooter in Windows 11 right now.
Network and Internet Troubleshooter helps you fix various internet connection-related issues on Windows 11. When you need to access this Troubleshooter, you can head to the Windows Settings > System > Troubleshoot > Other troubleshooters. Similarly, you can open the MSDT.exe tool and find the Troubleshooter. However, things are about to change in the upcoming build of Windows 11.
How to use Network and Internet Troubleshooter in Get Help app of Windows 11
To run the Network and Internet Get Help Troubleshooter in Windows 11, follow these steps:
- Open the Get Help app.
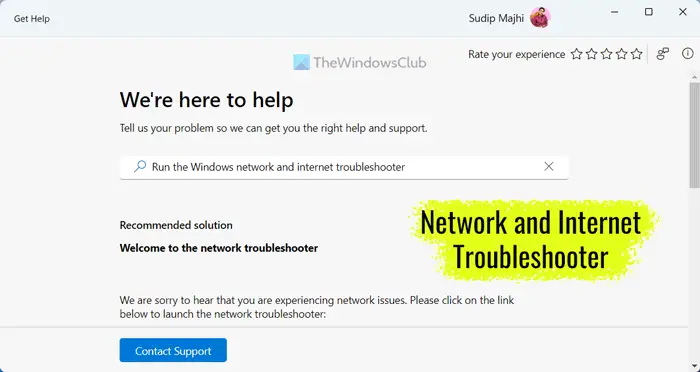
- Search for Run the Windows network and internet troubleshooter.
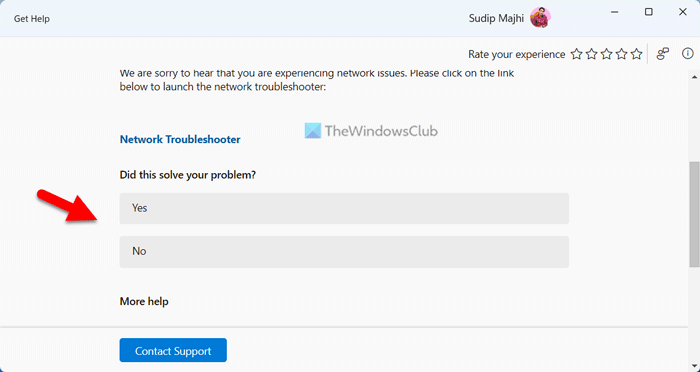
- Find the Yes/No option.
- Click the Yes button if the current solution solves your problem.
- Click the No button if it doesn’t.
- Keep clicking on the No button until it resolves your issue.
To use the Get Help app for running the Network and Internet Troubleshooter on Windows 11 PC, you need to open the Get Help first. For that, you can search for get help in the Taskbar search box and click on the individual search result.
Once it is opened, search for Run the Windows network and internet troubleshooter. Do not use any other keyphrase, as it may not work at times.
If you want to open it directly, you can click on this link to open the Network and Internet Troubleshooter via the Get Help app. A new tab will open, click on the Open Get Help button.

Once you do that, it opens up a panel where it displays some solutions. At the end of the solution, you can find a question called “Did this solve your problem?” along with two options – Yes/No.

If the current solution fixes your problem, click on the Yes button. However, if it doesn’t, click on the No button. When you click the No button, the Get Help app displays another solution, and the process continues.
For your information, if none of the solutions works, you will be asked to contact Microsoft support. For example, in this case, it will ask you to run the Network Troubleshooter that is included in Windows Settings. If it doesn’t do anything, you can click on the No button, and it will ask you to contact the Microsoft support team.
Read: WiFi keeps disconnecting in Windows
How do I get to Network Properties in Windows 11?
To get to the Network Properties in Windows 11, you need to open the Windows Settings panel. Press Win+I to open Windows Settings and switch to the Network & internet tab on the left side. Here you can find all network types, including Wi-Fi, Mobile hotspots, Ethernet, etc. You can choose the type and get more information accordingly.
How do you fix Cannot connect to this network in Windows 11?
To fix this error in Windows 11, you need to run the Network Troubleshooter first. If it doesn’t work, you must manually reset your network preferences, flush the DNS cache, reinstall the network adapter driver, change the adapter port (for the external adapter only), etc. If they do nothing, you need to switch to another internet source.
Read: Fix Network & Internet connection problems in Windows.