While you can run the System File Checker to scan for and restore corrupt Windows system files, in this post, we will see how to run System File Checker to scan and replace or repair a single file which may be potentially damaged or corrupted in Windows 11/10. The System File Checker or sfc.exe is a utility in Microsoft Windows located in C:\Windows\System32 folder.
Use System File Checker to scan & replace a single corrupted file

To check, scan and restore a potentially corrupted system file, run Command Prompt as Administrator. The command to be used is:
sfc /SCANFILE=<path of the file>
This /scanfile=file switch will scan and repair the specified file only.
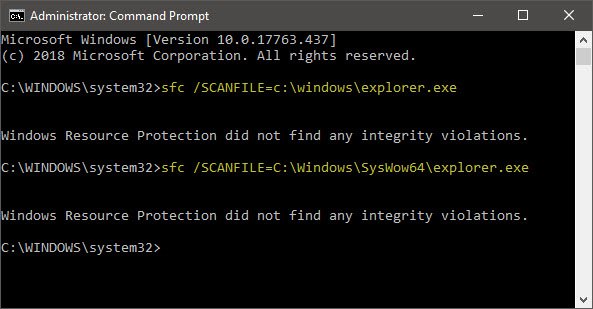
Let us say that you suspect your explorer.exe file to be corrupted and you want to scan it.
Then use the following command in CMD. This SFC option scans and repairs the file located at the specified full path:
sfc /SCANFILE=c:\windows\explorer.exe
If you use 64-bit Windows OS, execute the following command too:
sfc /SCANFILE=C:\Windows\SysWow64\explorer.exe
If System File Checker does not find any corruption, you will see the message:
Windows Resource Protection did not find any integrity violations
If System File Checker finds corruption, and it is successfully able to restore a good copy of the system file, you will get the success message:
Windows Resource Protection found corrupt files and successfully repaired them.
Restart the system.
Sometimes while running this tool, you may receive some errors, preventing the tool from successfully running or completing its run. They could be:
- SFC not working, will not run or could not repair corrupt file
- Windows Resource Protection found corrupt files but was unable to fix some of them
- Windows Resource Protection could not start the repair service.
If this does not help, you will have to follow this procedure to fix a corrupted system file in Windows.
TIP: You can also replace a Bad System File with a Good File using Installation Media.
Leave a Reply