Microsoft Planner and Microsoft To Do are both task management apps. Though their basic purpose is different from each other, they serve one common solution, and it is to manage tasks, time, and teams. To-Do is more about solo projects, where you need to see your personal to-do list. Microsoft Planner is efficient if you need to manage a team with fewer inter-dependencies. If you are doing both, you would like to see your personal To Do list alongside the tasks distributed in Microsoft Planner. Well, with Microsoft Teams, it is possible. Here are the steps that help you to see the Microsoft Planner tasks in Microsoft To Do.
How to see Microsoft Planner tasks in Microsoft To Do
If you are using the latest version of Microsoft 365 suite, then most probably you will see these two apps (Microsoft Planner and To Do) clubbed together. As a result, you see the tasks and other details below. This window looks as follows:
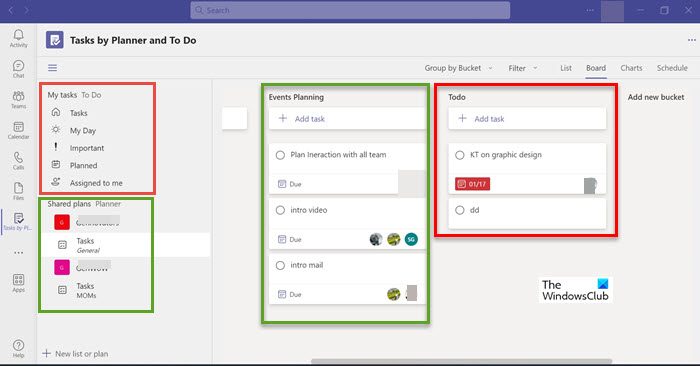
As seen in the above image, the To Do list appears at the top, while the Planner’s task list appears at the bottom. Microsoft To do mainly creates lists for individual planning. On the other hand, Planner creates a list of tasks for the team.
As you can see on the right-hand side pane, inside the green box is the list of tasks created for teams by using Planner. Some of the tasks are multi-dependent. Hence, you can see more than one team member appearing in front of those tasks. On the other hand, the tasks in the red box are the tasks that are part of the individual To Do list.
These two apps appearing together make task management much easier.
However, if you are not able to see these apps together, then follow the next steps to view the Microsoft Planner tasks in Microsoft To Do.
How to combine Microsoft Planner tasks in Microsoft To Do?
To add the tasks from Microsoft Planner to the To Do list, all you have to do is add the ‘Assigned to you’ tab into the To Do app.
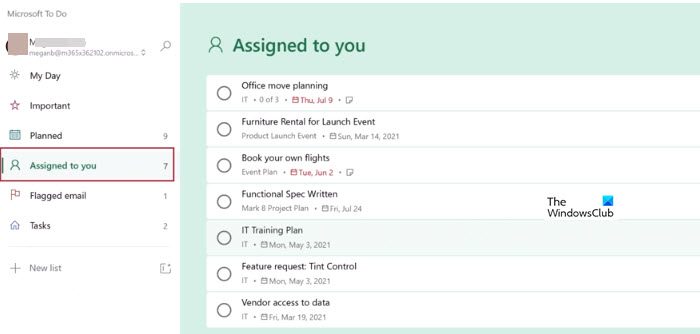
This tab shows the tasks that are assigned to you in Microsoft Planner. The process of assigning the tasks from Planner looks as follows:
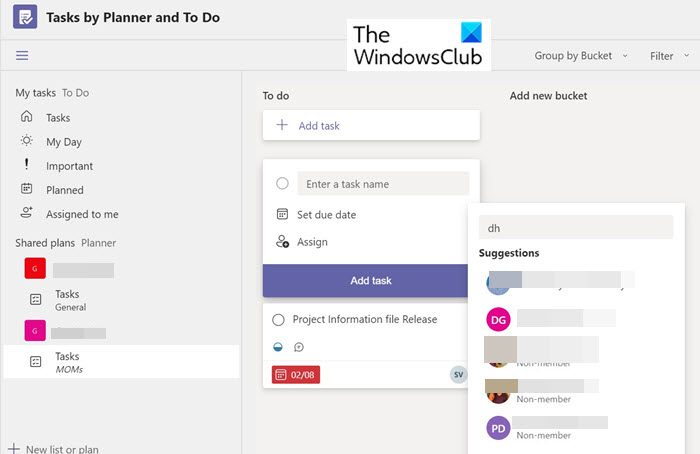
When a task is created in Planner, it is assigned to different people. If that task is assigned to you, then it comes to your To Do list. Now click on Assigned to me on the left side pane, and you can see the task assigned to you.
Switching on To Do list on Outlook
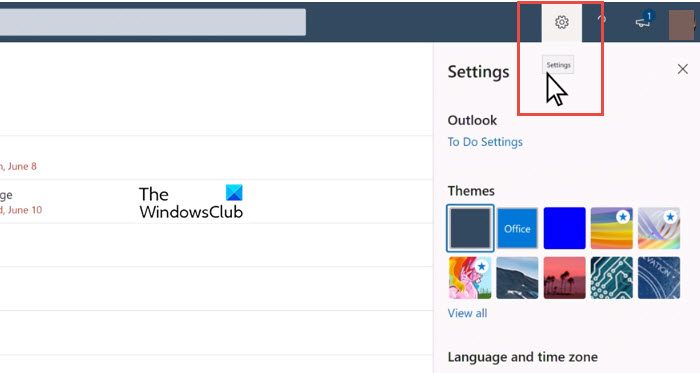
The To Do app can also be switched on via Outlook. For this, follow the next steps:
1] Go to Settings.
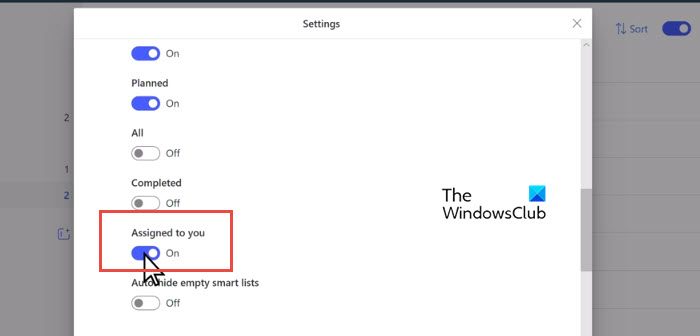
2] Scroll down to find the Assigned to you option. Toggle the switch to On this option.
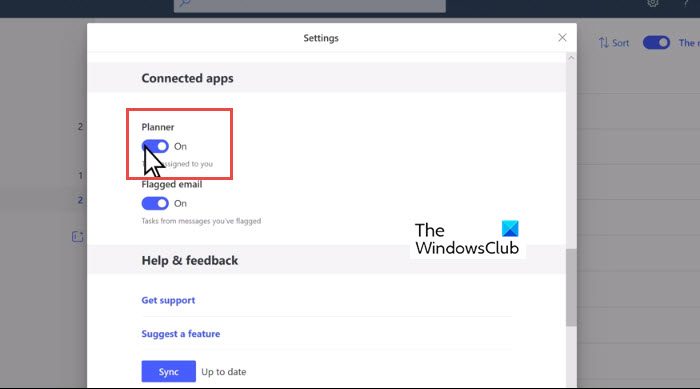
3] Now scroll down more and you can see Connected apps. Under that, switch on the Planner option.
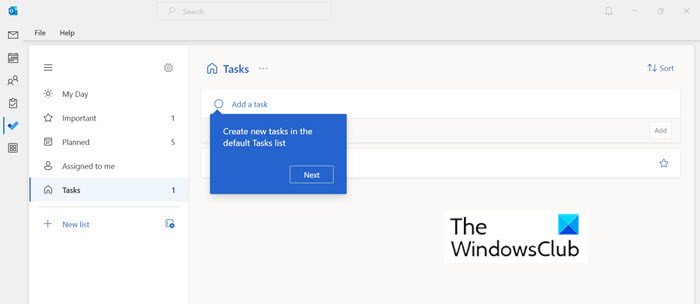
When the To Do app is included in switched on, it looks as follows:
Editing task details from Planner and To Do
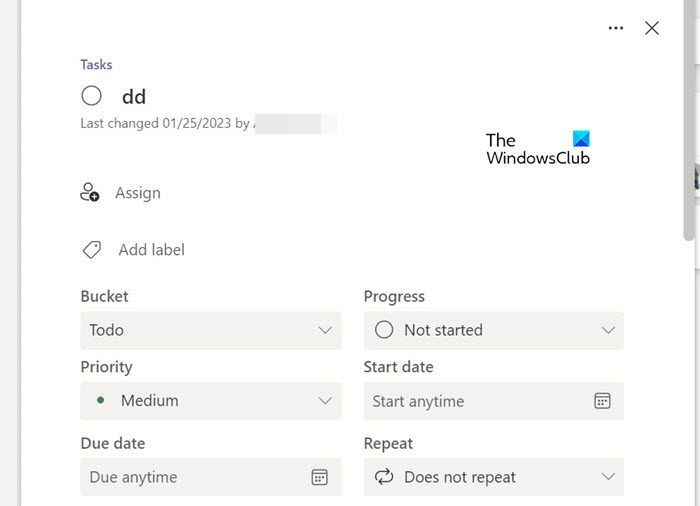
Once you have both apps, Microsoft Planner and To Do in one place, you can start editing the tasks. You can change the Bucket, Progress, Priority, Start Date, Due Date, frequency of the task, and so on in this window.
Summary
Microsoft has introduced several project and task management tools that are easy to use and compatible with each other. Make use of them for better productivity and organization. You can know the difference between different Microsoft organizing tools and when to use them in this article:
Read: Microsoft Project vs Planner vs To Do or Tasks app in Teams
Can I make Planner and To Do to work together?
Yes, it is possible. Microsoft’s task management and organizing tools can be used interchangeably. Because they are compatible with each other. To turn the connection to Planner on, follow the next steps.
- Find the To Do Settings
- In Settings, scroll down to the Smart lists section and make sure that Assigned to you is turned On.
- Then, under Connected apps, for Planner, choose On.
Can I share a task with a Planner on a team?
Follow the next steps to share a task with Planner on your team:
- Add a Planner tab to your team channel
- In your team channel, select Add a tab +.
- In the Add a tab dialog box, choose Tasks by Planner and To Do.
- In the Tasks by Planner and To Do dialog box, now select: …
- Choose whether to post to the channel about the tab and then select Save.
I hope this helps.
Leave a Reply