Although there are several methods, like using Team Viewer, Cloud storage, etc. to transfer files between Mac OS X and Windows, you can send a file from Mac to Windows without any software. All you need to do is to turn on File Sharing on Mac OS X, and you are good to go. To get things done, follow the following steps, which are quite easy.
Send files from Mac to Windows PC
Before getting started, you should know that you can execute the following steps only when your Windows computer and MacBook are connected to the same network, i.e., Wi-Fi router.
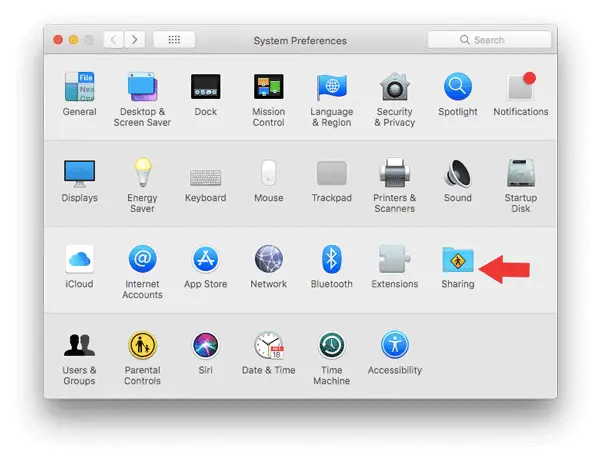
To start, you need to connect both computers to the same network. After that, you need to enable File Sharing on MacBook. To do that, open System Preferences. You can d0 that using Spotlight search or go to the Apple logo in the navigation menu bar > System Preferences and click on Sharing option.

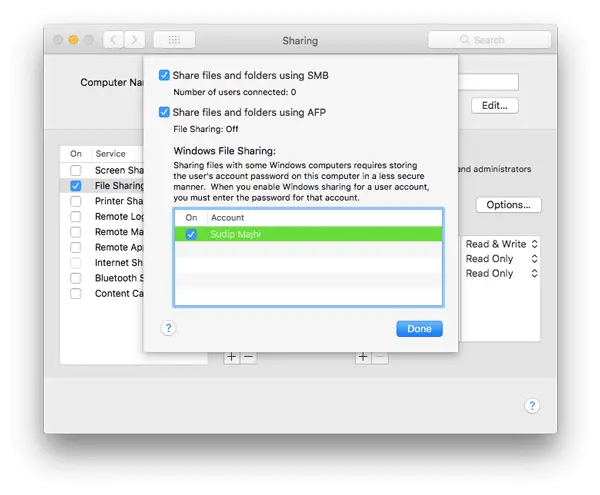
As you want to share files, you need to turn on File Sharing. Following that, click the Options button and select the following checkboxes-
- Share files and folders using SMB
- Share files and folders using AFP

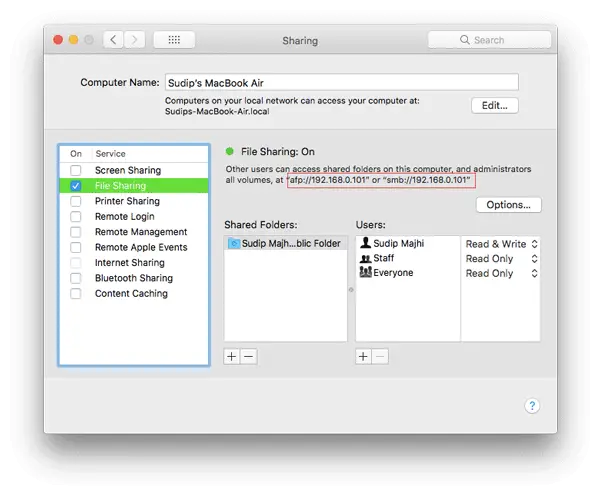
You will find an IP address on the Sharing window, which looks like this-

You need this IP address. So, copy it somewhere.
Following that, open up your Windows computer and press Win+R to open the Run prompt and enter the IP address like this-
\\192.168.0.101
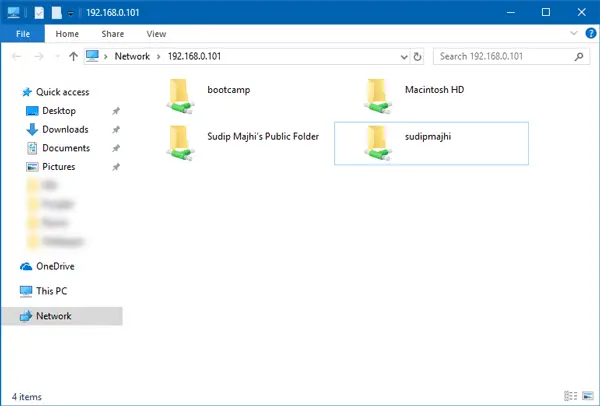
You will be asked for the username and password. Enter your MacBook’s username and password correctly, after which you will see this window.

From here, you can access all the MacBook’s files from Windows computer.
Hope this simple tutorial will be helpful for you.
This post shows you how to transfer data from Windows PC to Mac using Windows Migration Assistant Tool.
Leave a Reply