For one reason or another, which could be to enforce your corporate working hours policy or to improve security as threat actors will be unable to log on during non-office hours, administrators can set or restrict logon times for users in Active Directory for specific days or hours. When you do this, users will see a message Your account has time limit restrictions that prevent you from signing in at this time. In this post, we provide step-by-step instructions on how to accomplish this task!

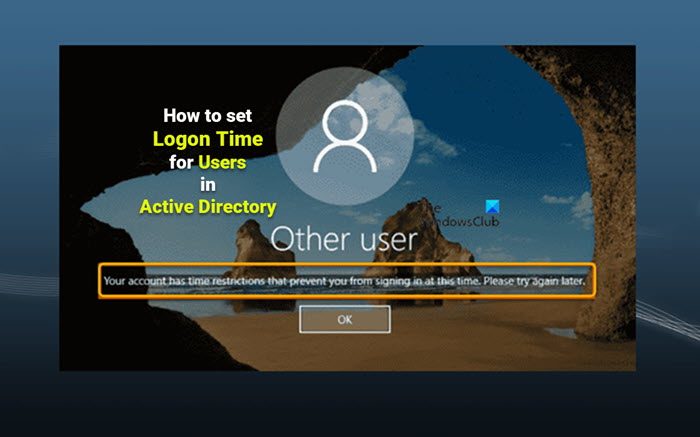
When login time has been set for users, when a user tries to log on to the Windows machine during the Logon Denied time, the user will receive the following notification on the login screen as shown in the lead-in image above.
Your account has time restrictions that prevent you from signing in at this time. Please try again later.
Read: The system cannot contact a domain controller to service the authentication request
How to set Logon Time for Users in Active Directory
As an IT administrator in an organization, you can set or restrict logon time for the users in Active Directory provided that you have received an official confirmation from management and equally the users have been informed beforehand about the logon time restriction before you enable the policy.
We will discuss this topic under the following subheadings:
- Set Logon Time for a Single User
- Set Logon Time for User Groups
- Disconnect user(s) when their Logon Time expires
Your account has time restrictions that prevent you from signing in at this time
1] Set Logon Time for a Single User

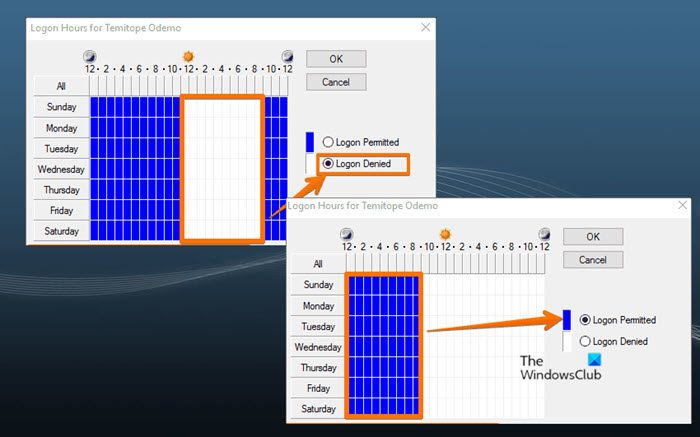
The image shows Sunday through Saturday from 11:00 AM to 9:00 PM and Sunday through Saturday from 12:00 AM to 9:00 AM as the period that a user cannot log on and the permitted logon hours respectively for the network domain.
To set Logon Time for a single User in Active Directory, follow these steps:
- Open Active Directory Users and Computers (ADUC).
- In ADUC, right-click the user account you want to configure the restriction.
- Select Properties from the context menu.
- Next, click the Account tab on the Properties page.
- Click the Logon Hours button.
You will now be presented with a screen that shows the Permitted or Denied hours. The Permitted color is shown in Blue, while the Denied color is in White.
- Next, click the radio button for the Logon Denied option.
- Now, drag your cursor across the tiny boxes showing days and hours, or select each box individually.
- Click Logon Permitted when done.
- Next, click the radio button for the Logon Permitted option.
- Now, drag the cursor to the period when you want the logon to be denied.
- Click Logon Denied when done.
Read: Create Logon Messages for Users signing in to Windows 11/10
2] Set Logon Time for User Groups
To set Logon Time for User Groups in Active Directory, follow these steps:
- Create an organizational unit (OU) and give it a unique descriptive name.
- Next, create or move all the users into this OU container.
- Now, press CTRL + A to select all the users in the OU.
- Right-click the highlighted users and choose Properties.
- Next, click the Account tab.
- Click to checkmark the Logon hours options.
- Click the Logon hours button.
- Now, on the Logon Hours page, you can restrict the logon hours for a group of users per your requirement.
3] Disconnect user(s) when their Logon Time expires

Taking it further, you can configure a Group Policy to disconnect a user who is already logged on when their Logon Time expires by following the steps below. The GPO must be assigned to the OU containing the users. When the policy is active, a user will be disconnected when the logon hours expire.
- Open Group Policy Management Console (gpmc.msc).
- Right-click Group Policy Objects, and then click New to create a new GPO.
- Give the GPO a descriptive name.
- Right-click the new GPO and then click Edit.
- Next, navigate to the path below:
Computer Configuration > Policies > Windows Settings > Security Settings > Local Policies > Security Options
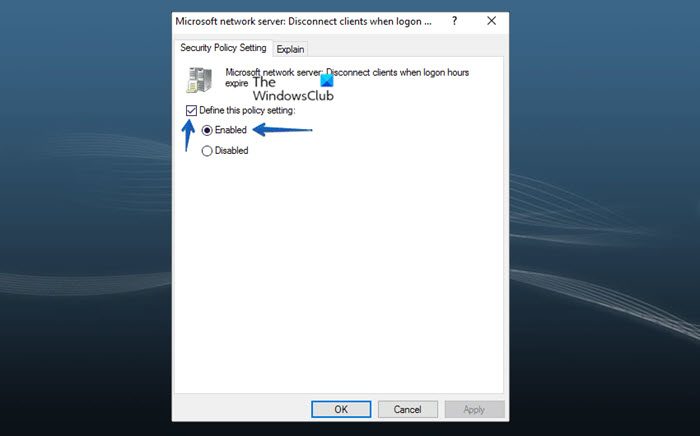
- In the policy pane, double-click Microsoft network server: Disconnect clients when logon hours expire policy to edit its properties.
- Now, click Security Policy Setting,
- Click to checkmark the Define this policy setting check box.
- Select the radio button for Enabled.
- Click OK.
That’s it!
Read next: How to set Permissions in Active Directory for Users
How do I track the logon and logoff times of domain users?
To perform this task, navigate to the path below in GPMC:
Computer Configuration > Policies > Windows Settings > Security Settings > Advanced Audit Policy Configuration > Audit Policies > Logon/Logoff.
At the location, per your requirement, configure the relevant audit policies to track user logon and logoff. When Logon hours restrictions are set using expression-based flexible rules, user access is restricted to published resources during specified time frames.
Read: What is Audit Success or Audit Failure in Event Viewer
How to get user login times in PowerShell?
To get a user’s last login history with PowerShell, you can use the Get-Eventlog cmdlet to get all events from the domain controller’s event logs. You can filter the events by the EventID you want, and display information about the time when a user authenticated in the domain and a computer used to log on. To find out the last logon time stamp for a stale account, run the command below in PowerShell:
Get-ADUser -Identity "UserName" -Properties "LastLogonDate"
Also read: How to check User Login History in Windows.
Leave a Reply