Windows 11/10/8/7 lets you create an ad hoc network that allows computers and devices to connect directly, rather than to a hub or router. These networks are generally set up temporarily to share files, presentations, or an Internet connection among multiple computers and devices. Still, you can also save an Ad hoc network profile also if you have to use it frequently.
Computers and devices in ad hoc networks must be within 30 feet of each other. Ad hoc networks can only be wireless, so you must have a wireless network adapter installed in your computer to set up or join an ad hoc network. If one or more of the networked computers is joined to a domain, each person using the ad hoc network will need to have a user account on that computer to see and access shared items on it.
How to set up an ad hoc network in Windows 11/10
To set up an ad hoc, computer-to-computer network in your Windows laptop, click on Start, open Control Panel and then select Network and Sharing Center.
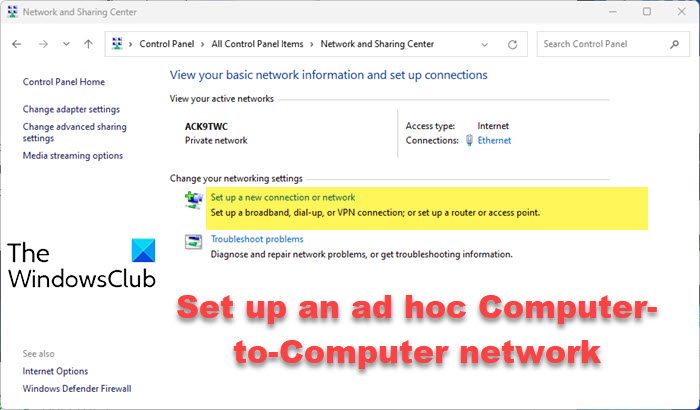
Click on Set up a new connection or network.
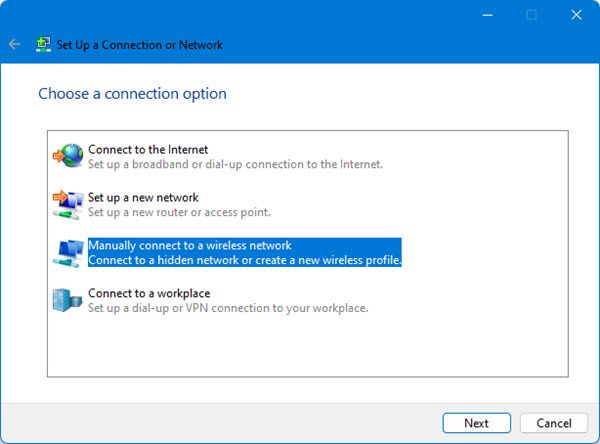
Next, click on Manually connect to a wireless network.
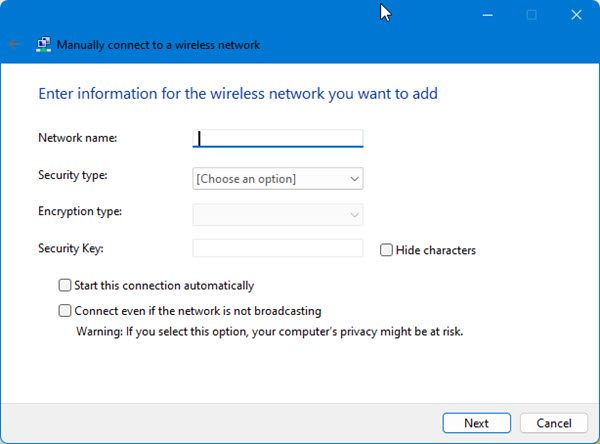
Now fill in the required details and then follow the steps in the wizard to set up the connection successfully.
Turn on password-protected sharing in Windows 11/10
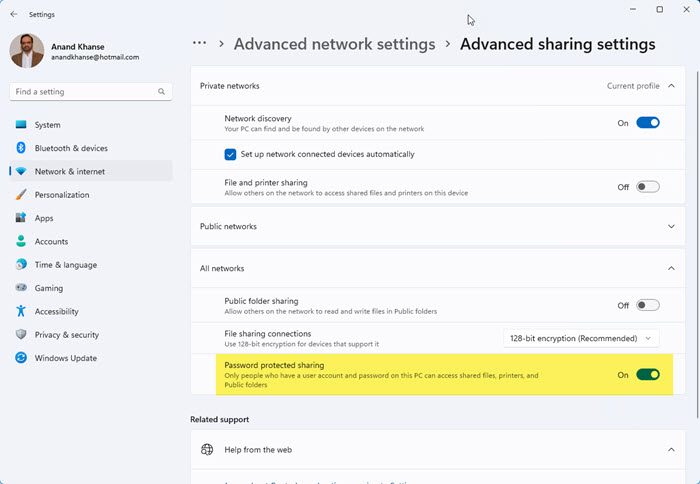
Open Windows Settings > Network and Internet> Advanced network settings > Advanced sharing settings.
Expand All networks and enable the toggle against Password protected sharing to On position.
For Windows 7
In Windows 7, follow these steps.
Open Control Panel and in the left pane, click Manage wireless networks.
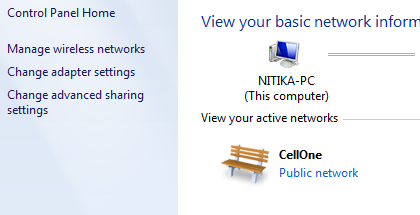
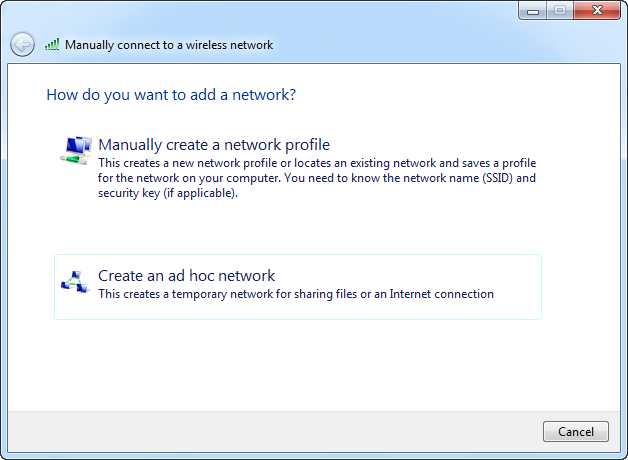
Click on Add button and select Set up a wireless ad hoc (computer-to-computer) network option, and then follow the steps in the wizard to set up the connection successfully.
To turn on password-protected sharing in Windows 7:
Click on Start, open Control Panel and then select Network and Sharing Center.
In the left pane click on Change Advanced sharing settings.
Click the chevron to expand the current network profile.
If password-protected sharing is off, click Turn on password protected sharing, and then click Save changes.

Important Notes:
- If one or more of the networked computers is joined to a domain, each person using the network will need to have a user account on that computer to see and access shared items on it.
- If the networked computers aren’t joined to a domain, but you want to require people to have a user account on your computer to access shared items, turn on password-protected sharing in Advanced sharing settings.
- An ad hoc network is automatically deleted after all users disconnect from the network or when the person who set up the network disconnects and goes out of range of the other network users unless you choose to make it a permanent network when you create it.
- If you share your Internet connection, Internet connection sharing (ICS) will be disabled if you disconnect from the ad hoc network, you create a new ad hoc network without disconnecting from the old ad hoc network for which you enabled ICS, or you log off and then log back on (without disconnecting from the ad hoc network).
- If you set up an ad hoc network and share your Internet connection, and then someone logs on to the same computer by using Fast User Switching, the Internet connection will still be shared, even if you didn’t intend to share it with that person.
Now read: How to create a Network Bridge in Windows.
I hope this helps.