Outlook is a powerful email client that offers a wide range of features to help you manage your emails efficiently. One such feature is the ability to set up and send recurring emails in Outlook.
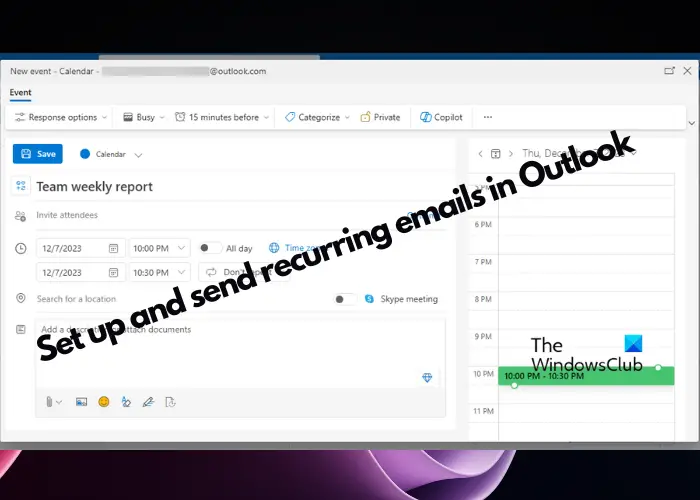
From sending weekly progress reports to your team members, and emailing monthly newsletters to your subscribers to setting up reminders for yourself, or monthly billing reminders for your clients, recurring emails are a great way to save time and ensure that important messages are sent out regularly without manually sending them every time.
How to set up and send Recurring Emails in Outlook
Here’s a step-by-step guide below on ways to set up and send recurring emails in Outlook to save time and streamline communications:
- Via the Calendar Appointment
- Use Boomerang for Outlook
- Through Auto Follow-Up
- Using Delay Delivery
- Through the Power Automate feature.
1] Via the Calendar Appointment
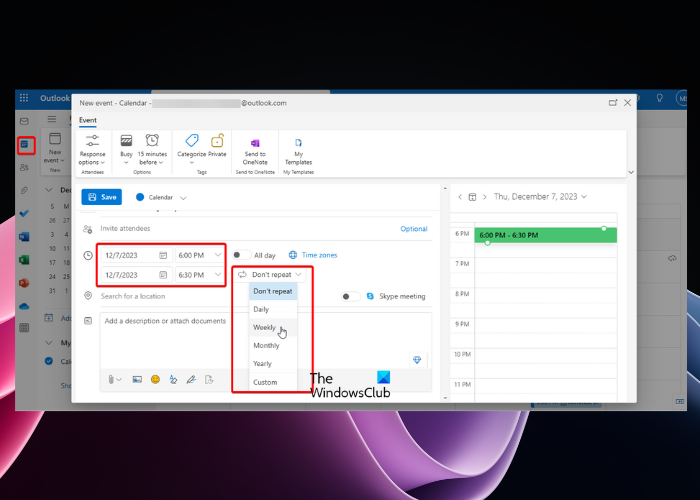
Alternatively, you can also set up recurring email reminders using the Calendar. To create a recurring message, firstly, you need to create a new email template, making it easier to set up and send automatic recurring emails in Outlook.
- For this, launch Outlook and click on New Email.
- Now, click on the File tab and select Save As.
- Hit the Save button and close the email, but make sure you do not send it.
Now that you have successfully created the email template, follow the below steps to set up the appointment for the recurring email in the calendar.
Launch Outlook and click on the Calendar icon on the left.
As the Calendar opens, double-click on the date to open the Event window. Here, fill in the subject files, and add attendees’ names in the Invite attendees field if you want. You can then proceed to select the date and time or select the Recurrence button, whichever applies to you.
You can then set it to All Day if you want the reminder for the entire day. Now, select the Don’t repeat drop-down and select if you want the reminder for Daily, Weekly, Monthly, Yearly, or Custom to set a specified date.
You can then set the location or add a description attach documents if needed and click on Save to save the changes.
Now, attach the email template you created in the beginning. For this, click on the Insert tab > Attach Item > Outlook Item > In the new window go to Look in > User Templates in File System.
Here, select your saved template > Insert. The template will now be attached to the calendar appointment.
Now, set a reminder in the calendar appointment window reminding you when to send the email.
Please note that this reminder DOES NOT automatically send the email but will instead remind you to do so.
2] Use Boomerang for Outlook
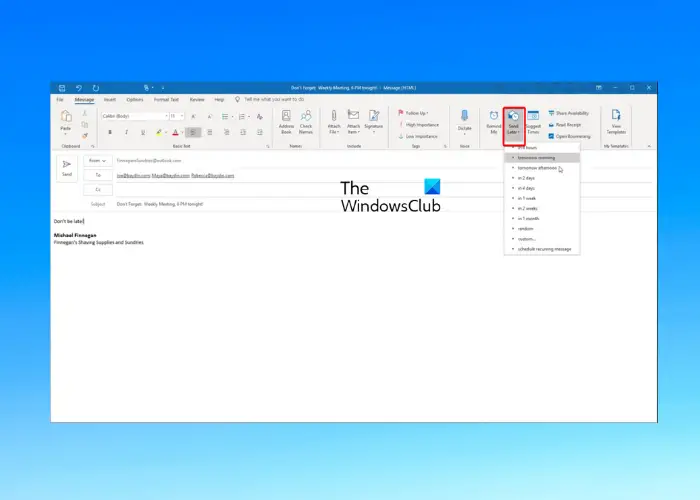
If you want to schedule recurring emails in Outlook, using Boomerang for Outlook is a great way to save time and get things done quickly. Therefore, to set up and send recurring messages through Boomerang, create a new email.
Once you have composed the email, click on the Send Later option.
From the drop-down, select schedule recurring message.
Now, select the date and send time for the first email that you want to send.
Next, go to Sends Every, and from the drop-down, select the frequency of the email, for example, daily, weekly, monthly, or yearly. At the same time, select the day/s when you want the email to be sent.
Now, select a specific date when you want the recurring emails to stop. But instead of a specific date, you can also make it stop after a certain number of messages have been sent, or allow it to keep it going.
Once you have made your selection, review the summary and hit the Schedule button.
The recurring message you create will be saved in the Boomerang-Recurring subfolder and will be sent automatically to the recipients as set by you. This neither needs you to be signed into Outlook or any internet connection.
3] Through Auto Follow-Up
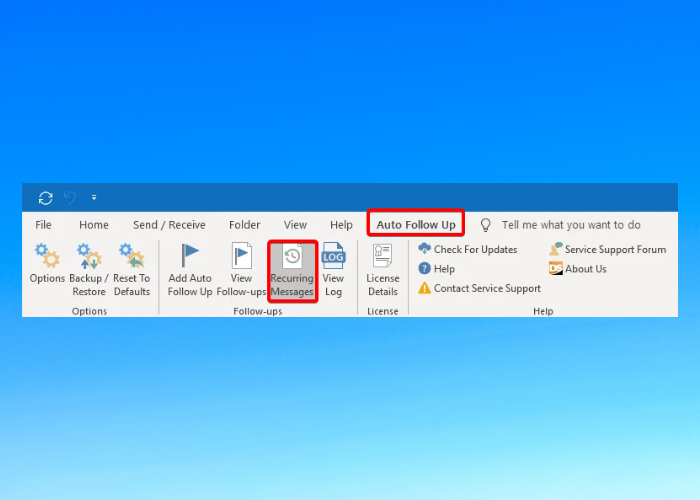
Do you have the Auto Follow-Up feature on your Outlook version? If yes, that’s another key to creating recurring emails.
For this, click on the Auto Follow-Up tab next to Help in the toolbar and select Recurring Messages.
It will open the Recurring Messages Manager window. Here, click on the Add button.
Now, write your recurring email message, and fill up the To and the Subject fields.
Once done, from the side panel, select the frequency, for example, daily, weekly, monthly, quarterly, yearly, or custom. You can also select the weekday and/or time of the day for the email to be sent.
Do you want to add attachments to the recurring email? Click on the Attachment file sources button to send the attachments along with the email.
4] Using Delay Delivery
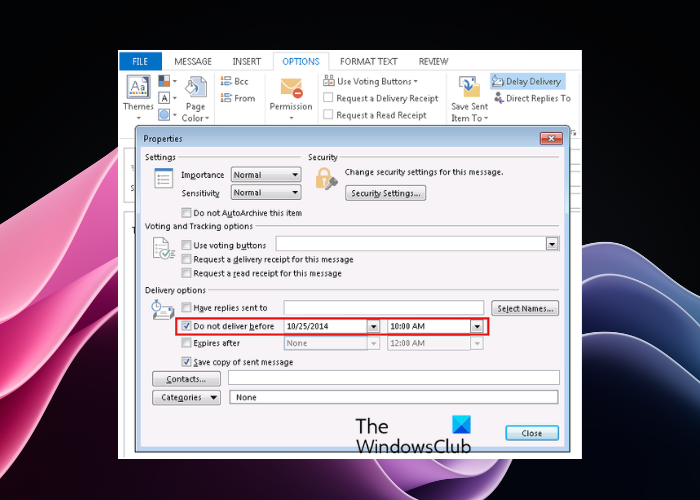
- If using Outlook 365, click on the Home tab and click on New Mail to create a new email message.
- Select the Options tab in the toolbar and hit the Delay Delivery button.
- It will open the Properties window. Here, check the box next to Do not deliver before.
- Now, set the date and time next to it for when you want the emails to be sent.
- You can either check the box for the Recurring option or select the box that says Expires after and set the date and time.
- Press the Close button and then click Send.
Read: How to Automatically Forward Email in Outlook
5] Through the Power Automate app
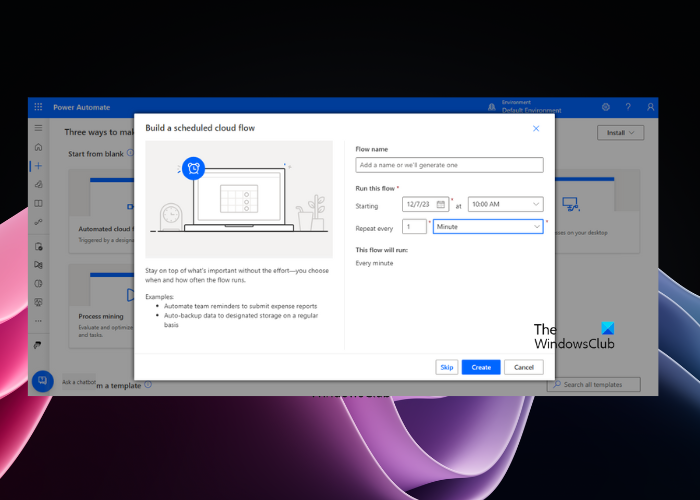
But if you want a one-button solution, using the Power Automate app is the best way to set up and send recurring emails in Outlook. Here’s how to use the app:
Sign in to your Outlook app, click on the app launcher in the upper left corner, click on All Apps to expand the section, and select Power Automate.
Next, in the Power Automate window, click on the Create button.
On the next screen, select the Scheduled cloud flow tile to define when and how frequently an email should be sent.
Now, in the Build a Schedule cloud flow window, assign a name in the Flow name field.
Next, under the Run this flow section set the date and time and the frequency in the Repeat every field. Click on the drop-down to select from Month, Week, Day, Hour, Minute, and Second. Once done, press the Create button.
Once the Recurrence is set up, click on New Step to open the Choose an operation prompt.
Now, click on the Office 365 Outlook icon. Next, from the list of Actions, select Send an email (V2).
As the email window opens, fill up the details to create the recurring email. Click on Show advanced options to add cc, bc, or attachments. Click on Save to finish setting up the recurring email.
Note: Make sure that you re-enable the settings once you finish the task and you now want to stop sending the recurring email.
How do I set up automatic scheduled emails in Outlook?
To set up automatically scheduled emails in Outlook, create your message and click on the Send Later option. Next, select Schedule Recurring Message, set the send date and time for the first email, and select the recurrence frequency (daily, weekly, monthly, or yearly) from the dropdown menu. Click on Save to activate.
How do I automate multiple emails in Outlook?
To automate multiple emails in Outlook, use the Mail Merge feature which allows you to send personalized emails to a large list of recipients efficiently. For this, create a template in Word, link it with your contacts list, and select Finish & Merge. This will send out your emails automatically.
Leave a Reply