USB Passthrough in Hyper-V allows you to copy and paste critical files to and from the Virtual Machine. By default, USB Passthrough is not enabled, and one needs to turn it on if they want to perform the mentioned activities. In this post, we will learn how you can set up Hyper-V USB Passthrough on Windows 11/10.

Set up Hyper-V USB Passthrough on Windows 11/10
You can set up Hyper-V USB Passthrough using one of the following methods.
- Configure Hyper-V USB Passthrough from Hyper-V Settings
- Configure Hyper-V USB Passthrough from Remote Desktop
Let us talk about them in detail.
1] Configure Hyper-V USB Passthrough from Hyper-V Settings

Enhanced Session Mode allows you to redirect local devices and resources to a virtual machine session with the help of the Virtual Machine Connection tool. This feature is enabled by default on Windows client versions such as Windows 11/10/8/8.1, but, on Windows Server 2012 R2 or Windows Server 2016, you need to enable it manually. Also, note that network connectivity is only required for the host, not the guest OS. Follow the steps mentioned below to enable Enhanced Session Mode and configure it.
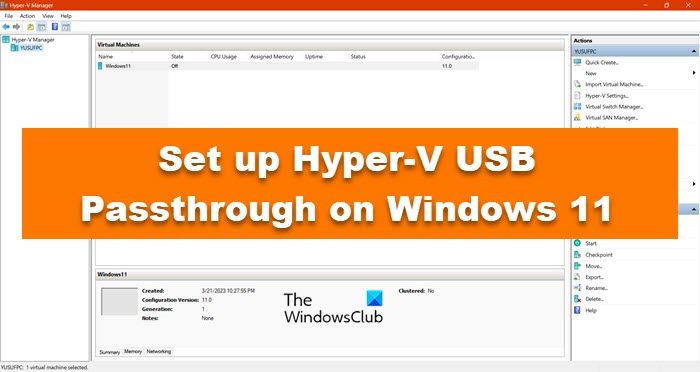
- Launch the Hyper-V Manager, right-click on the VM, and select Hyper-V Settings.
- Now, go to the Enhanced Sessions Mode Policy tab and tick the box associated with Allow enhanced session mode.
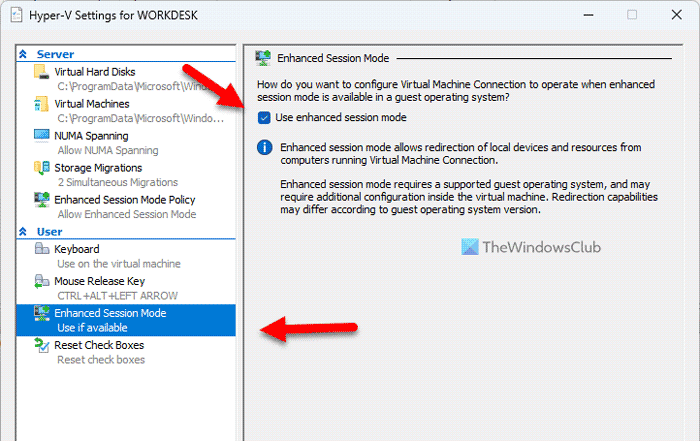
- Now, navigate to Enhanced Sessions Mode and tick the box associated with Use enhanced session mode.
- Now, click on Apply > Ok.
- You then have to boot up the virtual machine.
- You will get a Display configuration prompt, click on the Show options.
- Navigate to the Local Resources tab, and click on More from the Local devices and resources section.
- Tick the box associated with Other supported Plug and Play (PnP) devices and Devices that I plug in later that should be below it.
- Click OK.
- Once you are back on the Display configuration window, tick Save my settings for future connections to this virtual machine and click on Connect.
This will do the job for you.
Read: How to change Hyper-V Display Resolution in Windows 11
2] Configure Hyper-V USB Passthrough from Remote Desktop

The Remote Desktop is a built-in Windows application that allows you to connect to the remote computer. We are going to open the Remote Desktop on your Virtual Machine and then configure it to allow USB Passthrough. To do the same, you need to follow the steps mentioned below.
- Open your Virtual Machine and then open the Control Panel by searching it out from the Start Menu.
- Click on System and Security and then click on Allow remote access from the System section.
- Now, go to Remote, tick Allow Remote Assistance connections to this computer, and select Allow remote connections to this computer.
- Click Ok.
- Search out Remote Desktop Connection from the Start Menu, and go to the Show options > Local Resources tab.
- Click on the More button from the Local devices and resources section.
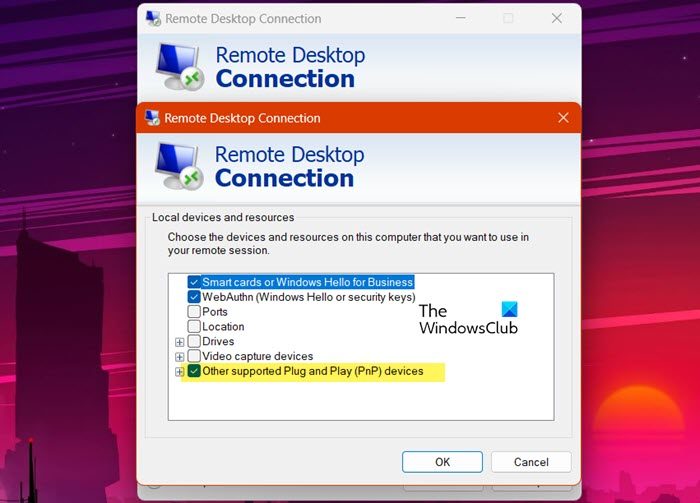
- Once the Local devices and resources window appears, tick the box next to Other supported Plug and Play (PnP) devices.
- Click Ok.
- Now, go back to the General tab, enter the details asked there related to your host system, and then click on Connect.
- You will get various prompts asking you to confirm your actions, do that to connect to the remote desktop.
So, that was how you can enable USB passthrough using Hyper-V. Do keep in mind that for this approach to work, there must be network connectivity between the computer that has a USB device connected and the guest OS.
That’s it!
Read: How to Install Windows 11 using Hyper-V in Windows?
Why does Hyper-V not have USB passthrough?
Hyper-V does have USB passthrough but it is not enabled by default. That’s because USB passthrough poses security risks, letting virtual machines access USB devices. Attackers could damage data on connected devices or even compromise the host with malicious code. However, if you are fine with it, check out this guide to enable the feature.
Read: How to Disable or Enable Hardware Virtualization in Windows?
How do I enable Hyper-V on Windows 11?
Even though Hyper-V is built-in to Windows 11, one needs to enable it to get the Hyper-V Manager app. In order to do the same, open Control Panel, and navigate to Program > Programs & Features > Turn Windows features on or off. Check Hyper-V, Hyper-V Management Tools, and Hyper-V Platform. In case, you can’t see the option, check our guide to install and enable Hyper-V on Windows Home.
Read Next: Check if your Intel or AMD processor supports Hyper-V using these tools.
Leave a Reply