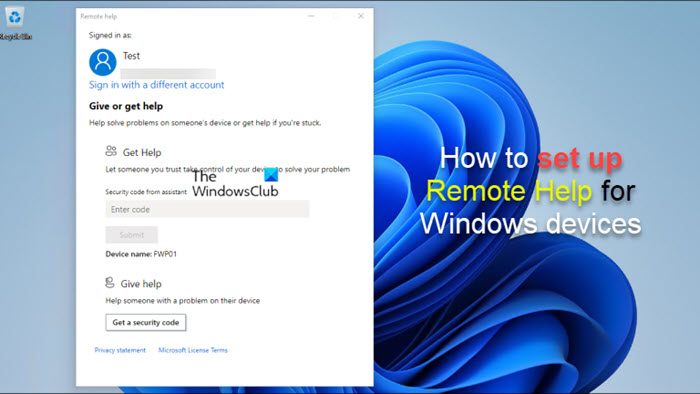
Remote Help is a feature in Microsoft Intune that can be used for providing remote assistance to users on Windows 11/10 devices in an enterprise environment. In this post, we will walk you through the steps on how to set up (enable and configure) Remote Help.

How to set up Remote Help for Windows 11/10
The Remote Help app looks a lot like or has a similar function as the existing Quick Assist app on Windows, but with a few significant advantages which include:
- It integrates with Microsoft Endpoint Manager for providing remote assistance to managed devices.
- It integrates with Azure Active Directory for providing authentication and compliance information. Both the IT support engineer and the end user need to authenticate through Azure AD.
- It provides a better administrator experience.
- There are communication options with the user and there is the ability to work with elevated permissions. The rights (which could be full control of the desktop, or view only) the IT support engineer will have depends on the Role-based access control (RBAC) and what the end user permits.
We will discuss this topic under the following subheadings:
- Requirements
- Enable Remote Help in Microsoft Endpoint Manager admin center
- Deploy (download and install) the Remote Help app
- The Remote Help experience (using the app to provide help)
Now, let’s get into the details of the steps involved.
1] Requirements
Remote Help is now generally available as an additional cost to the licensing options that include Microsoft Endpoint Manager or Intune. Below are the requirements:
- Microsoft Intune license (or a license where Intune is part of like EMS E3/E5).
- Remote Help license (premium add-on) for both the end user(s) and the IT support engineer(s).
- Endpoints need to run Windows 11 or Windows 10.
- The Remote Help application needs to be installed on both sides.
- Port 443 (https) needs to be open to the address specified in this Microsoft documentation.
Read: How to receive Remote Assistance Support from Microsoft
2] Enable Remote Help in Microsoft Endpoint Manager admin center

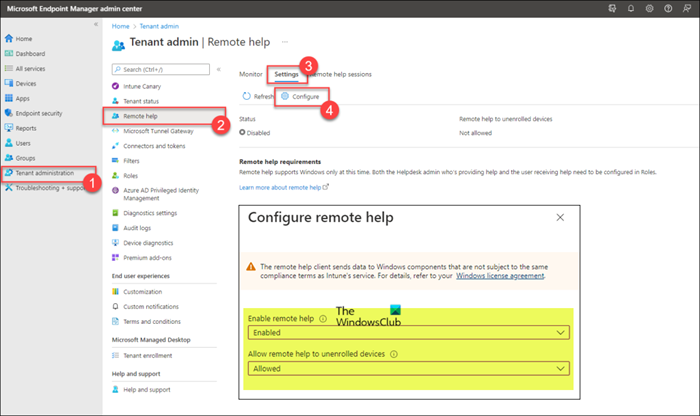
Before using Remote Help, the feature must be enabled for the tenant. After it’s enabled for the tenant, then it can be used for providing remote assistance. To enable Remote Help for the tenant, follow these steps:
- Log into endpoint.microsoft.com.
- In the Microsoft Endpoint Manager admin center, navigate to Tenant administration > Remote help > Settings.
- Click Configure.
- In the page that opens, set the Enable remote help option to Enabled.
- Next, set the Allow remote help to unenrolled devices option to Allowed or Not allowed per your requirement.
- Click Save.
Read: Get Windows Help directly from Microsoft Store
3] Deploy (download and install) the Remote Help app

The Remote Help app needs to be installed on both sides (IT support and end-user). The application can be downloaded from the Microsoft site at aka.ms/downloadremotehelp. To deploy the application with Microsoft Intune, you need to make a Win32 package as outlined in this Microsoft documentation. This will enable the IT administrator to create a flexible installation method for making the Remote Help app available for users.
Once done, you can follow the steps below to add the Win32 app. The steps focus on the program and detection configurations that are specific to the Remote Help app.
- Sign in to the devicemanagement.microsoft.com portal.
- Navigate to Apps > Windows > Windows apps.
- On the Windows | Windows apps page, click Add > Windows app (Win32).
- Click Select.
- On the App information page, select the just created .intunewin file and click Next.
- On the expanded App information page, specify at least a Name, Description, and Publisher.
- Click Next
- On the Program page, specify the installation command with the command below. The acceptTerms parameter is case-sensitive.
remotehelpinstaller.exe /install /quiet acceptTerms=1
- Click Next.
- On the Requirements, specify at least an Operating system architecture and Minimum operating system.
- Click Next.
- On the Detection rules page, select Manually configure detection rules, and specify the following rules:
- Rule type: Select File as the rule type.
- Path: Specify C:\Program Files\Remote help as the path to detect the correct installation.
- File or folder: Specify RemoteHelp.exe as the file to detect the correct installation.
- Detection method: Select String (version) as the method to detect the correct installation.
- Operator: Select greater than or equal to as the operator to detect the correct installation.
- Version: Specify the version of the Remote help app that is being installed to detect the correct installation.
- Associated with a 32-bit app on 64-bit clients: Select No.
- Click Next.
- On the Dependencies page, click Next.
- On the Supersedence page, click Next.
- On the Scope tags page, click Next.
- On the Assignments page, configure the assignment to deploy the Remote help app.
- Click Next.
- On the Review + create page, verify the provided configuration.
- Click Create.
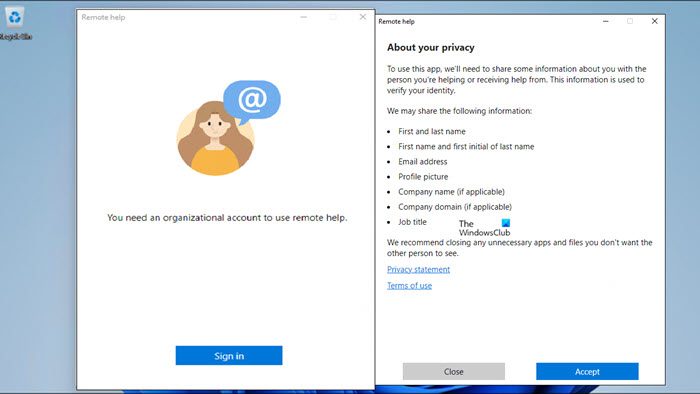
After the installation is completed, when starting the app for the first time on an Intune-managed device, you need to do the following:
- Start the Remote Help application.
- Click Sign in.
- After signing in, click Accept.
Read: How to Get Help in Windows
4] The Remote Help experience (using the app to provide help)

Once Remote Help is enabled in the tenant and the Remote Help app is installed on the devices of the users, you are now set to use the app to either get remote assistance or to provide remote assistance. The user must always first start the Remote Help app and sign in to either get help or give help. The user that will get help must receive a code from the user that will give help who will then have to choose to either view or take control of the session and the user getting help has to allow the session. The following are the interaction options available for the user giving help:
- Select monitor
- To annotate
- To set the actual size
- To toggle the instruction channel
- To start Task Manager
- To pause, resume and stop the session
To provide help by using Remote Help, follow these steps:
- Open the Remote Help application either from the IT support engineer side or from the Microsoft Endpoint Manager admin center in the device options on the Overview tab.
- Click Get a security code.
- On the end user side, also open the Remote Help application.
- Enter the Security code provided by the IT support engineer.
- Click Submit.
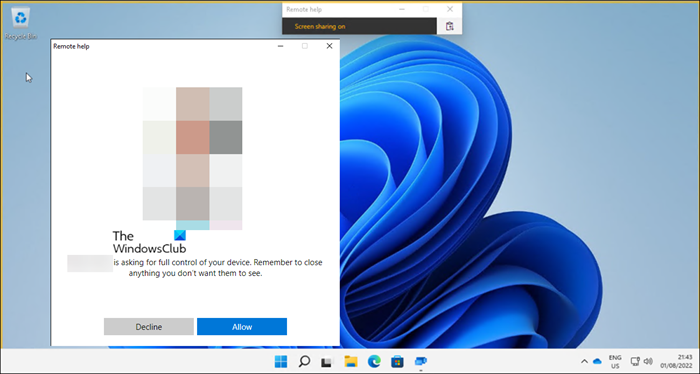
- On the IT support engineer side, you can choose the Take full control or View screen option.
- On the end user side, choose Decline or Allow to establish the Remote Help session.
Read: How to use the Get Help app in Windows
That’s it!
How to fix Remote Help error This app isn’t available for your organization?
After Remote Help has been enabled and configured, and the helper and helpee devices are both enrolled into Intune as corporate devices, you may receive the message stating This app isn’t available for your organization when logging in to the support tool. Based on reported cases, this isn’t an issue per se – just that the setup might take about 24 hours to activate.
Read: Best Windows Help & Tech Support websites
What is the difference between Quick Assist and Remote Help?
Quick Assist can be used for supporting a wide range of users, but larger organizations want more controls for permissions for remote control and more assurance that the right user is talking to legitimate IT support staff and vice versa. On the other hand, PCs have to be enrolled with Intune as Remote Help can’t be used to support people who aren’t on the organization’s tenant. Remote Help also supports both cloud and co-managed endpoints as well as Windows 365 Cloud PCs and Azure Virtual Desktop.