Branch Cache enables faster access to files and data in branch offices by allowing them to cache content from a central server, reducing the need for constant data transmission over the network. In this post, we will see how to set up a Branch Cache in Windows Server.
Branch Cache will enable us to have a remote office where we can cache files from a central or a main office over a slow VPN tunnel, where the file caching makes it significantly smoother for the user to access the files. It has two operating modes.
- Distributed Cache mode: Here each client stores a cached version of requested BranchCache-enabled files and serves as a distributed cache for other clients requesting the same files.
- Hosted Cache mode: Designated servers at specific locations act as a cache for files requested by local clients. Instead of retrieving files from a remote source, the cache server provides the content on their behalf.
Do, in Hosted Cache, the files will be cached on the server, whereas, in Distributed mode, the caching will be done on the local computer or the client. The server way is the best, but it costs more.
How to set up Branch Cache in Windows Server
To set up a BranchCache in Windows Server, you need to follow the steps mentioned below.
- Add roles and features
- Create an Organizational Unit in the Domain Controller
- Create a GPO for the newly created organizational unit
- Check the properties of the folder and make sure that the users have the access
- Reboot the server and start BranchCache
Let us discuss them in detail.
1] Add roles and features
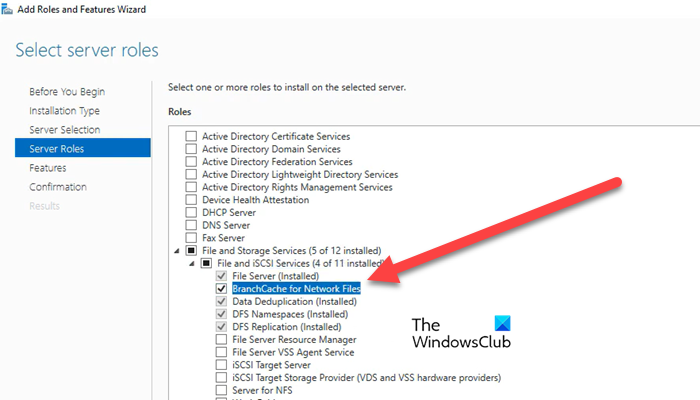
First, we are required to add some roles to use Branch Cache and install a few features. You can follow the steps mentioned below to do the same.
- Open the Server Manager on your computer.
- Go to Add roles and features.
- Navigate to the Server roles tab, and expand File and Storage Services.
- Next, expand File and iSCSI Services, and tick the box associated with BranchCache for Network Files.
- Click on Next, and go to Features.
- Now, you need to install the BranchCache feature on your computer.
You need to have shared files and folders already for it to work.
2] Create an Organizational Unit in the Domain Controller
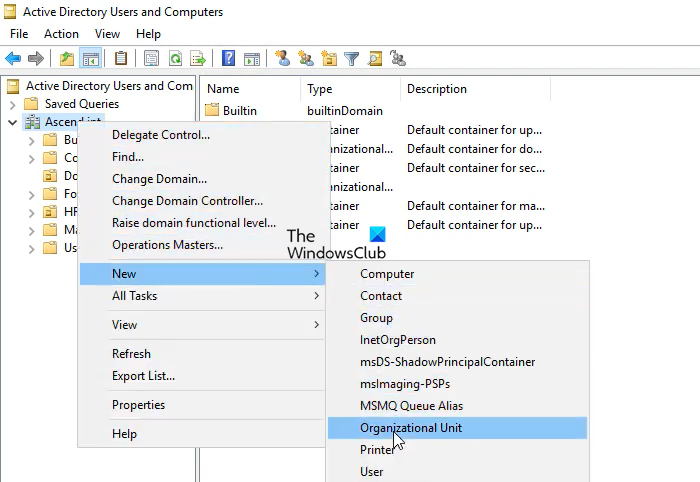
We need to switch to the Domain Controller and create a Group Policy that will only consider the server where we have enabled the BranchCache, which can then be deployed for all the users connected to the domain. Let us see how to do the same.
- In the Domain Controller, go to Server Manager.
- Next, click on Tools and then click on Active Directory Users and Computers.
- Right-click on your domain, and click New > Organizational Unit.
- Give the newly created object a name, you can call it “BranchCache Users” or “BranchCache Object”.
- Now, go to the Computers tab, select the server where you have enabled Branch Cache, drag it, and drop it into the newly created object.
In the next step, we will add a GPO to the newly created object.
3] Create a GPO for the newly created organizational unit
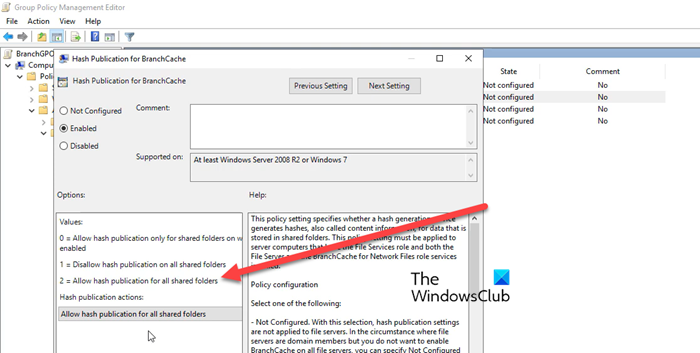
Here we are going to create a Group Policy that will affect the organizational unit and allow us to deploy the BranchCache. To do the same, follow the steps mentioned below.
- Go back to Server Manager.
- Click on Tools > Group Policy Management.
- Right-click on the BranchCache User organizational unit and click on “Create a GPO in this domain, and Link it here”.
- You can give it a name, let’s say BranchGPO.
- Once the GPO object is created, right-click on it and select Edit.
- It will launch the Group Policy Management Editor, go to Computer Configuration > Policies > Administrative Template > Network > Lanman Server.
- Double-click on Hash Publication for BranchCache.
- Select Enabled.
- You have to select Allow high publication for all shared folders.
By enabling this policy, we are allowing BranchCache to be used for all shared folders.
4] Check the properties of the folder and make sure that the users have the access
You need to go to the server where you have installed BranchCache (in the first step), go to the Shared location, right-click on the file or folder, and select Properties. Go to the Sharing tab and click on Advanced Sharing > Permissions.
We need to control who has access to the GPO, so, remove Everyone, and click on Add type “domain user”, and click on Check Names. You have to make sure to tick all the boxes, Full Control, Change, and Read.
Go to the Security tab and click on Advanced > Effective Access to find out what privileges they will have.
5] Reboot the server and start BranchCache
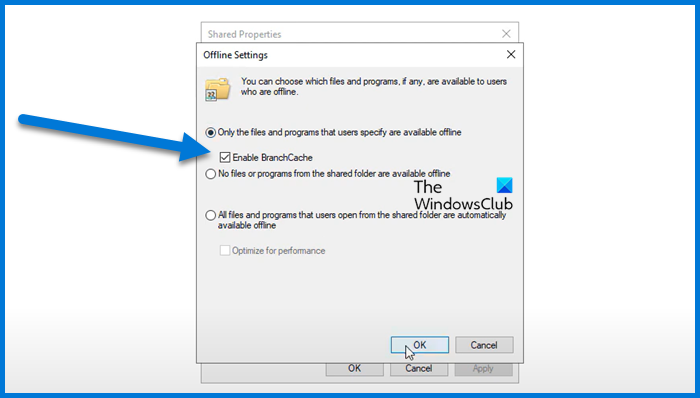
- Open Server Manager.
- Go to Tools > Computer Management.
- Navigate to Shared Folders > Shares.
- Look for your shared folder, right-click on it, and click on Properties.
- Click on Offline Settings.
- Under “Only the files and programs that users specify are available offline”, tick Enable BranchCache, and click Ok.
Now, go to the Domain Controller, and click on Tools > Group Policy Management. Right-click on your policy and click on Edit. Now, go to Policies > Administrative Templates > Network > BranchCache.
Double-click on Set BranchCache Distributed Cache mode or Set BranchCache Hosted Cache mode and set to Enabled.
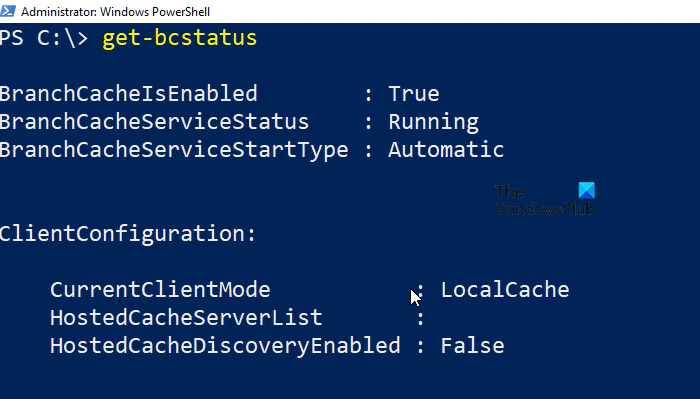
Again, restart the server hosting the BranchCache feature. Once it is open, launch PowerShell as an administrator and run the following command.
get-bcstatus
You will see that the Branch Cache is installed and is running fine. Also, go through all the other settings and options mentioned there and you will be good to go.
That’s how you can set up a Branch Cache in Windows Server.
Read: How to allow or block BITS client from using Windows BranchCache.
How to check if BranchCache is enabled?
There are two commands that you can use in PowerShell (as an admin) to check the status of BranchCache – netsh branchcache show status all and Get- BCStatus.The former will give the BranchCache service status, whereas, the latter will give BranchCache status and configuration information.
Read: How to remove Roles and Features in Windows Server?
What are the requirements for BranchCache?
To use BranchCache, the client computers must have Windows 7 or later, while server computers should be running Windows Server 2008 or later. There should be sufficient available storage space for cache storage, and there needs to be stable and reliable network connectivity between the central server and branch offices.
Also Read: Windows Server 2022 Hardware Requirements.