If you are an IT administrator, it is essential to allocate your resources, such as Printers, properly. In this post, we are going to learn how you can setup Windows Print Server and deploy printers using the Group Policy. This will be a detailed tutorial, where we will see how you can the Print and document services role on your server and then deploy the printer hardware.
Install Windows Print Server and deploy printers
In order to set up the Windows Print Server and deploy printers, follow the steps mentioned below.
- Install Print and Document Service
- Add Printer Driver
- Set up the Port
- Connect your Printer
- Create a security group
- Create a Group Policy
- Add Users
Let us talk about them in detail.
1] Install Print and Document Service
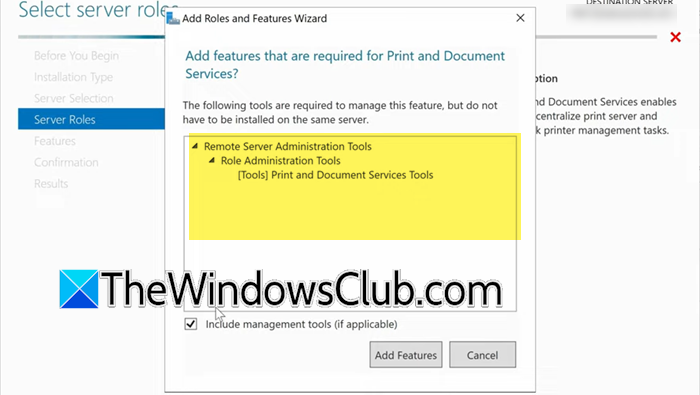
First of all, we need to install the Print and Document Service on the computer that will be our Print Server. To do so, follow the steps mentioned below.
- Open Server Manager.
- Click on Manage > Add Roles and Features.
- Keep clicking on Next until you reach the Server Roles tab.
- Look for Print and Document Service, tick its checkbox, a prompt will ask you to install features, click on Add Features.
- Click Next until you reach the Role Services tab, make sure that the Print Server is checked.
- Then click on Next > Install.
Wait for a few seconds as the service is getting installed on your computer.
2] Add Printer Driver
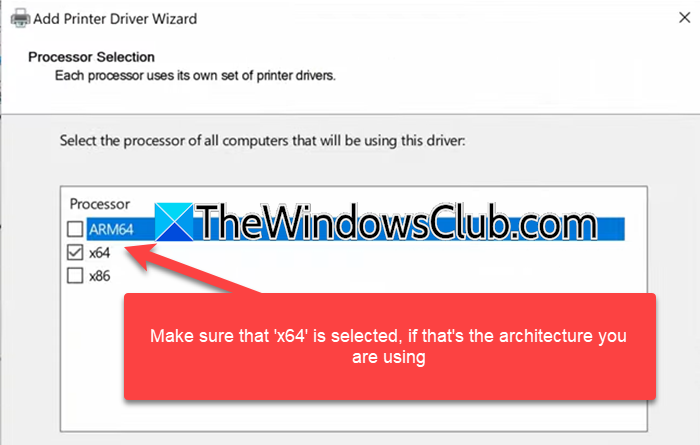
Next up, we are required to import the printer driver to the Print server. Before doing this, you need to copy the ZIP file that contains the printer driver to your server, then extract it to a folder. Once done, follow the steps mentioned below.
- In Server Manager, go to Tools > Print Management.
- Expand Print Server, then export the local server, then go to Drivers.
- Right-click on an empty place and then select Add Driver.
- Click on Next, then select the architecture you are using, most probably, it will x64, then, click on Next again.
- Now, traverse through all the preinstaller drivers, in order to add the copied driver, click on Have Disk > Browse, go to the location where you have copied the drivers, and then add them.
- Then, click on Next.
This is how the driver will be added, allowing you to access the corresponding printer.
3] Set up the Port
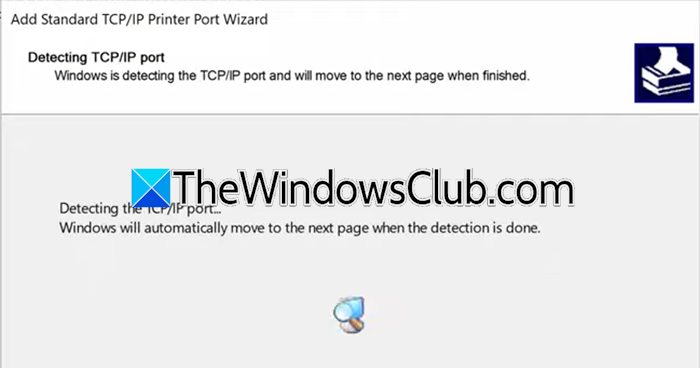
Now, we need to add a TCP/IP Printer port so the printer can form a connection. To do so, follow the steps mentioned below.
- Click on Ports, right-click on an empty space, and then select Add Ports.
- Select Standard TCP/IP Port and click on New Port.
- Click on Next.
- Enter the IP address of your printer in the Print Name or IP Address and Port Name field; click Next.
- Click Next > Finish.
You will be able to see the newly created port in the list.
4] Connect your Printer
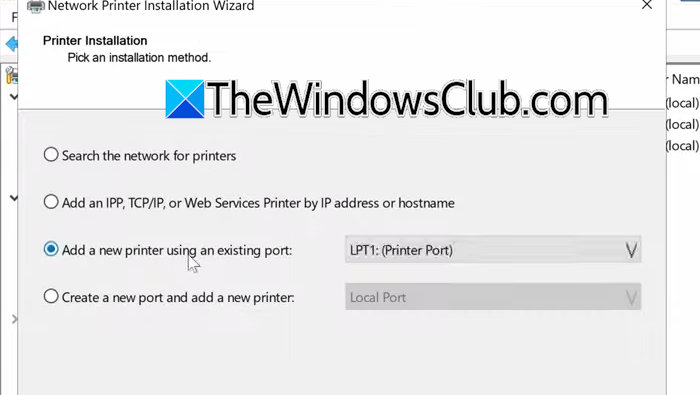
We are now going to create a virtual printer, that we will connect to this port. To do so, follow the steps mentioned below.
- Go to the Printers tab, right-click on the empty section, and click on Add Printers.
- Select Add a new printer using an existing port, now, select the port from the drop-down menu; click Next.
- Select Use an existing print driver on the computer, make sure that the correct driver is selected, and click on Next.
- Enter the details of your printer such as its name, shared name, location, and description.
- Click on Next and finish the installation of the printer.
Even though the printer is added, it’s not ready for deployment. To do that, you need to right-click on the printer (from the list of printers) and select Properties. Now, go to the Sharing tab, and make sure that the Share this printer and List in the directory options are checked. Click on Apply > Ok once you have configured everything. You can also setup multiple printers using the same driver or various other drivers.
5] Create a security group
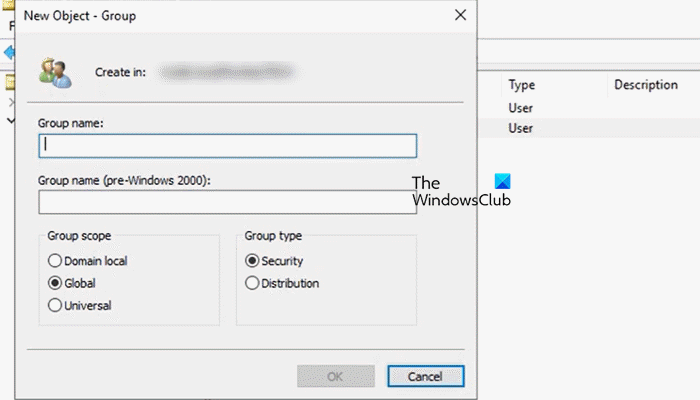
We need to create a new security group for the deployment purposes and add users to it. To do so, we recommend you follow the steps mentioned below.
- In the Server Manager, go to Tools > Active Directory Users and Computers.
- You can create a new Organizational Unit, by right-clicking on Groups and selecting Organizational Unit. Give the OU a name and click on Ok.
- Right-click on new OU and select New > Group.
- Give it a name and select Ok.
Our work with this security group is not done, we will have to add users to it, but before that, let us create a group policy for the deployment.
6] Create a Group Policy
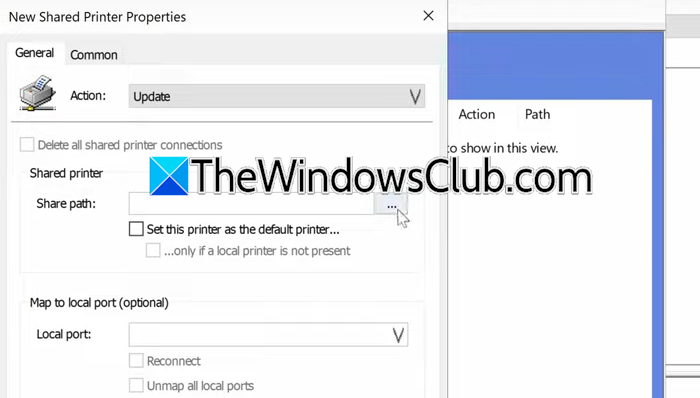
In order to deploy the printer, we need to create a Group Policy object and alter its parameter to make the deployment work. To do so, follow the steps mentioned below.
- In Server Manager, click on Tools > Group Policy Management.
- Under your domain controller, right-click on the Group Policy Objects, and select New.
- Now, give it a name, you can just call it a “Printer”.
- Then, right-click on the object that you just created and select Edit.
- Now, navigate to User Configuration > Preferences > Control Panel Settings > Printers.
- Once the Printers interface comes up, right-click on an empty screen inside the interface and select New > Shared Printer.
- In the Share Path field, click on the three dots, this will open the active directory printer list, you need to select the printer, and click on Ok.
- Make sure that the Action type is Updated.
- Go to the Common tab, tick Item-level targeting, and click on Targeting.
- Click on New Items> Security Groups.
- Click on the three dots associated with the Group.
- Type the name of the security group and click on Check Names.
- Once the security group is added, just click on Apply > Ok.
If you want to list more printers, you can add them as well here.
Now, you need to link the GPO to the Users folder. For that, just hold Printers GPO and drag it to the Users Organizational Unit, you will get a prompt asking you to acknowledge your actions, just click Ok to do that.
Read: How to set Permissions in Active Directory for Users
7] Add Users
Finally, we are going to add users to the Printers group. For that, go to Active Directory Users and Computers, under Groups, right-click on Printers, double-click on the policy, type the user account name, and click on Check Names.
Once you have added the account, you can log in with that particular user name and use the printer.
Read: Windows Server Editions compared and discussed
How do I deploy a printer in Windows server?
In order to deploy a Printer in Windows Server, we first need to install the Print and Document Service role, then create a security group, add users to it, create a GP object, allocate printer hardware, and link them. To know more, we recommend you check out the aforementioned post.
Read: How to migrate WDS and MDT to a new Windows Server
How to create a GPO for printer?
To create a GPO for the Printer, open the Group Policy Management utility, go to your Domain Controller, right-click on Group Policy Objects, and click on New. You can create an object for the printer from the interface, check out the sixth step in the aforementioned tutorial to know more.
Also Read: Configure Data Deduplication on Windows Server.
Leave a Reply