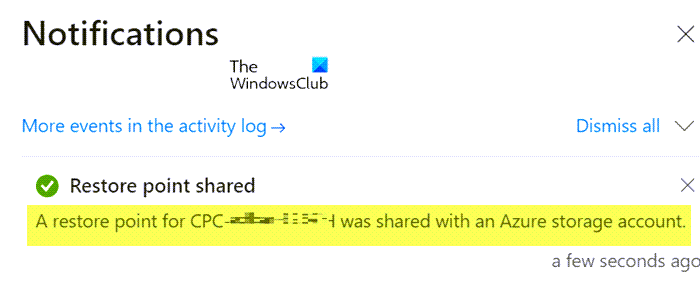
Just like on your local Windows PC, you can create your own restore points on your Cloud PC and in addition to that, you can also copy that restore point to an Azure Storage Account. In this post, we will show you how to share & download Cloud PC Restore Points.

How to share & download Cloud PC Restore Points
Restore points whether on a local or Windows 365 Cloud PC can come in handy especially in recovering a PC back to a previously working condition. You might want to share (move or copy) a Cloud PC and its contents to:
- Create a geographically distributed copy of a Cloud PC.
- Make a copy of a cloud PC during the off-boarding process.
- Get a historical view of a Cloud PC (vs current) for eDiscovery.
- Create a VHD that can be mounted on a physical device.
We will discuss this topic under the following subheadings:
- Prerequisites
- Share a single restore point
- Share multiple restore points
- Download the restore point from the storage account
Let’s see these in brief detail.
1] Prerequisites
The following prerequisites need to be met:
- A Cloud PC with restore points
- An account that can manage Cloud PC’s and has access to the Azure subscription (and create a storage account)
2] Share a single restore point

- Sign into the Microsoft Intune admin center.
- Navigate to Devices > All devices > select a device > select the ellipses (…) > Share (preview).
- In the Select restore point (preview) area, select a Subscription and Storage account.
- Select Share (preview).
A folder is created in the storage account. The folder name is identical to the Cloud PC name. The folder contains a VHD copy of the Cloud PC device disk.
Read: This Cloud PC doesn’t belong to the current user [Fix]
3] Share multiple restore points

- Sign into the Microsoft Intune admin center.
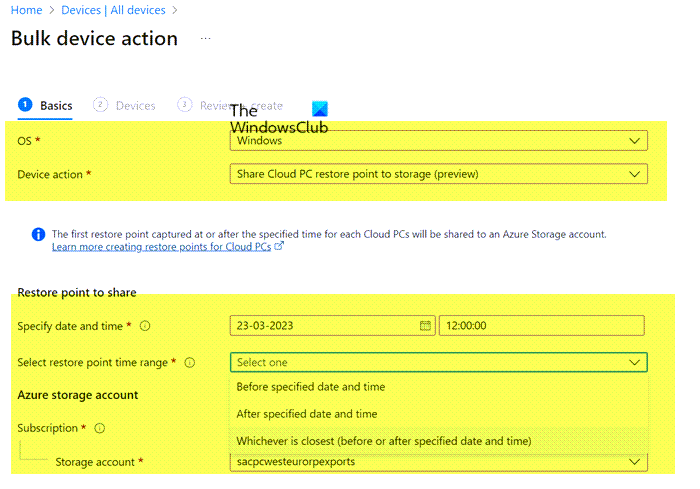
- Navigate to Devices > All devices > Bulk Device Actions.
- On the Basics page, select the following options:
- OS: Windows
- Device action: Share Cloud PC restore point to storage (preview)
- Specify date and time: Choose a date and time. This setting defines the Cloud PC restore point time that you’d like to share. The following options help determine exactly which restore point is used for each of the Cloud PCs you select.
- Select restore point time range: Choose one of the following options:
- Before specified date and time: Share the closest Cloud PC restore point before the date and time you specified.
- After specified date and time: Share the closest Cloud PC restore point after the date and time you specified.
- Whichever is closest (before or after specified date and time): Share the Cloud PC restore point closest to the date and time you specified.
- Select a Subscription and Storage account > Next.
- On the Devices page, choose Select devices to include.
- In the Select devices, choose the Cloud PCs that you want to share restore points for > Select > Next.
- On the Review + create page, confirm your choices > Create.
For each Cloud PC restore point shared, a folder is created in the storage account. The folder name is identical to the Cloud PC name. The folder contains a VHD copy of the Cloud PC device disk.
4] Download the restore point from the storage account

You can download the restore point using the built-in storage browser using the Azure portal or you could use the Azure Storage Explorer. To perform this task, do the following:
- Sign-in to the Azure portal.
- Go to the Storage accounts.
- Click on the storage account you used earlier.
- Click on Storage browser from the menu.
- From the Storage browser, select Blob containers to get an overview of the content.
- Next, click the item to view the .VHD file. You can click on the .VHD file to get more information.
- Finally, click the Download button in the ribbon to start the download.
Once the download is complete, you can use Hyper-V to create a new VM with the downloaded disk. You might need to convert the disk type from .VHD to .VHDX. In which case, run the PowerShell command below on a system that has the Hyper-V role installed. Keep in mind that the command can take a while to complete execution.
Convert-VHD -Path 'D:\Temp\Disk.VHD' -DestinationPath 'D:\Temp\ConvertedDisk.VHDX'
That’s it!
How do I restore from Windows Cloud backup?
To perform this task, follow these steps:
- Sign into the Microsoft Intune admin center > Devices > Windows 365 > All Cloud PCs > choose the Cloud PC to restore.
- Select Restore (preview) > under Select restore point, select the point that you want to restore the Cloud PC to > Select.
- In the confirmation dialog box, select Restore.
How many restore points can you have in Windows 365?
For Frequency of restore-point service, choose an interval for how often restore points will be created. There’s a limit of 10 restore points. So a shorter frequency results in a shorter overall history of restore points. The instructions provided in this post above shows you how you can share and download a single or multiple Cloud PC restore points.
Read: Where are System Restore Points stored? How to view Restore Points?