Snap Windows is one of the new features that Microsoft introduced in Windows 11. Snap Windows lets users arrange multiple apps on one screen so that they can manage and do multiple tasks quickly. To use the Snap Windows feature, you just have to place your mouse cursor on the Maximize button on an opened window. After doing that, Windows 11 will show you all the snap layouts available to arrange the opened apps on a single screen. You can select any of these snapped layouts to arrange your apps on your screen. In this article, we will show you how to show Edge tabs when snapping on Windows 11.
How to show Edge tabs when snapping on Windows 11
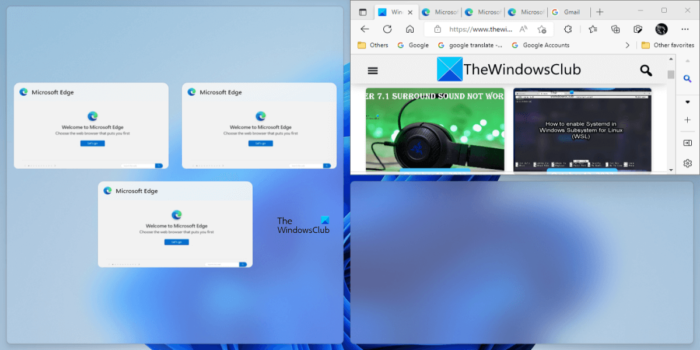
When you select a snap layout to arrange your apps on a screen, Windows 11 helps you fill all the apps quickly in the layout. This feature of Windows 11 is called Snap Assist. After selecting a snap layout, Windows 11 automatically resizes and places the current app window in the selected pane in the snap layout. After that, it shows all the remaining apps. You can select any of these apps to place it in the other pane of the snap layout. Windows 11 keeps showing the remaining apps until it fills all the panes in the snap layout. Suppose you have opened multiple tabs in Edge and you want to arrange some or all the tabs on your screen using the snap layouts feature. Below, we have explained how to show Edge tabs when snapping on Windows 11.
The following steps will help you show Edge tabs when snapping on Windows 11:
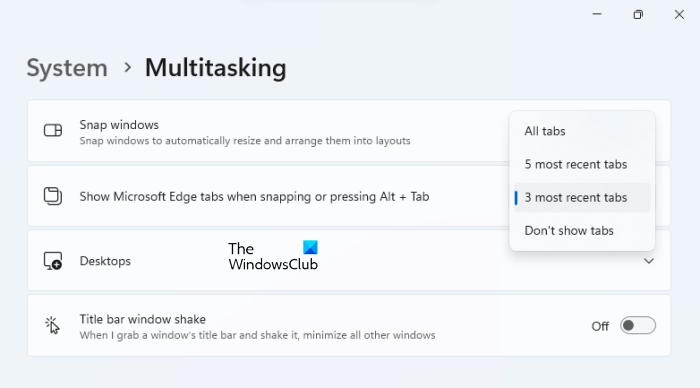
- Open Windows 11 Settings.
- Select the System category from the left side.
- Scroll down and click Multitasking.
- Click on the “Show Microsoft Edge tabs when snapping or pressing Alt + Tab” drop-down and select the desired option.
When you click on the drop-down, you will see the following four options:
- All tabs
- 5 most recent tabs
- 3 most recent tabs
- Don’t show tabs
If you select the first option (All tabs), you will see all the tabs in Microsoft Edge to place them in the remaining panes in the snap layout.
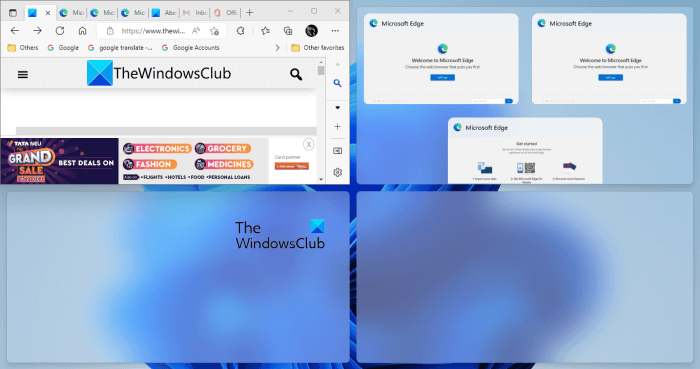
If you select the 5 most recent tabs or 3 most recent tabs option, Windows 11 will show you the 5 and 3 most recent tabs respectively to place them in the remaining panes in the snap layout. Referring to the above screenshot, I have opened 7 tabs in Edge but Windows 11 is showing only the three Edge tabs to place them in the remaining panes on a snap layout. This is because I have selected the 3 most recent tabs option.
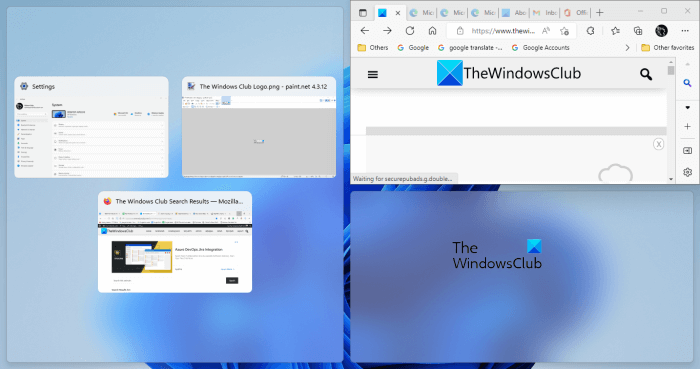
If you select the Don’t show tabs option, Windows 11 will not show you Edge tabs while using the Snap windows feature. See the above screenshot, Windows 11 is not showing any Edge tab after selecting this option.
Read: How to remove Edit with Clipchamp from Windows 11 Context Menu.
How do I turn off Snap Assist in Windows 11?
Snap Assist shows you what you can snap next to a snapped window. When you place an app in one of the panes on the snap layout, Windows 11 shows you all the remaining apps to place any one of them in the next pane on the snap layout. This feature is called Snap Assist. You can turn it off in Windows 11 Settings.
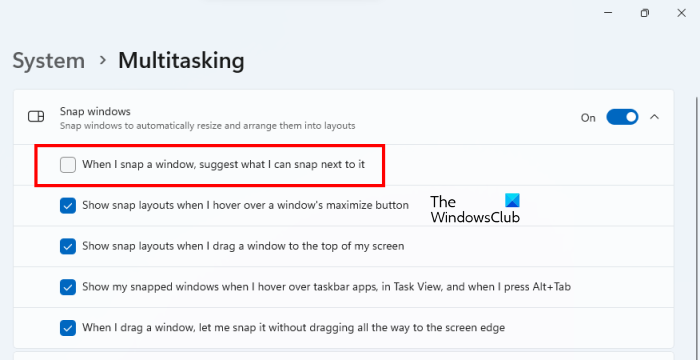
Follow the steps written below:
- Open Windows 11 Settings.
- Go to “System > Multitasking.”
- Click on the Snap windows tab to expand it.
- Uncheck the “When I snap a window, suggest what I can snap next to it” checkbox.
How do I enable snap layout in Windows 11?
If you want to create custom snap layouts on Windows 11, you can do so by using the PowerToys app. PowerToys is a productivity app developed by Microsoft. The FancyZones feature of PowerToys lets you create new snap layouts and save them.
How do I keep tabs visible in Edge?
To keep tabs visible in Edge, you need to enable Vertical Tabs. For that, open the Microsoft Edge browser, go to Settings and click on the Appearance menu. Then, find the Customize toolbar option and get to the Shoe vertical tabs option. Following that, toggle the corresponding button to turn it on or off.
I hope this helps.
Read next: How to enable Full-Screen Widgets on Windows 11.
Leave a Reply