When opening a Microsoft Publisher document, you will see a Horizontal and Vertical Ruler by default. The Ruler shows the dimension and position of the cursor of your publication. The user can use the Ruler to align the text if it is out of line. Rulers are essential to Microsoft office because without Rulers; you cannot draw Guidelines. A Guideline is a tool that will help you as you draw or align objects in a publication.

What is a Ruler in Microsoft Office
A Ruler is a Microsoft Office tool that allows the user to measure, move table borders, set tab stops, and line up objects in the document.
Hide or Show the Ruler in Publisher
Open Microsoft Publisher.
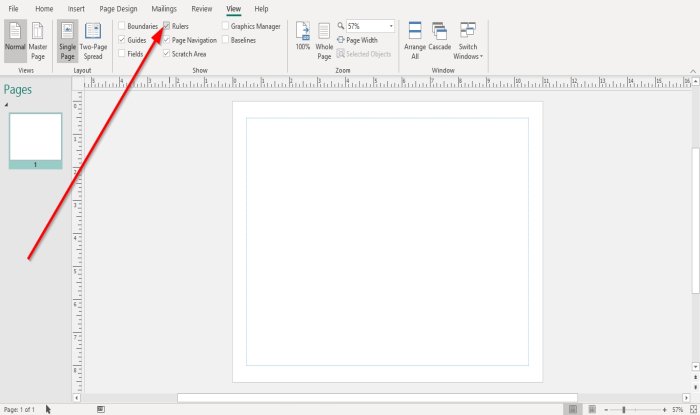
The Ruler should be beside the document by default, but if you have not seen any Ruler, follow these steps.
Go to the View tab in the Show group and click the Ruler’s check box to show the Ruler.
If you want to hide the Ruler, click the Checkbox to remove the tick, and the Ruler will disappear. To make the Ruler appear, click the Checkbox again, and the Ruler Bar will show.
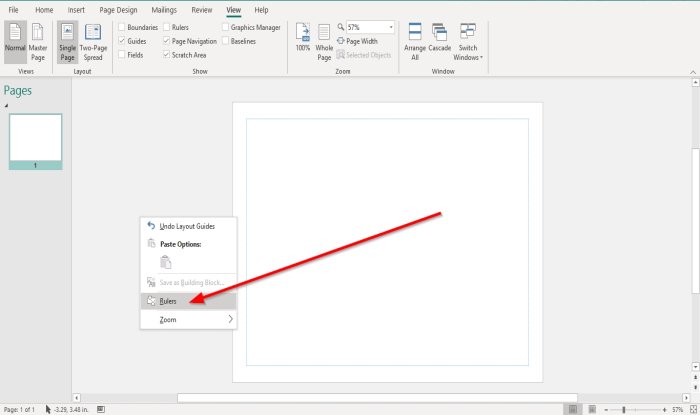
There is another option to Hide and Unhide the Ruler.
To hide the Ruler, right-click the blank area outside of the publication and select Rulers. The Ruler will disappear.
If you want to show the Ruler right-click the blank area and select Rulers again, the Ruler will appear.
How to Use the Ruler to set Tabs in Publisher
In Microsoft Publisher, the Ruler has four Tab Stops: Left, Center, Right, and Decimal. Microsoft Word as Five.
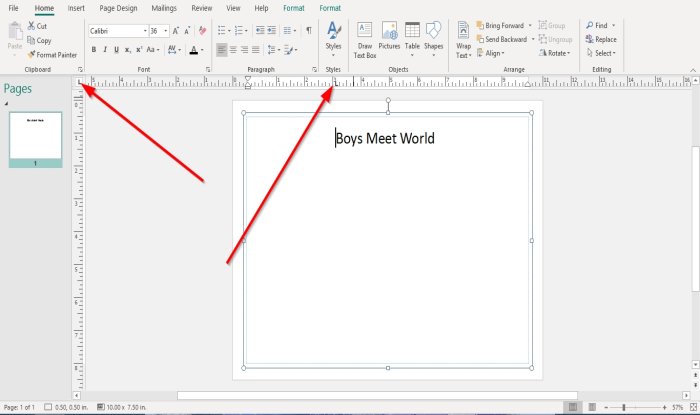
First, we are going to start with the Left Tab Stop. The Left Tab Stop allows the text to go to the right of the left tab stop.
Move your cursor on the left of the Horizontal Ruler Bar; you will see the Left tab Stop symbol on the Tab Stop Styles Button.
Then go to the Horizontal Ruler Bar and click on it to place the Left Tab Stop on the Ruler Bar.
Click the Tab Key on your Keyboard. You will notice that when pressing the Tab key, anywhere on the Ruler Bar that you place the Left Tab Stop, the cursor will go there.
To remove the Left Tab Stop, click on the tab, hold, and drag it back to the Tab Styles Button on the left of the Horizontal Ruler Bar.
To change the Tab Stops on the Tab Styles button. Click on the Tab Stop Styles Button; the tab stop will change.

The Center Tab Stop position the text in the middle of your tab stop.
To use the Center Tab Stop, click on the Tab Stop Style Button.
When you see the Center Tab Stop symbol, click anywhere on the ruler tab.
Press the Tab Key button, and the cursor or text where you place the cursor in front will go in the center of the document.
To remove the Center Tab Stop from the Ruler. Click on the Center Tab Stop, hold, and drag it back to the Tab Style button on the left of the Horizontal Ruler Bar.
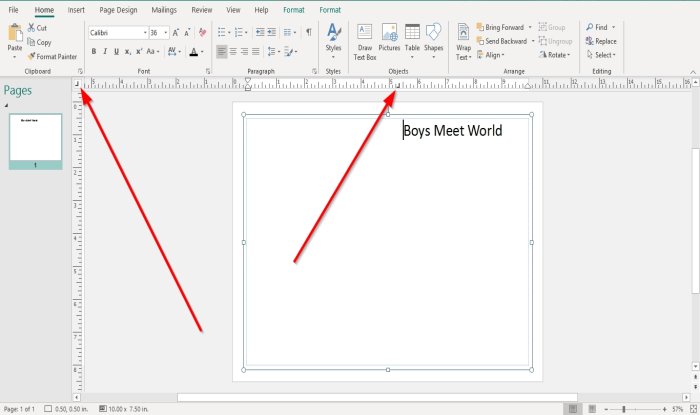
The Right Tab Stop position the text on the right of the tab stop.
To use the Right Tab Stop, place the cursor in front of the text.
Click on the Tab Stop Styles Button.
When you see the Right Tab Stop symbol, click anywhere on the ruler tab, and you will see the symbol on the Horizontal Ruler Bar.
Press the Tab Key.
The text will go on the right to where the Right Tab Stop symbol is.
Remove the Right Tab Stop from the Ruler Bar.
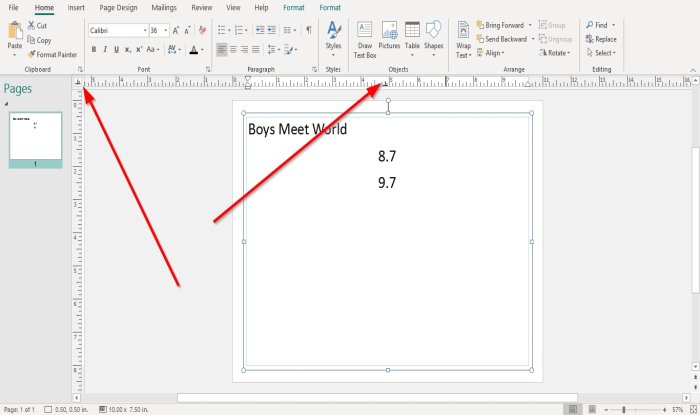
The Decimal Tab Stop aligns the decimal point, along with the decimal tab stop, you place on the Horizontal Ruler Bar.
To use the Decimal tab, Place the cursor in front of a Decimal; you type in the document.
Then, go to the Tab Styles Button and click it until you see the Decimal Tab Stop symbol.
Go to the Horizontal Ruler Bar and click on it; you will see the Decimal Tab Stop symbol on the Ruler.
Press the Tab Key.
The Decimal number will move to where you place the Decimal tab Stop on the Ruler.
Try to type another decimal; the new decimal will align with the first decimal.
Move or Change the Ruler in Publisher
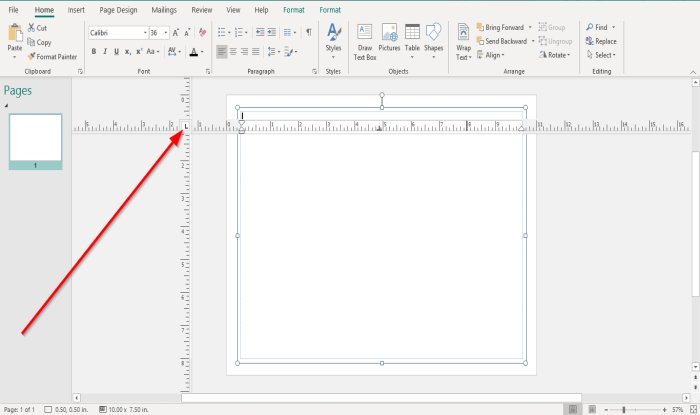
Suppose you want to move the Ruler. Click the Square holding the Horizontal and Vertical Ruler Bar together and drag it across; you will see the ruler position shift. You can move it up and down.
Suppose you want to return the Ruler to its original state. Click the Ruler and drag the Ruler back to where it was.
The other option to move the Ruler is to place the cursor on the Vertical Ruler Bar.
Press the SHIFT key and Click the Vertical Ruler Bar; you will see an arrow with points at both ends; hold, and drag the Vertical Ruler Bar towards the publication (Document).
Do the same with the Horizontal Ruler Bar.
Using Indents on the Publisher Ruler Bar
There are three indents on the Ruler Bar: Left Indent, Right Indent, and First Line Indent.

To use the Left Indent. On the Ruler Bar, click the Square Marker on the lower left side of the marker and drag it to the right; notice that the text in the document move.
Notice when you try to use the backspace key to carry back the text; it is not moving; the reason is that the left indent sets the position of the left side of a paragraph.
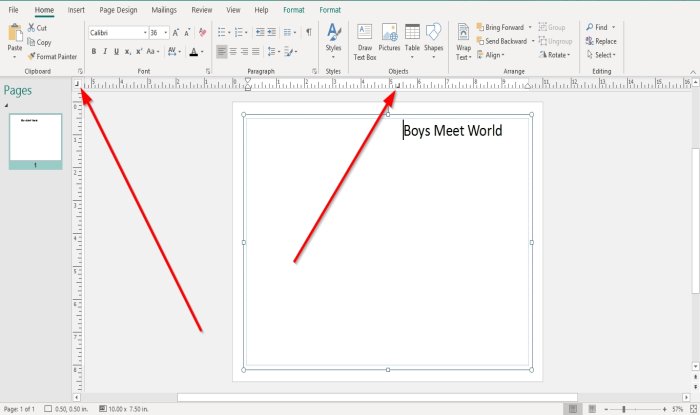
To use the Right Indent on the Horizontal Ruler Bar’s right, you will see a Triangle Marker, click on it and drag the cursor to the left.
Try to type a letter at the end of the paragraph, and it will bring the letter to the other line in your publication. The reason is that the Right Indent commands the position of the left side of a paragraph.
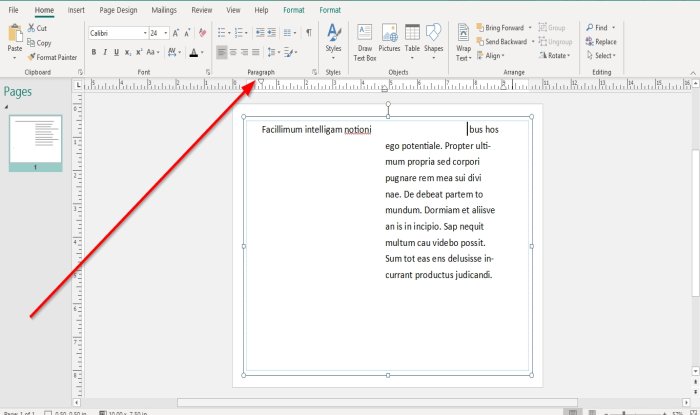
To use the First Line Indent. Click the Triangular Marker on the top-left of the Ruler and drag it to the right. You will notice that only the first line of the paragraph move. The reason is that the First Line of a paragraph is indented, and the others are not.
Read: Microsoft Publisher cannot save the file as PDF.
I hope this helps; if you have questions, please comment below.
Leave a Reply